13
Owner’s Manual EN
5.2 How does my Landroid
®
know where to go?
Your Landroid
®
is made to work on its own. Landroid
®
knows when it needs to go to its charging base to charge, can sense
when it is raining, can stop itself if it senses a problem, and knows to stop, drawback, and turn around when it bumps into
something blocking its path. Landroid
®
will also automatically stop its blade turning disc from rotating if it is lifted off the
ground to prevent an accident.
A. Finding the Charging Base
When your Landroid
®
needs to recharge, it will stop mowing and follow the boundary wire in an anti-clockwise direction
back to its Charging Base. Landroid
®
is pre-programmed to mow the grass near the boundary wire once a week. By
default, Landroid
®
will mow near the boundary wire every Monday of its system time.
If you don’t want to enable boundary cut, deactivate it via your smartphone or by the control panel in “Work Time -
Customize work time - Monday”.
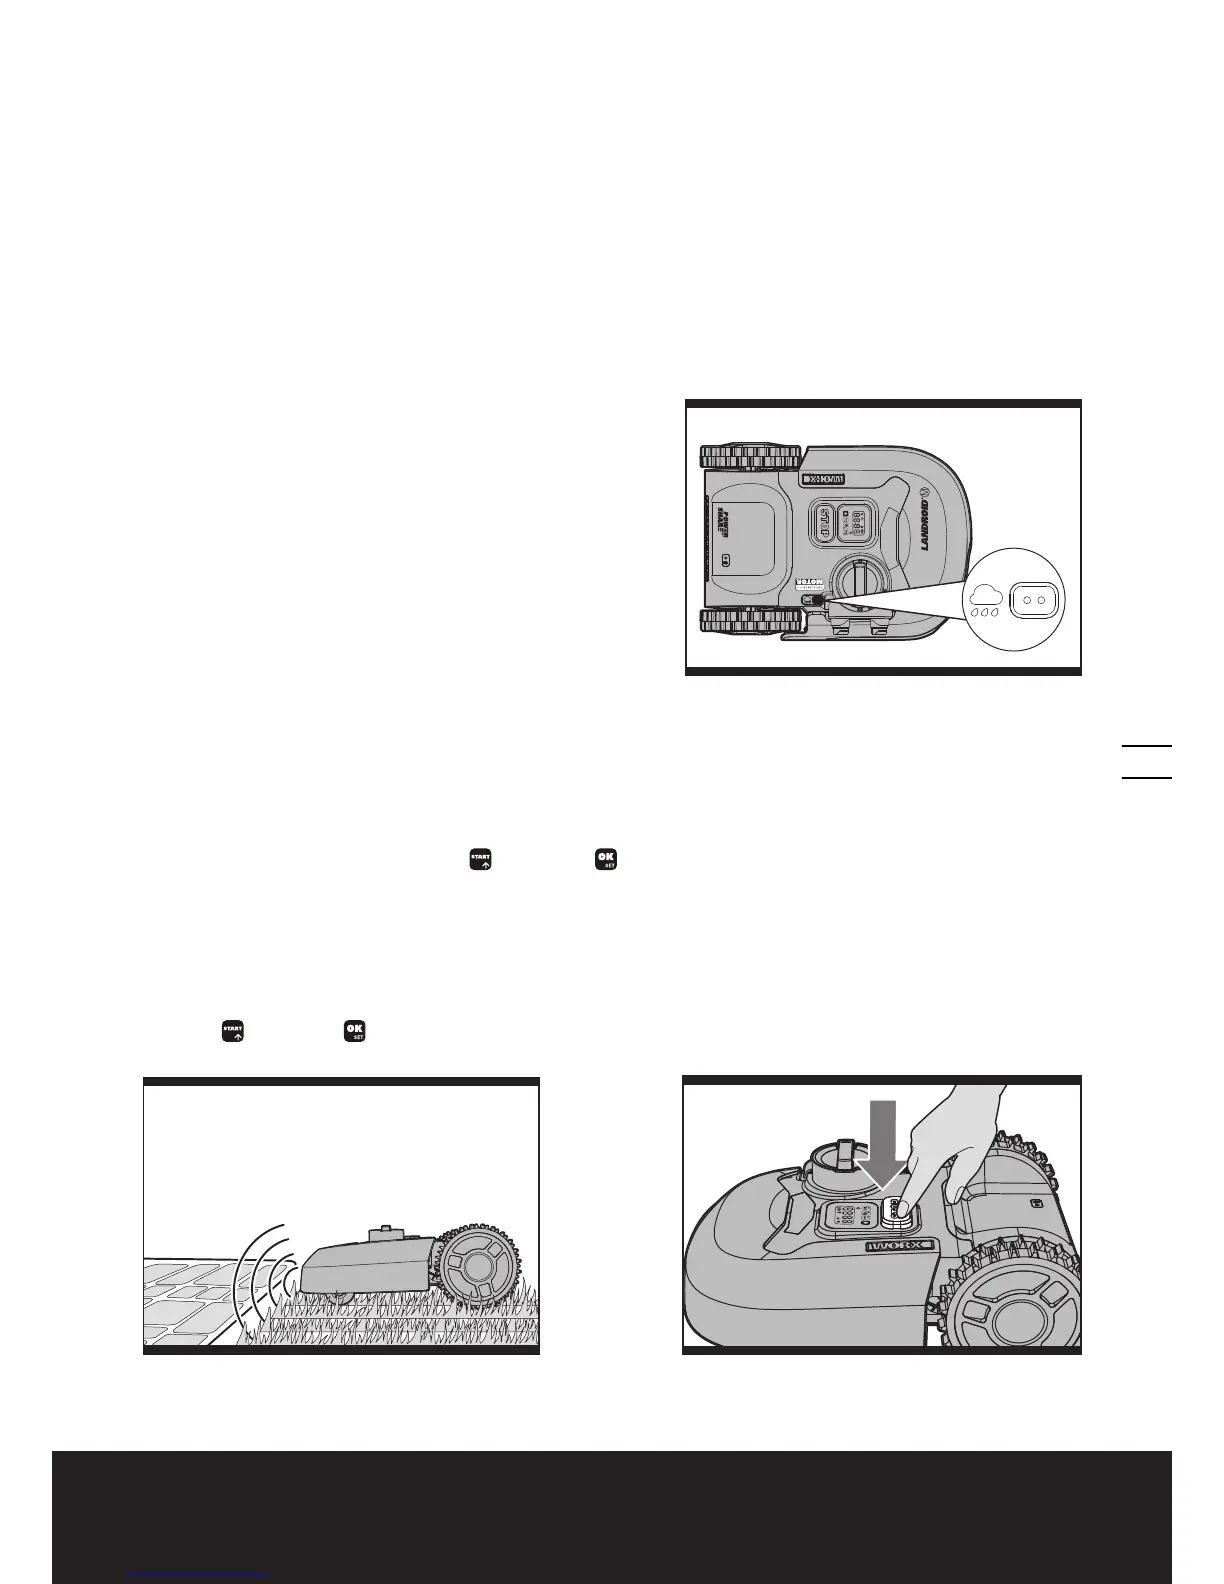
B. Rain sensors
Landroid
®
is equipped with a rain sensor which detects rain and tells
Landroid
®
to stop mowing and follow the boundary wire back to its
charging base (See Fig. B).
Landroid
®
will resume mowing after passing the Delay Time. The
default Delay time is 180mins. The delay time setting can be changed
via Landroid
®
APP or by the control panel in “General settings - Rain
start delay”.
When the rain sensors are wet, Landroid
®
returns to its charging
base. When the rain sensors are dry, Landroid
®
will begin the delay
time countdown or return to mowing (depending on the saved
settings). If you want to exit from the rain delay, dry the sensor area,
and perform a power cycle by operating the ON/OFF key. After the
power cycle has been performed you can operate again.
NOTE: If the delay time is set to 0, Landroid
®
will continue mowing.
C. Sensing the boundary wire
Landroid
®
always obeys the border set by the boundary wire and uses sensors at its front to detect it. (See Fig. C)
D. Starting and stopping while mowing (See Fig. D, E1, E2)
If you would like Landroid
®
to stop mowing, simply press the STOP button on top of the mower. To start mowing, press the
ON/OFF key and input the PIN code. Press
, then press
.
If Landroid
®
senses something is wrong, it will display a fault message on the display. For information on these messages,
refer to the Error Messages. Landroid
®
will turn off if it does not receive any input from the user within 20 mins.
To resume:
• Press the ON/OFF Key to OFF
• Correct the problem (refer to Error Messages)
• Press the ON/OFF Key to ON
• Press
, then press
• Now the Landroid
®
will begin to mow!
C

 Loading...