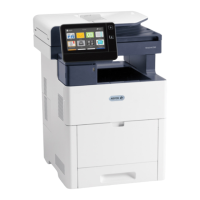
IInnssttaalllliinngg aa WWSSDD PPrriinntteerr UUssiinngg tthhee AAdddd DDeevviiccee WWiizzaarrdd
1. At your computer, click Start, then select Printers and Scanners.
2. To add the required printer, click Add a Printer or Scanner.
3. In the list of available devices, select the device that you want to use, then click Next.
Note: If the printer that you want to use does not appear in the list, click Cancel. To add
the printer manually, use the IP address of the printer. For details, refer to Installing the
Windows Print Driver .zip File.
4. Click Close.
IInnssttaalllliinngg tthhee DDrriivveerrss aanndd UUttiilliittiieess ffoorr MMaaccOOSS
1. Download the latest print driver from www.xerox.com/office/ALC81XXsupport.
2. Open the Xerox
®
Print Drivers 5.xx.x.dmg or .pkg as needed for your printer.
3. To run Xerox
®
Print Drivers 5.xx.x.dmg or .pkg, double-click the appropriate file name.
4. When prompted, click Continue.
5. To accept the license agreement, click I Agree.
6. To accept the current installation location, click Install, or select another location for the
installation files, then click Install.
7. If prompted, enter your password, then click OK.
8. From the list of discovered printers, select your printer, then click Next.
9. If your printer does not appear in the list of discovered printers:
a. Click the Network Printer Icon.
b. Type the IP address of your printer, then click Continue.
c. Select your printer in the list of discovered printers, then click Continue.
10. If your printer was not detected, verify that the printer is powered on and that the Ethernet or
USB cable is connected properly.
11. To accept the print queue message, click OK.
12. Select or clear the Set Printer as Default and Print a Test Page check boxes.
13. Click Continue, then click Close.
AAddddiinngg tthhee PPrriinntteerr ffoorr MMaaccOOSS
For networking, set up your printer using Bonjour
®
(mDNS), or for an LPD, LPR connection, connect
using the IP address of your printer. For a non-network printer, create a desktop USB connection.
For more information, go to the Online Support Assistant at: www.xerox.com/office/ALC81XXsupport.
Xerox
®
AltaLink
®
C81XX Series Color Multifunction Printer
User Guide
63
Getting Started

 Loading...


