Scanning and Configuring One Touch
Xerox
®
DocuMate
®
4799
User’s Guide
6-51
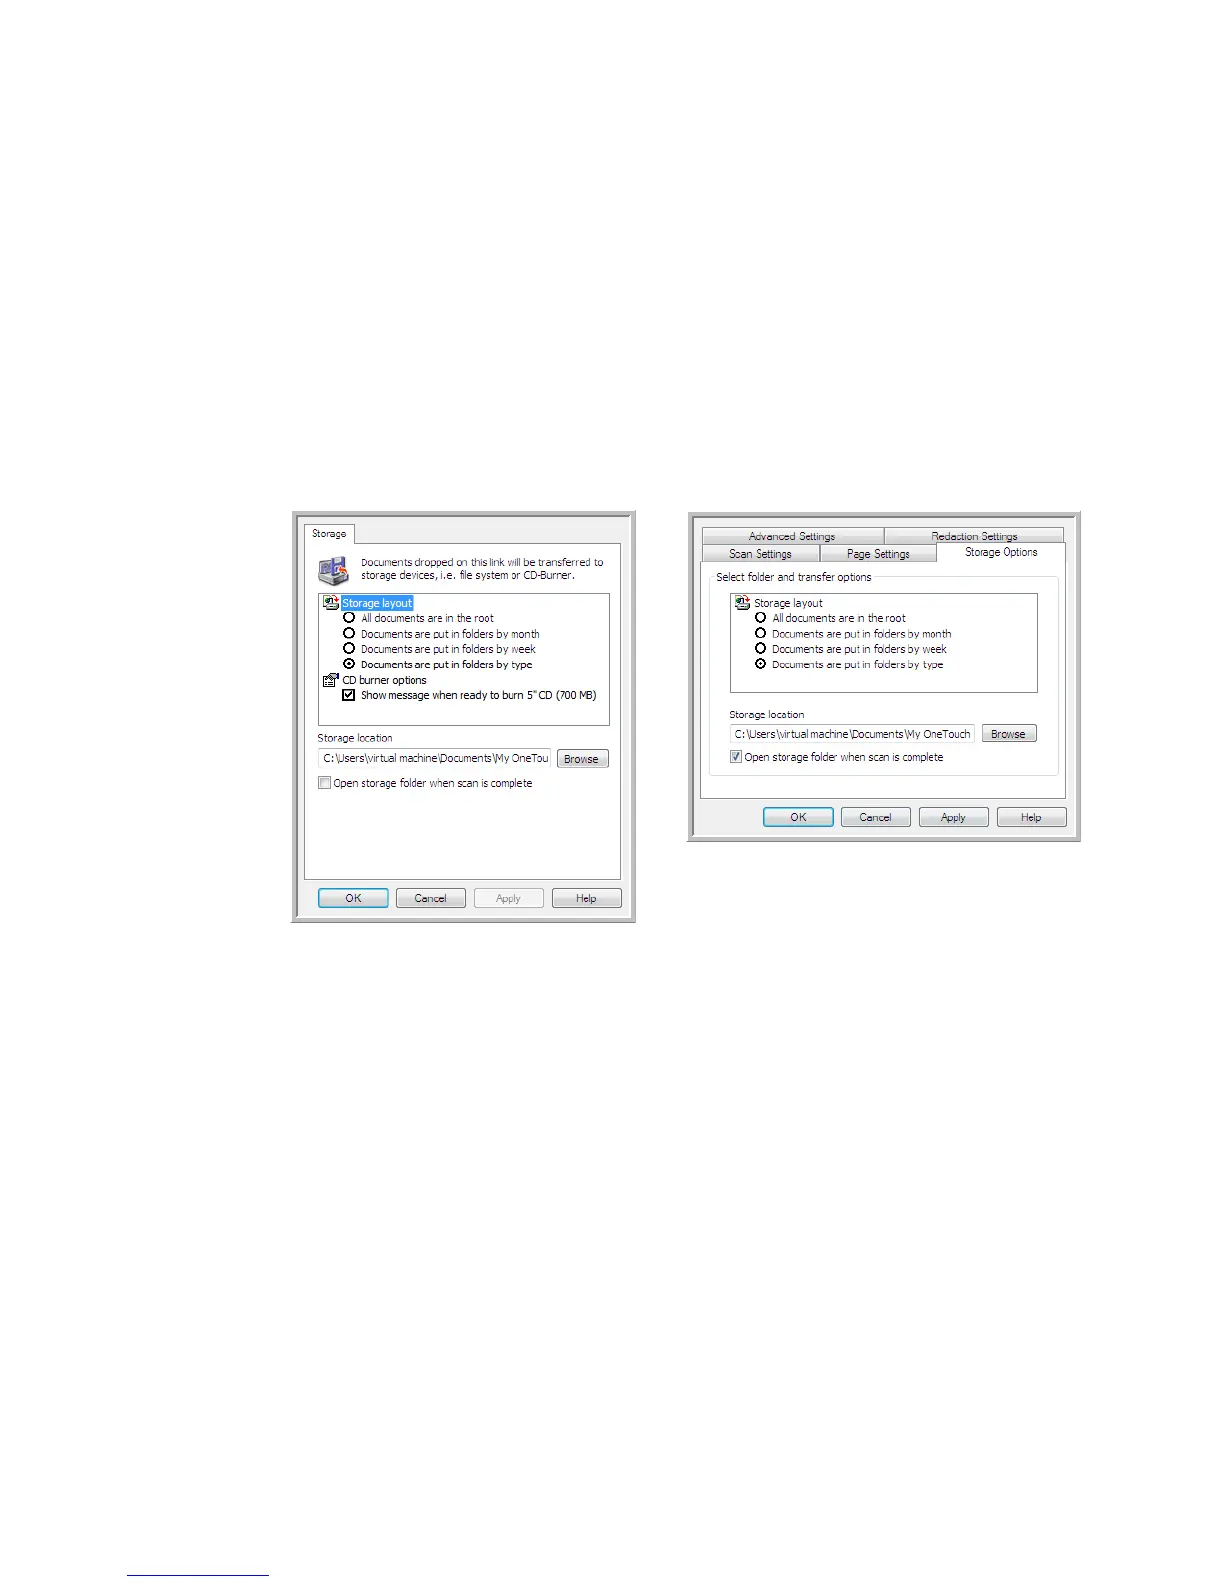
•Click the Properties button to open the One Touch Link Properties for Transfer to Storage. From this window,
you can change the global default storage location and options.
On initial installation of One Touch, all scan configurations use these settings. When you create new
configurations, the default settings will also match what you have selected here. If you modify the storage
options in an individual configuration, changing the options in this Link Properties window will no longer
update to the configurations you modified.
•Click the New, Copy, or Edit button to open the Scan Configuration Properties window. Click on the Storage
Options tab and use this window to set a configuration to scan to a different folder than the one selected in
the Link Properties window.
Changing the options in this window only affects the configuration you are creating or modifying. All other
configurations will retain their settings for this destination.
Storage layout
• All documents are in the root—the scanned documents are saved in the root of the folder specified in the
Storage location.
• Documents are put into folders by month, week, or type—folders are created based on your selection
(month, week, or file type) and the scanned documents are saved in those folders. New folders are created
for each month and week so you can keep track of when you scanned the documents.
Storage location
• This is the location on the computer or network where the file will be saved. Click on the Browse button to
change the location by browsing through your Windows folder list, or type a location directly into the input
field. You can select a local folder, or a folder on a server or mapped drive.
Open storage folder when scan is complete
• Select this option to have the folder, specified in the Storage location, open when scanning is complete and
the image has been transferred to that location. If you have selected a month, week, or type grouping
option, the folder that opens will be the grouping option you selected.
Transfer to Storage One Touch Link
Properties window
Scan Configuration Properties window -
Storage Options tab
 Loading...