Adjustments and Maintenance Procedures
ADJUSTING PAPER REGISTRATION
Use Adjust Paper Registration to adjust the placement of the printed image on the page. The adjustment allows
you to place the top, bottom, left, and right margins exactly where you want. You can specify the image position on
both the front and back sides of the paper, for each installed paper tray.
Verifying Paper Registration
1. At the printer control panel, press the HHoommee button.
2. Log in as administrator. For details, refer to the System Administrator Guide at www.xerox.com/support/
VLB600_VLB610docs.
3. Touch DDeevviiccee >> SSuuppppoorrtt >> IImmaaggee PPoossiittiioonn.
4. Select the source paper tray for the registration print.
a. Touch PPaappeerr SSuuppppllyy.
b. Touch the desired tray.
5. If your printer has automatic 2-sided printing, select the sides that you want to optimize.
• To select a sample registration page for adjusting side 1, touch AAddjjuusstteedd SSiiddee, then touch SSiiddee 11.
• To select a sample registration page for adjusting both sides, touch AAddjjuusstteedd SSiiddee, then touch SSiiddee 22.
6. Specify the consecutive number of sample pages to print.
a. Touch PPrriinntt SSeettttiinnggss.
b. To increase or decrease the number of sample pages, for Quantity, touch the PPlluuss icon (++) or the MMiinnuuss icon
(--), then touch OOKK.
7. To print the sample pages, touch PPrriinntt SSaammppllee.
8. When printing is completed, touch CClloossee.
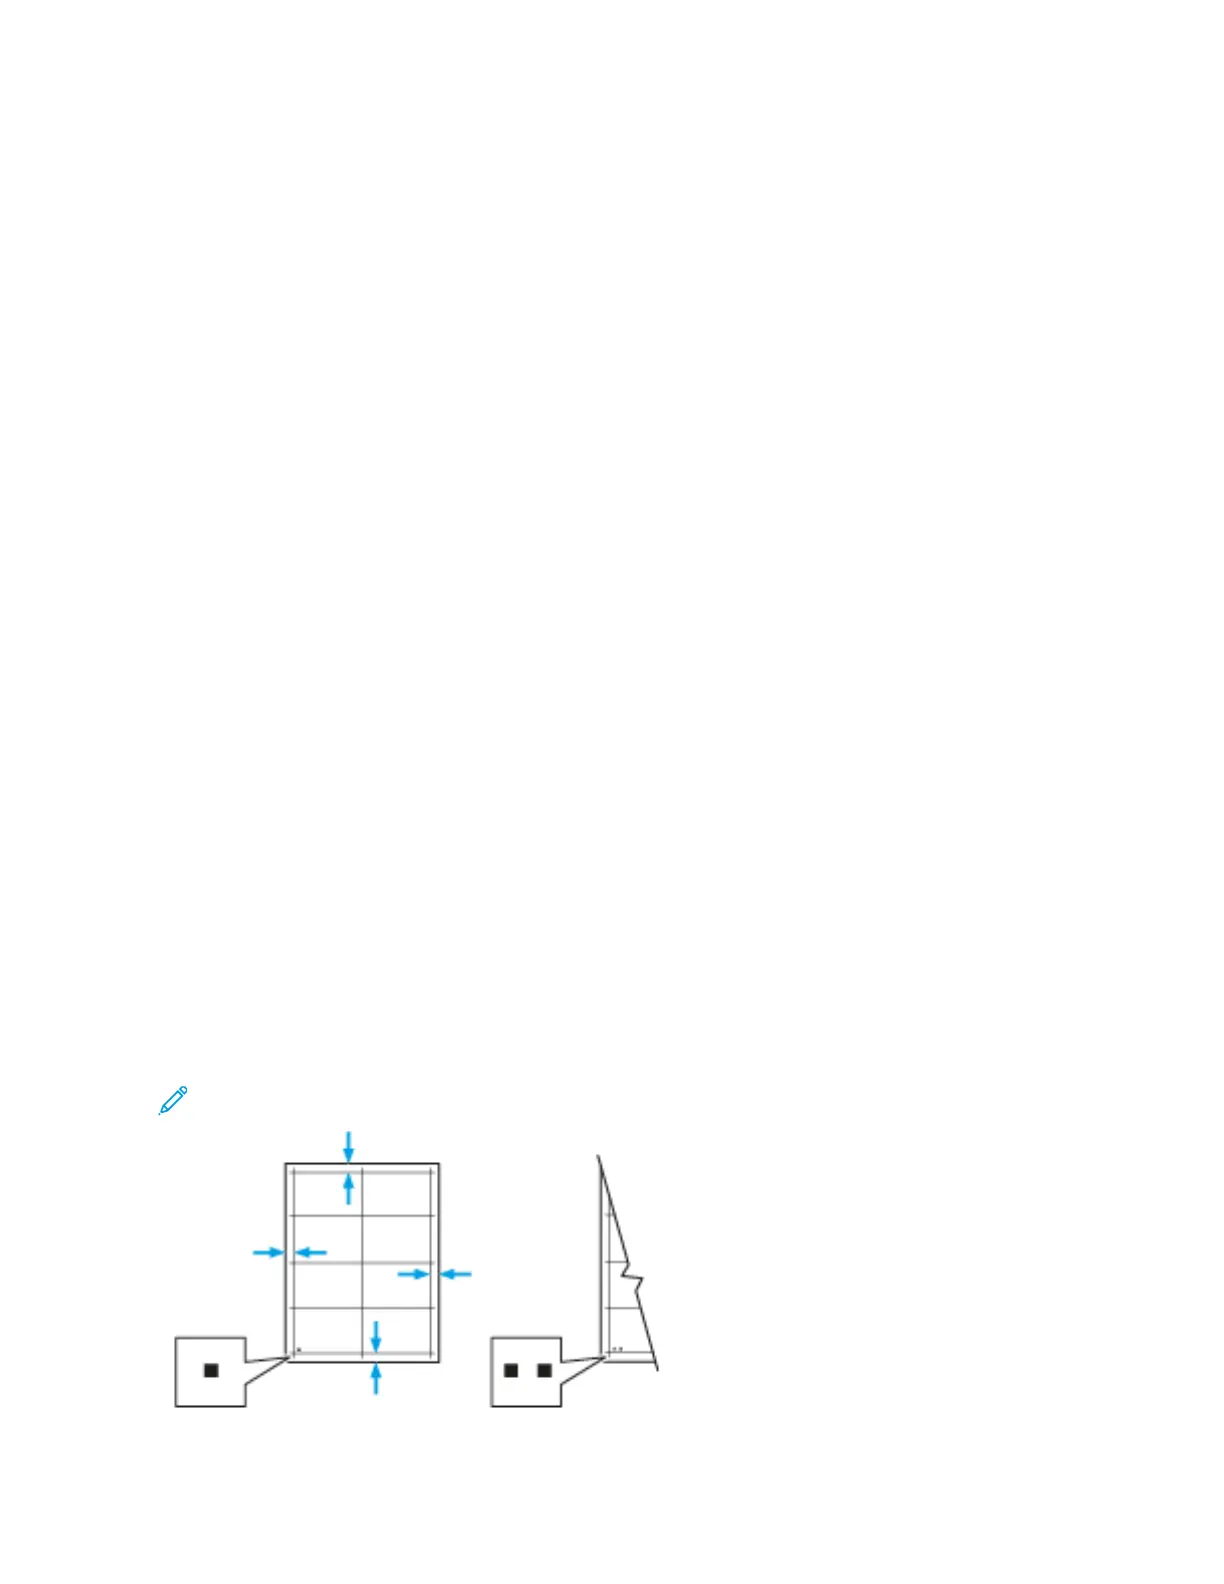
9. On the sample pages, for Side 1, use a ruler to measure the distance of the printed image from the top, bottom,
left, and right edges.
Note: For identification, a single dot is printed on Side 1, and two dots are printed on Side 2.
138 Xerox
®
VersaLink
®
B600/B610 Printer User Guide
Maintenance
 Loading...