When on LIVE mode, click the mouse button, or [Menu]
button on the remote controller/ Front panel, or click
[ ] icon on the toolbar to enter the main menu screen.
If the system interface is locked, refer to section unlock
by inputting the password.
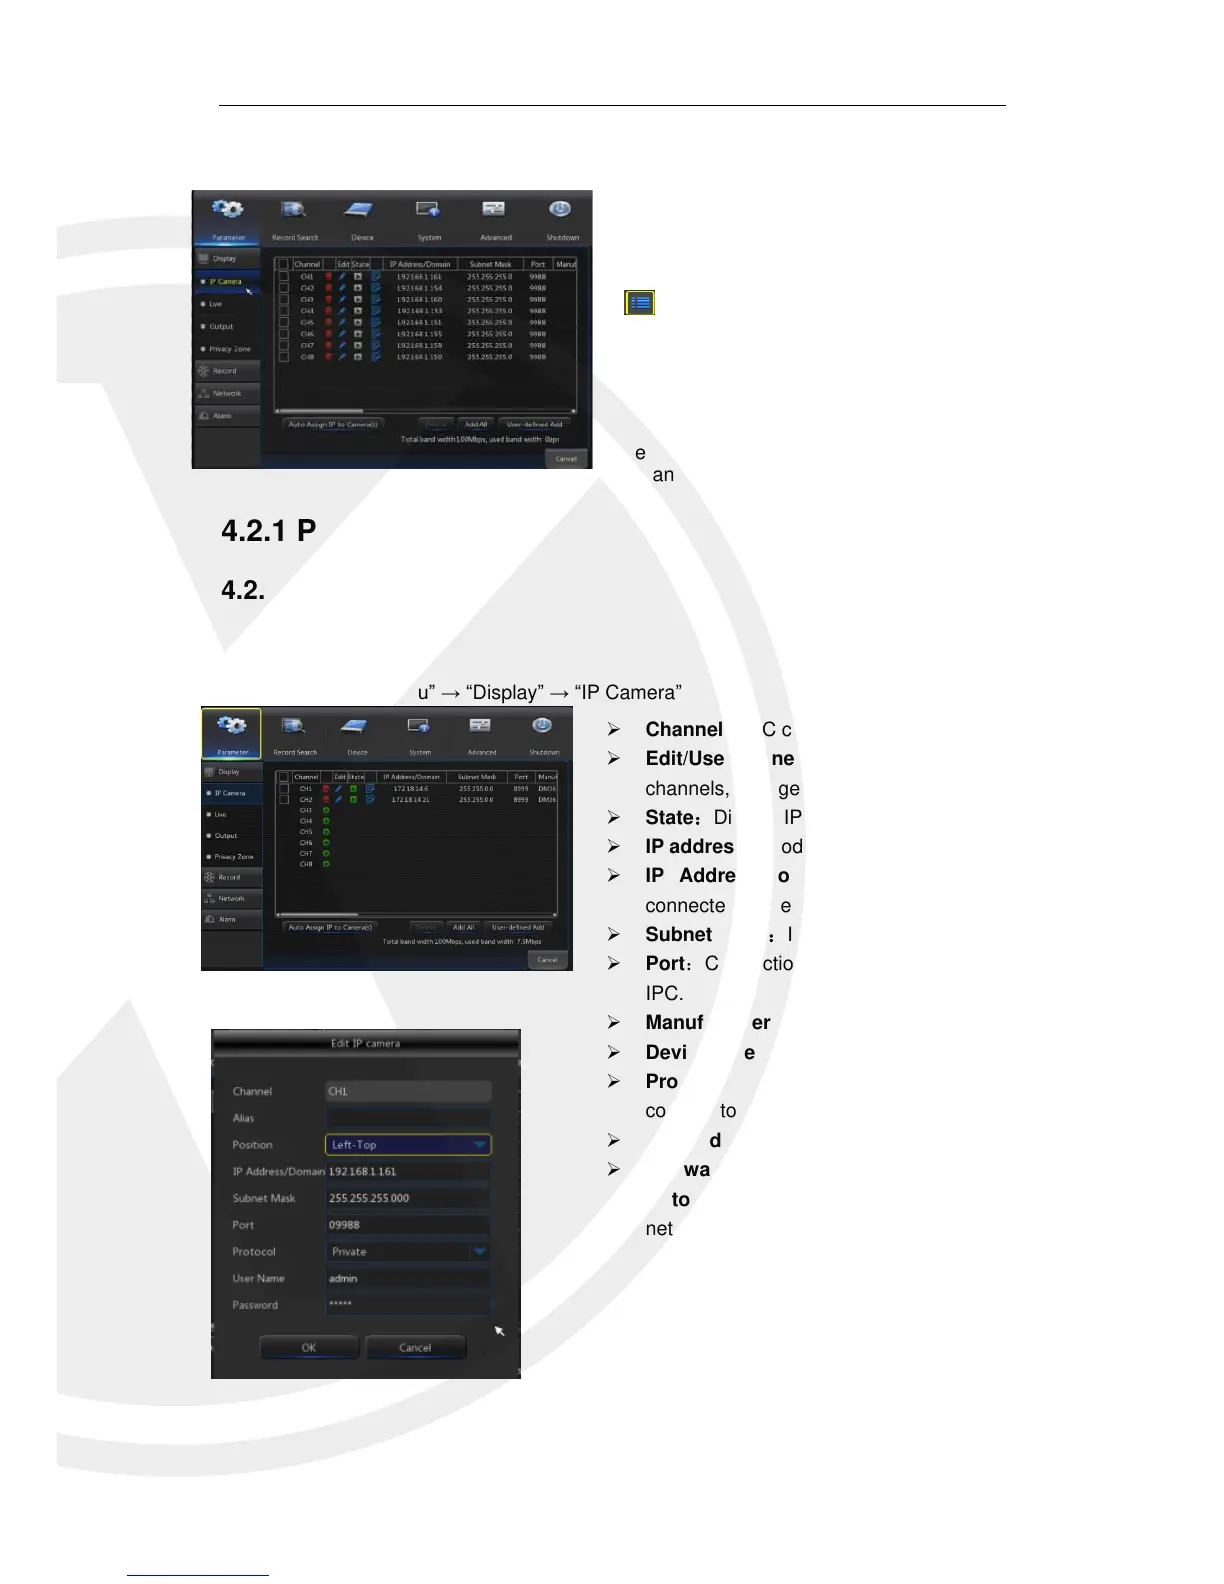
In the Main Menu mode, you can make changes to
the settings, Record Search, Device, System,
Advanced and Shutdown.
Channel:IPC camera channel
Edit/User defined:Modify the name and location of
channels, change other IPC or protocols, etc.
State:Display IPC on-line state.
IP address:Modify IP address of IPC camera.
IP Address/Domain : IP address of the IPC
connected to the channel.
Subnet Mask:IPC camera subnet mask.
Port:Connection port number of the currently set
IPC.
Manufacturer:Manufacturer for different IPC
Device type:Add IPC with different protocols.
Protocol: The selected access protocol for IPC to
connect to the X2RxN.
MAC Address:Physical address for device
Software:Display current version of the IPC.
Auto Assign IP to Camera: This will use the built in
network POE switch to assign your IPC(s) IP
addresses automatically, please note the IP
addresses handed out will be based on the settings
you input on the X2RxN e.g. if your X2RxN IP
address is 192.168.1.2 your 1st IPC will be
192.168.1.3 and so on.
 Loading...