47
DXS12/DXS15
4. Operation procedures
4-1. Short circuit between pin 3 (CPU-MODE) and pin 1
(GND) of connector CN701 on the DSPW circuit board,
and turn on the power switch. The fi rmware update mode
is activated.
* All indicators on the rear panel do not light at this
moment.
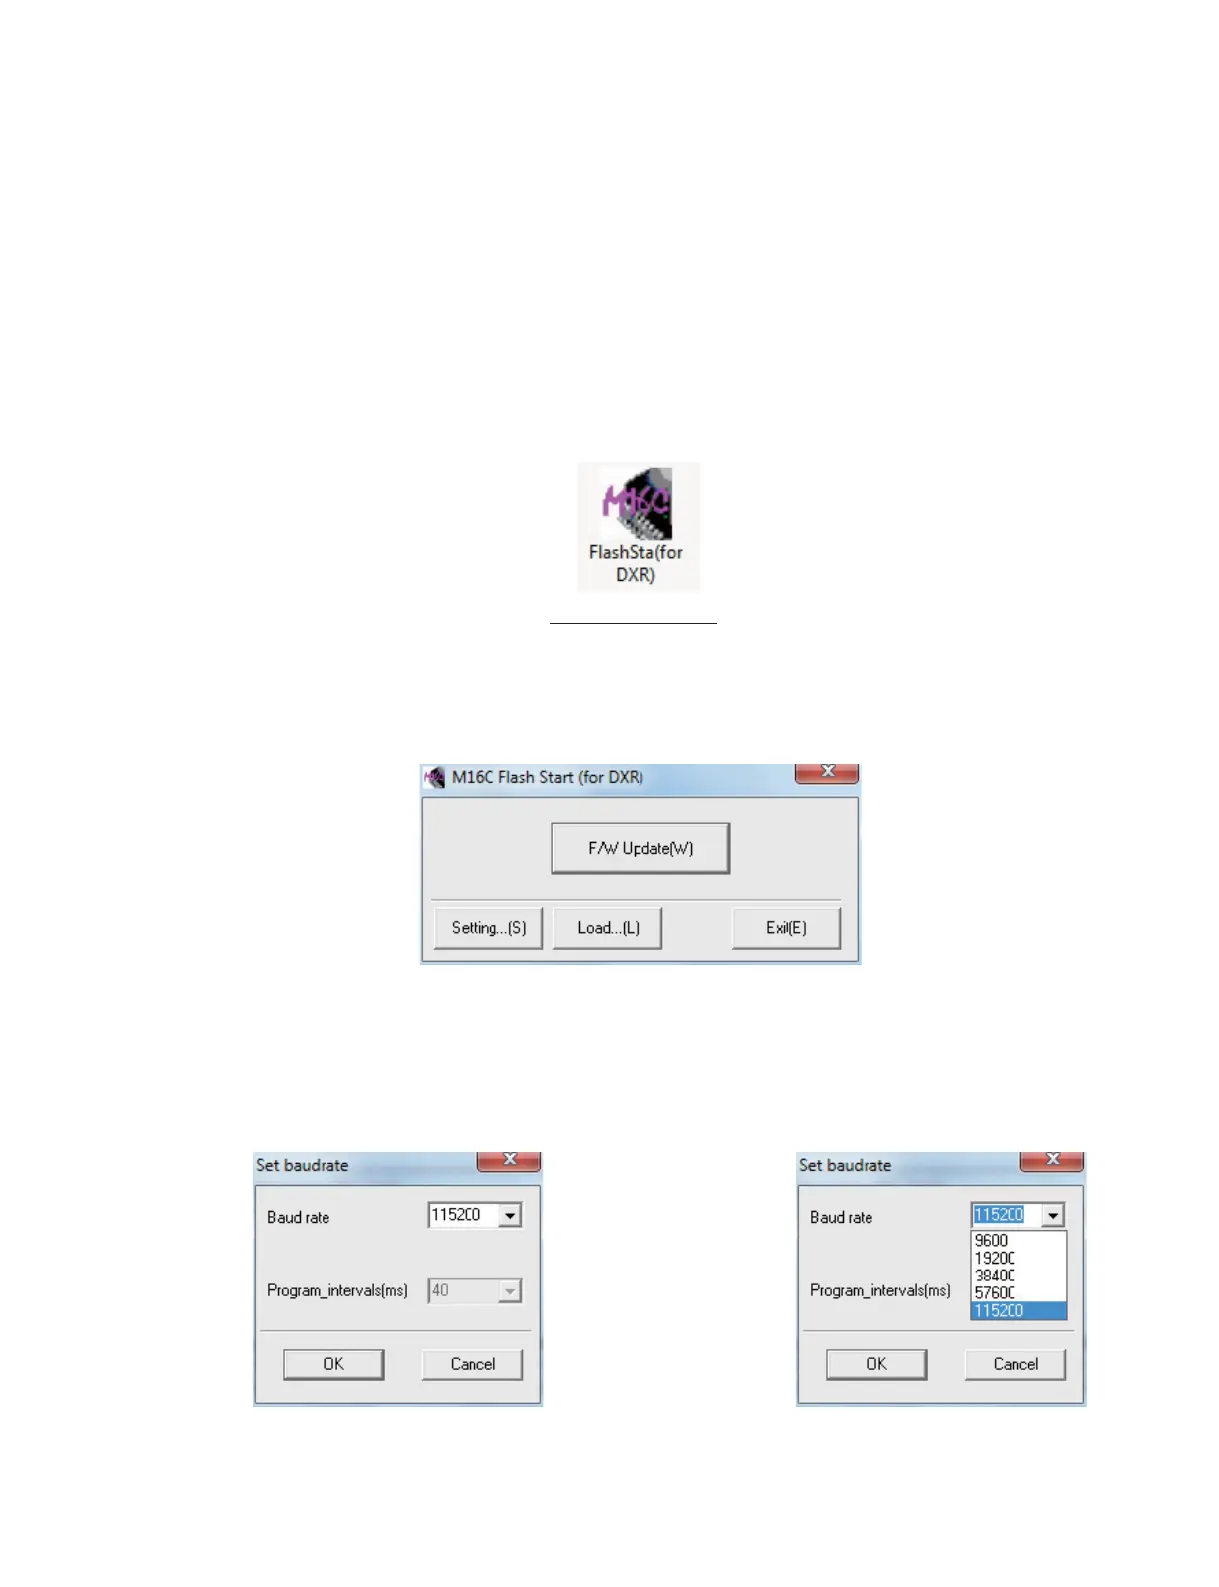
4-2. Execute “FlashSta (for DXR).exe.”.
* If error message is displayed, see “5. Error message”on
page 48.
4-3. Make sure that the baud rate is set to “115200”.
(1) Click “Setting...[S]” button.
(2) If “115200” is already selected, click “Cancel” button.
If other than “115200” is selected, select “115200”
and click “OK” button.
FlashSta(for DXR).exe
4. 操作方法
4-1. DSPW シートのコネクター CN701の3ピン(CPU-
MODE)と 1 ピン(GND)をショートし、アンプ
Ass'y の電源をオンすると、ファームウェアアップ
デートモードが起動します。
※ このときリアパネルの全てのインジケータは点
灯しません。
4-2. FlashSta(forDXR).exe を起動します。
※ エラーメッセージが表示されたときは、「5. エ
ラーメッセージ」(48 ページ)を参照してくださ
い。
4-3. Baudrate が115200に設定されていることを確
認します。
(1)「Setting...[S]」ボタンをクリックします。
(2)Baudrateが既に115200に設定されていると
きは「Cancel」ボタンをクリックします。
Baudrateが115200以外に設定されていると
きは115200を選択して「OK」ボタンをクリッ
クします。
 Loading...