BRKT
Bracket unit
7-39
6D93G11
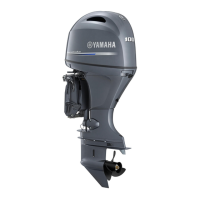
4. Remove the bolt
3
, then the tilt piston
4
.
Checking the tilt cylinder and trim
cylinder
1. Check the power trim and tilt unit for
cracks or corrosion. Replace if neces-
sary.
2. Check the inner walls of the trim cylinder
and tilt cylinder for scratches. Replace if
necessary.
3. Check the outer surface of the tilt piston
and free piston for scratches. Replace if
necessary.
4. Check the tilt ram for bends or excessive
corrosion. Polish with 400- to 600-grit
sandpaper if there is light rust or replace
if necessary.
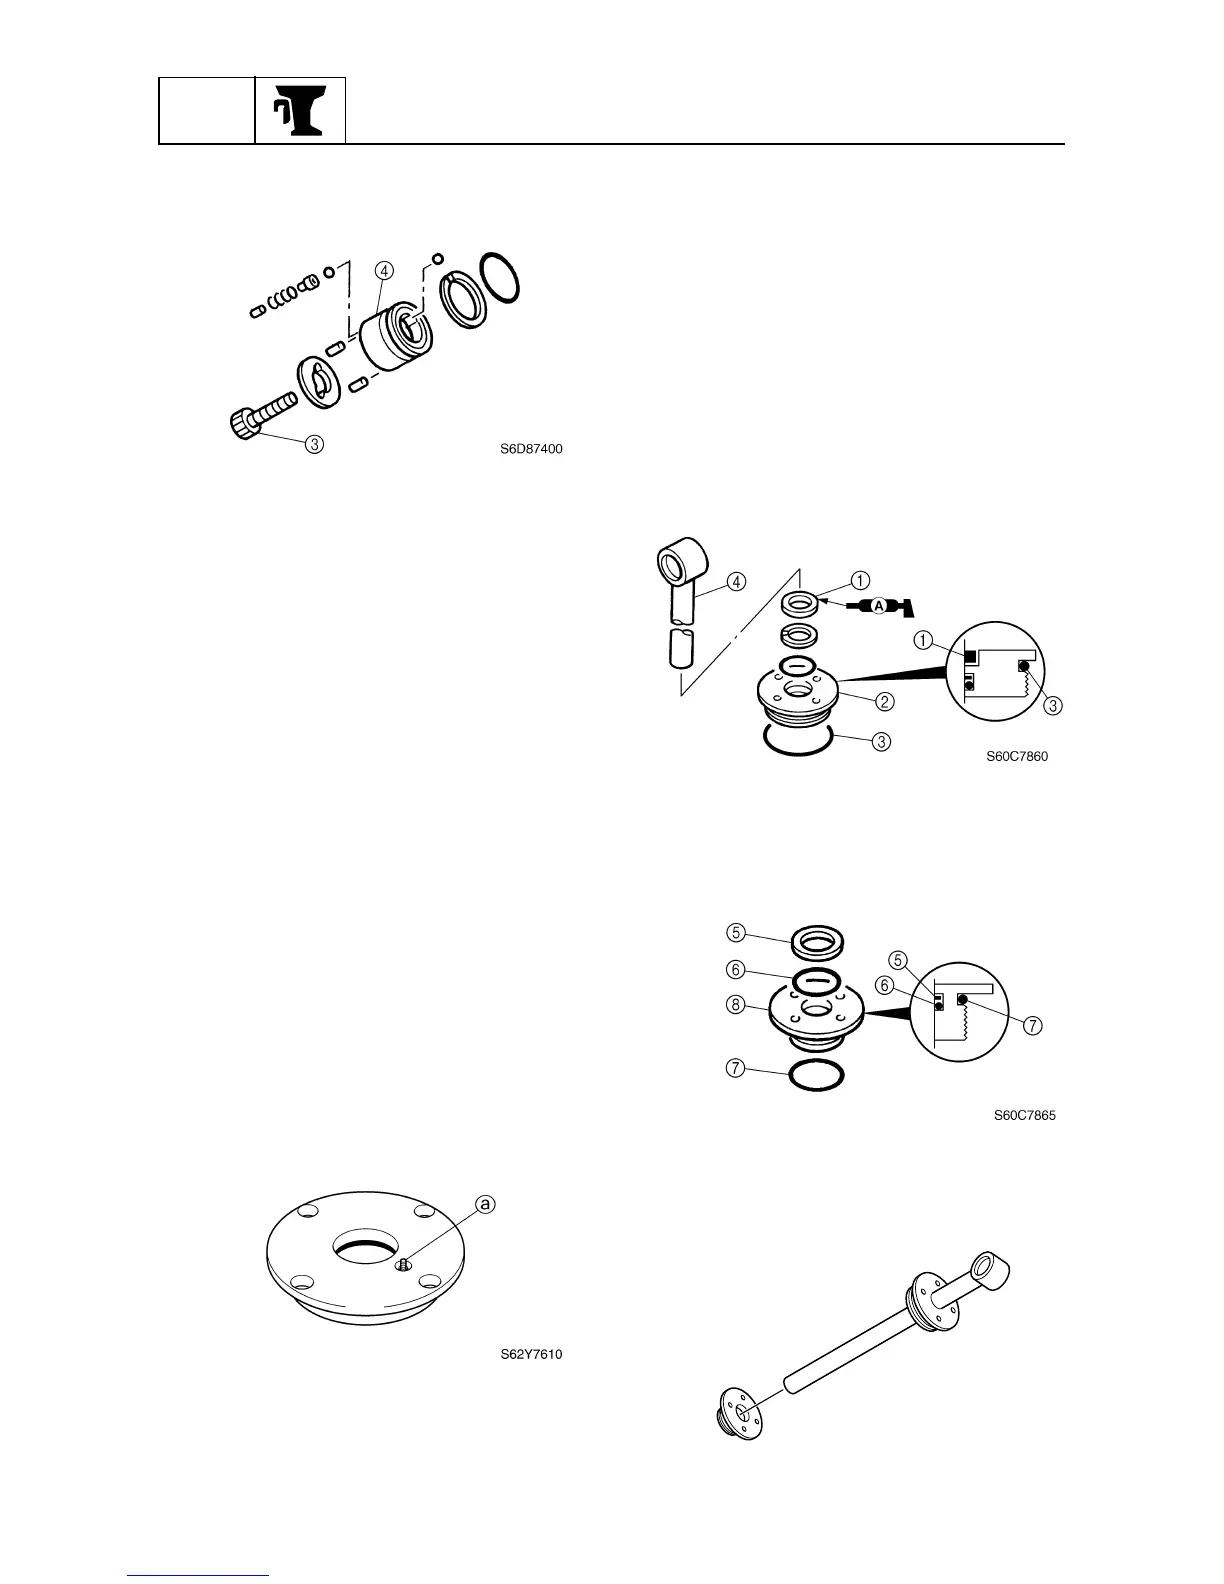
Checking the valves
1. Check the operation of the check valve
a
of the tilt cylinder end screw and
check the valve for dirt or residue. Clean
if necessary.
2. Check the operation of the absorber
valve and check for dirt or residue. Clean
if necessary.
Assembling the tilt cylinder
1. Install a new O-ring, the backup ring, and
a new dust seal
1
into the trim cylinder
end screw
2
.
2. Install the O-ring
3
onto the trim cylinder
end screw.
3. Install the tilt ram
4
into the trim cylinder
end screw.
4. Install the backup ring
5
and new O-
rings
6
and
7
into the tilt cylinder end
screw
8
.
5. Install the tilt cylinder end screw onto the
tilt ram.
S60C7870

 Loading...