POWR
Power unit
5-15
6D93G11
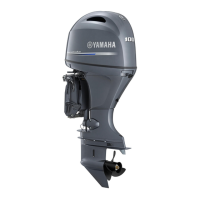
10. Install a new timing belt
8
onto the drive
sprocket with its part number in the
upright position, and then install the belt
onto the driven sprockets in a counter-
clockwise direction.
CAUTION:
• Do not twist, turn inside out, or bend the
timing belt beyond the maximum limit of
25 mm (1.0 in) otherwise it can be dam-
aged.
• Do not get oil or grease on the timing
belt.
NOTE:
The lower edge of the timing belt should be 2
mm (0.08 in)
e
from the bottom of the driven
sprockets.
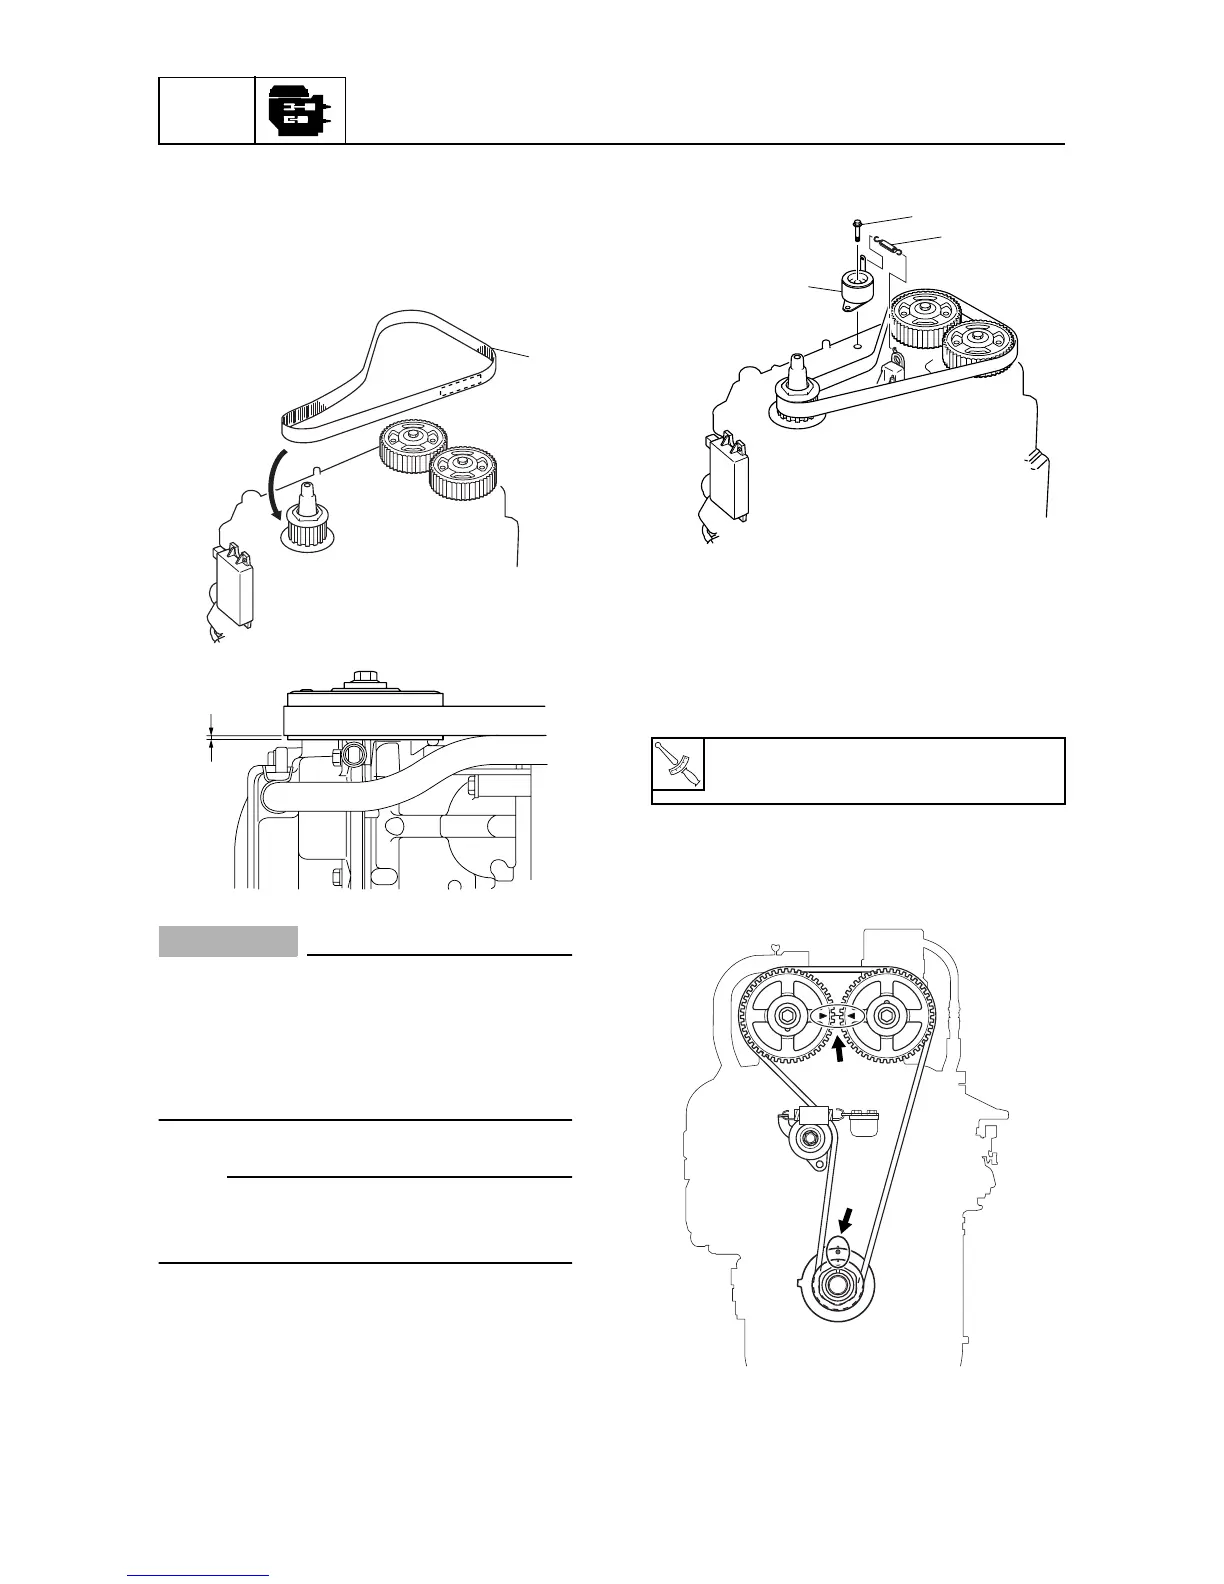
11. Install the timing belt tensioner
9
and
finger tighten the bolt
0
until the bolt
seat contacts the timing belt tensioner.
12. Loosen the timing belt tensioner bolt 90°.
13. Install the spring
A
.
14. Take up the timing belt slack by turning
the drive sprocket clockwise at least two
full turns.
15. Tighten the timing belt tensioner bolt to
the specified torque.
16. Turn the drive sprocket two full turns, and
then check that the alignment marks are
aligned.
17. Install the bracket and connect the cool-
ing water hose.
S6D85290
67F-46241-00
8
S6D85250
e

 Loading...