REAR SHOCK ABSORBER ASSEMBLY
1
2. Check:
• Bearings
• Oil seals
Damage/pitting
4 R
ep
lace.
3. Check:
• Collars
Damage/scratches
->
Replace.
INSTALLING THE RELAY ARM
1. Lubricate:
• Collars
• Oil seals
•
2. Install:
Recommended lubricant
Lithium-soap-based grease
• Bearings "1"
(to t
he
relay arm)
• O
il
seals
"2"
l@IMi
(to t
he
relay arm)
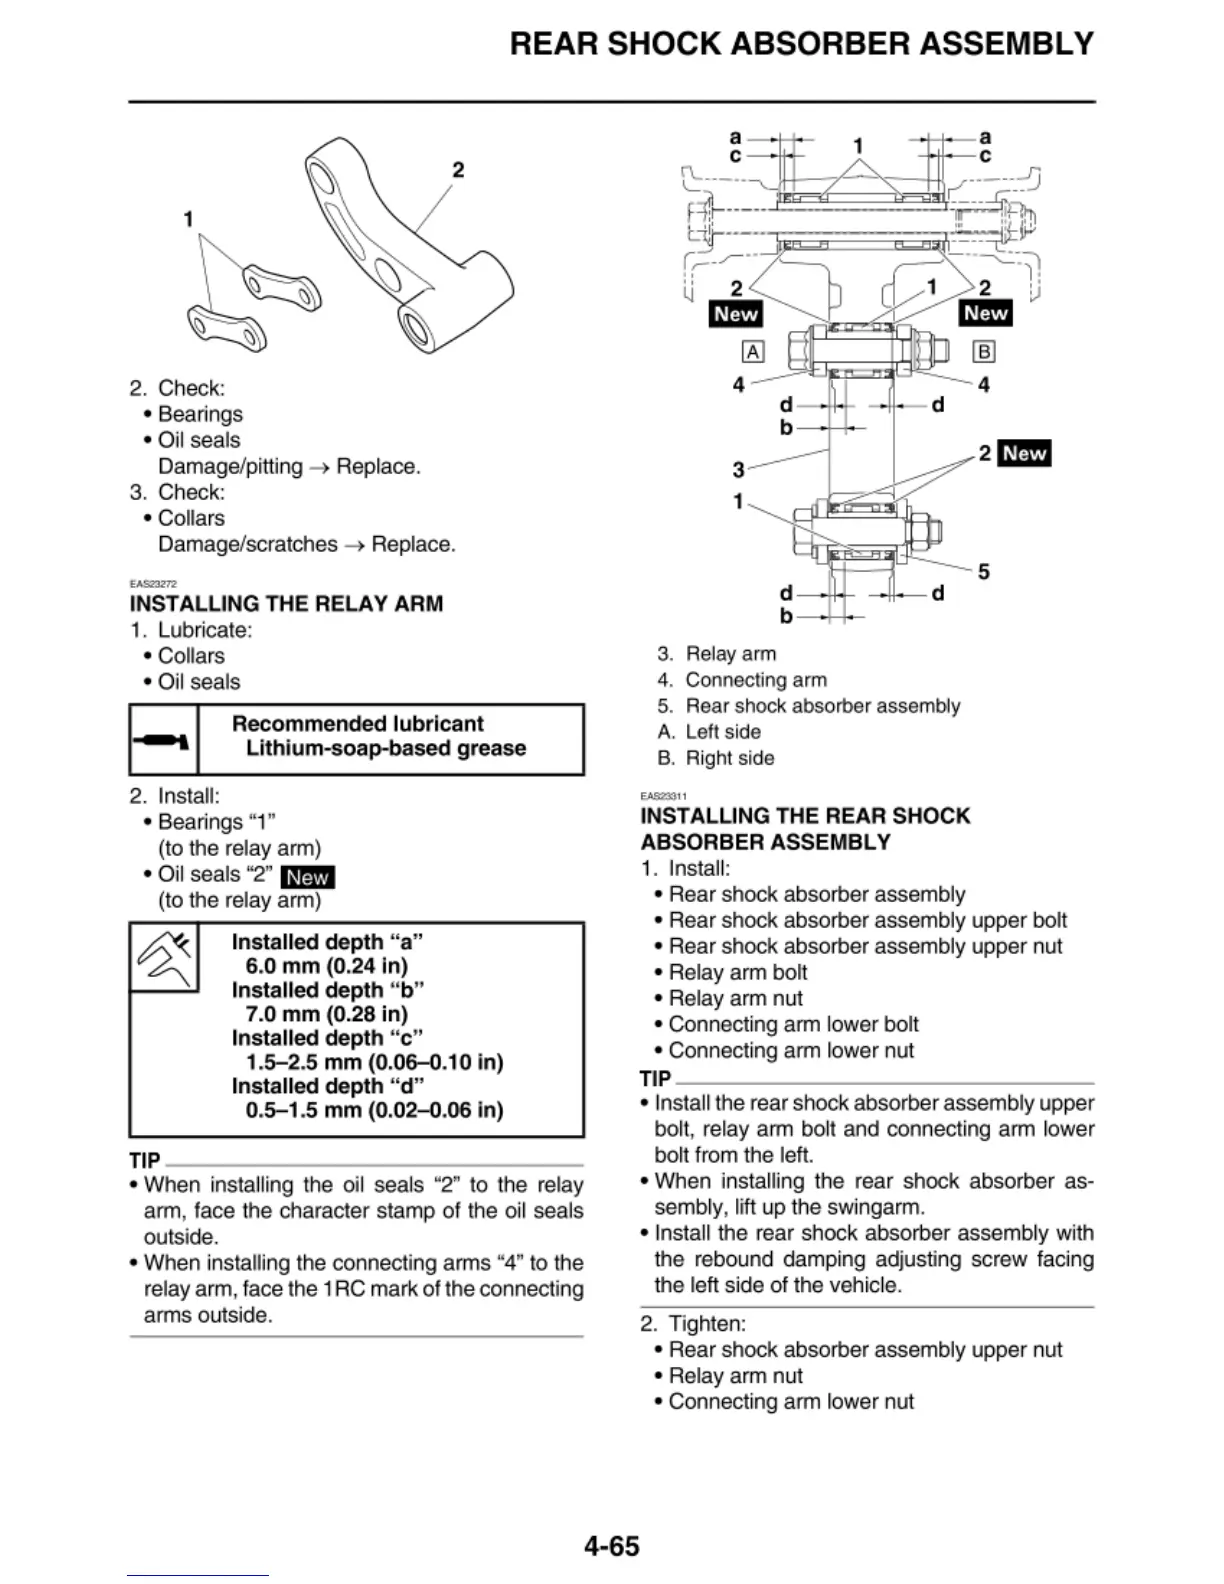
Installed depth "a"
6.0 mm (0.24 In)
Installed depth "b"
7.0 mm (0.28
in
)
Installed depth
"c"
1.
5-2.5 mm (0.06-0.10 in)
Installed depth "d"
0.5-1.5 mm (0.02- 0.06 In)
TIP
--------------
• When insta
lli
ng
the oil seals "2" to the relay
arm, face t
he
character stamp
of
the o
il
seals
outside.
• When installing the connecting arms "4" to the
relay arm, face the 1
RC
mark
of
the connecting
arms outside.
3.
Relay
arm
d
-"'-'-
-"-
d
b
-+-i.-
4. Connecting arm
5. Rear shock absorber assembly
A.
Left si
de
B.
Right s
id
e
......,,,
INSTALLING THE REAR SHOCK
ABSORBER ASSEMBL V
1. Install:
• Rear shock absorber assembly
5
• Rear shock absorber assembly
up
per
bolt
• Rear shock absorber assembly
up
per
nut
• Relay arm bolt
• Relay arm nut
• Connecting arm lower bolt
• Connecting arm lower nut
TIP
--------------
• Insta
ll
the rear shock absorber assembly upper
bo
l
t,
re
l
ay
arm
bo
lt and connecting arm lower
bo
lt
fr
om
t
he
left.
• When
in
stall
in
g t
he
rear shock absorber as-
sembly, li
ft
up t
he
sw
in
garm.
• Insta
ll
t
he
rear shock absorber assembly with
t
he
rebound damping adjusting screw facing
t
he
left side
of
the
ve
hicl
e.
2. Tighten:
• Rear shock absorber assembly
up
per
nut
• Relay arm nut
• Connecting arm lower nut
4-65
 Loading...