EA$2>1
2$)
REMOVING
THE
VALVES
The following procedu
re
applies to all of the
valves and
re
lated components.
TIP
~~~~~~~~~~~~~~
Before removing the internal parts
of
the cy
li
nder
head (e.g., valves, valve sp
rin
gs
, valve seats),
make sure the valves prope
rl
y seal.
1. Remove:
• Valve lifter
"
1"
• Va Ive pad "2"
TIP
~~~~~~~~~~~~~~
Make a note
of
the position
of
each valve lifter
and valve pad so that they can be reinstalled in
their original place.
1
3
EX
IN
2 1
2. Check:
• Valve sea
li
ng
Leakage at the valve seat
--t
Ch
ec
k the valve
face, valve seat, and valve seat width.
Refer to "CHECKING
THE
VALVE SEATS"
on page 5-25.
••••••••••••••••••••••••••••••••
a. Pour a clean solvent "a" into the intake and
exhaust ports.
b. Check that the valves properly sea
l.
TIP
~~~~~~~~~~~~~~
There should be
no
leakage
at
the valve seat "
1".
1
••••••••••••••••••••••••••••••••
3. Remove:
• Valve cotters
VALVES AND VALVE SPRINGS
TIP
~~~~~~~~~~~~~~
Remove the valve cotters by compress
in
g the
valve spring with the valve spri
ng
compressor
"1"
and the valve
sp
ri
ng compressor attachment
''2".
Valve
sp
ring
compressor
90890-04019
YM-04019
Valve
sp
ring
compressor
attach-
ment
90890-04108
Valve
sp
ring
compressor
adapter
22mm
YM-04108
1
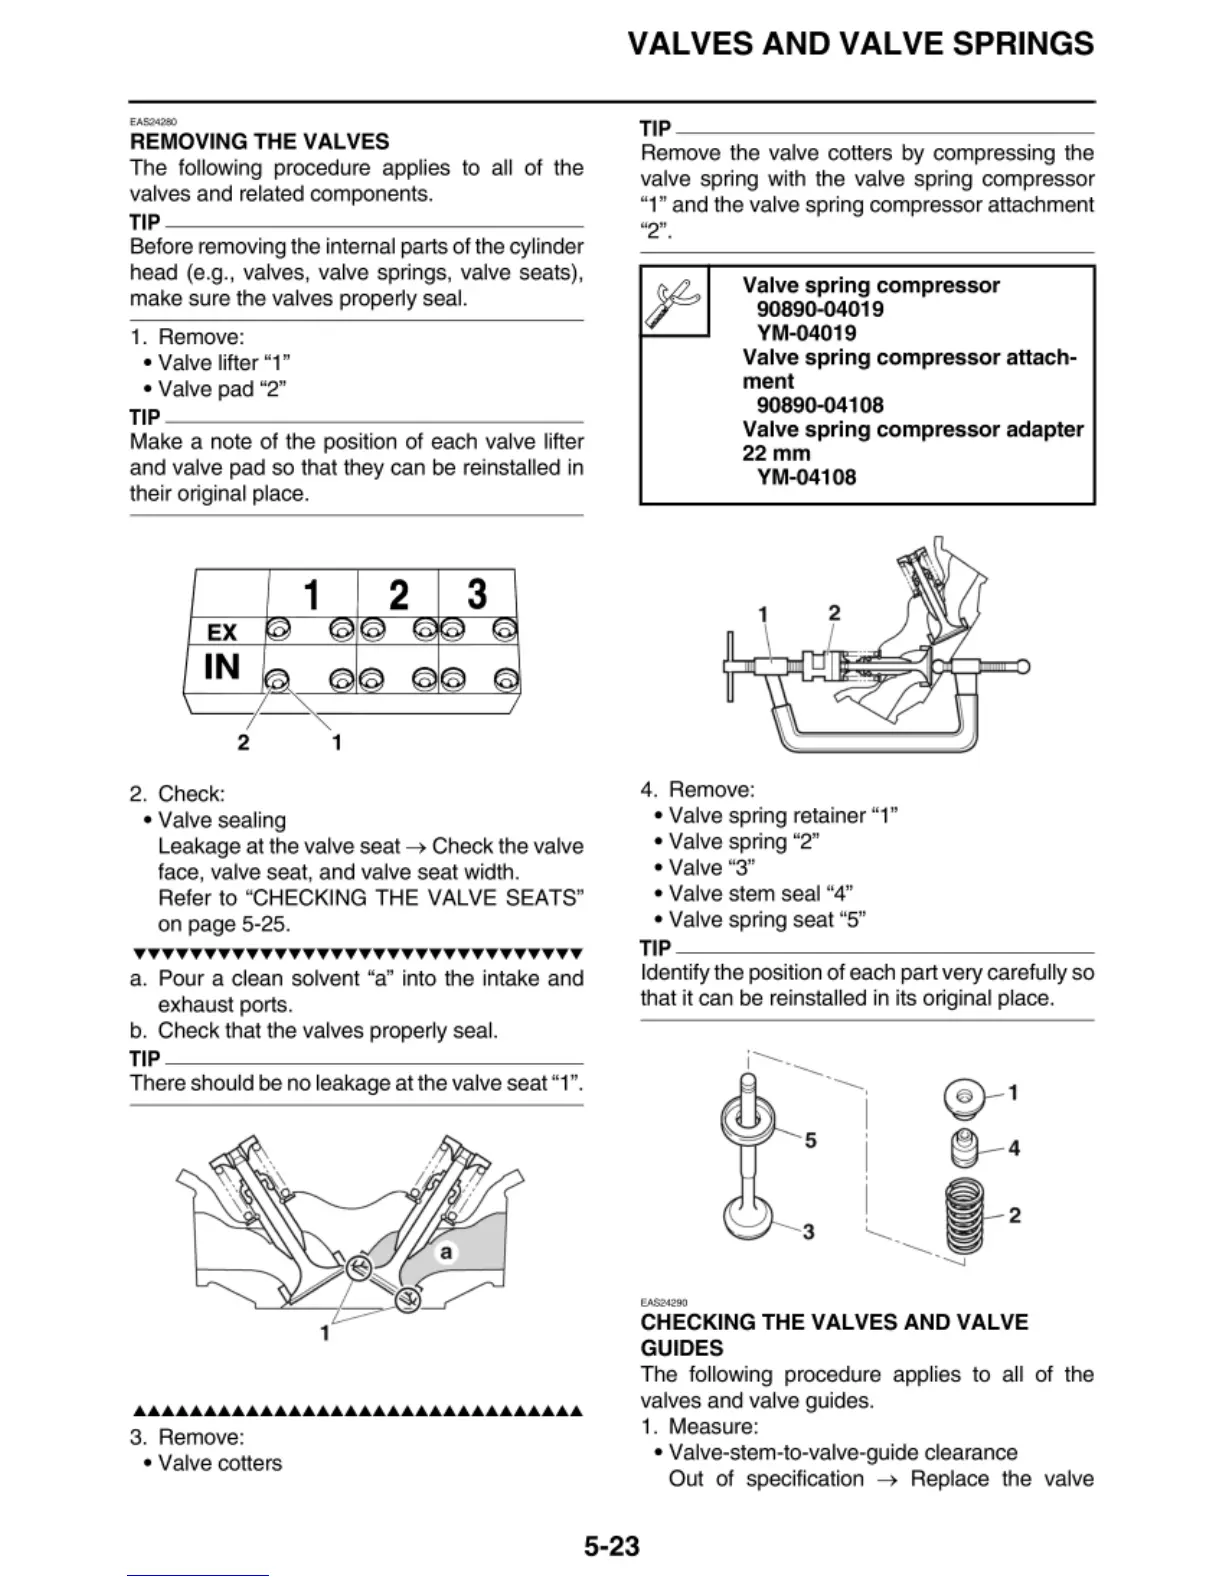
4. Remove:
• Valve spring retainer
"1"
• Valve spring "2"
• Valve "3"
• Valve stem seal "
4"
• Valve spring seat "5"
TIP
~~~~~~~~~~~~~~
ldenti
fy
the position of each part very carefu
ll
y so
that it can be reinsta
ll
ed in its o
ri
ginal place.
·--._
I ·
--._
-----
'
©-
1
I
®-
4
i
~
- 2
.........
_____
~
'.__,
3
,_,,.
CHECKING
THE
VALVES
AND
VALVE
GUIDES
The fo
ll
owing procedure app
li
es
to all
of
the
valves and valve gu
id
es
.
1.
Measure:
• Valve-stem-to-valve-guide clearance
Out of specification
--t
Replace the valve
5-23
 Loading...