• Valve seat
TIP
~~~~~~~~~~~~~~
After replacing the
cy
li
nder head
or
replacing the
valve and valve g
ui
de, the valve seat and valve
face sho
ul
d be lapped .
••••••••••••••••••••••••••••••••
a. Apply a
coa
rse lapping compound
"a
" to t
he
valve face.
NOTICE
~~~~~~~~~~~~~
Do
not
let
the
lap
ping
compound
enter
the
gap
between
the
valve
stem
and
the
valve
guide
.
b. Apply molybdenum disulfide o
il
onto the
valve ste
m.
c. Install the valve
in
to the cylinder head.
d. Turn t
he
valve
un
til the valve face and valve
seat are evenly polished, then clean off all
of
the la
pp
ing compound.
TIP
~~~~~~~~~~~~~~
For the best lapping results,
li
ghtly tap the valve
seat while rotating the valve back and forth be·
tween your hands.
e. Apply a fine lapping compound to the valve
face and repe
at
the above steps.
f.
After every lapp
in
g procedure,
be
su
re
to
clean off all of the lapping compound from the
valve face and val
ve
sea
t.
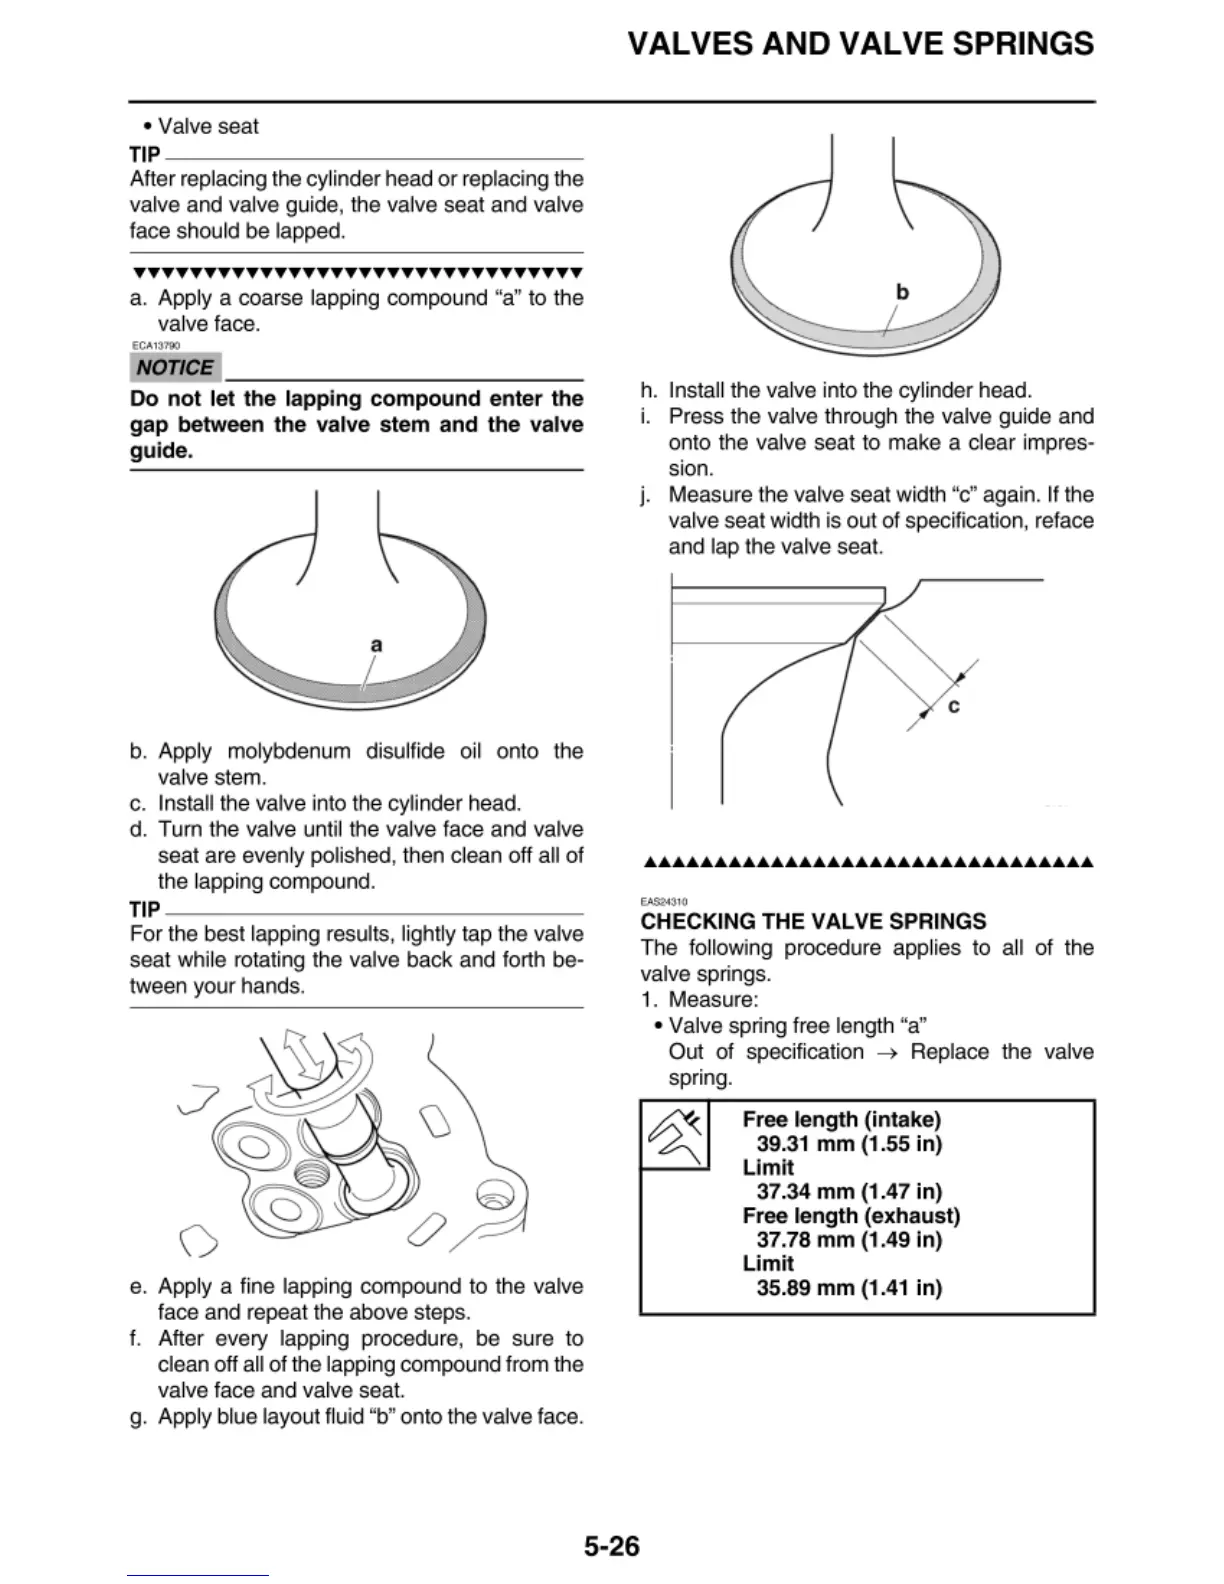
g. Apply blue layout fluid "b" onto the valve face.
VALVES AND VALVE SPRINGS
h. Insta
ll
the valve into the
cy
li
nder head.
1.
Press the valve throu
gh
the valve guide and
onto the valve seat to make a clear impres·
sion.
J. Measure the valve seat width "c" agai
n.
If the
valve seat w
id
th is
ou
t of specification, reface
a
nd
lap the valve seat.
c
f.o\S2-1:110
CHECKING
THE
VALVE
SPRINGS
The fo
ll
owing procedure app
li
es
to all of the
valve springs.
1. Measure:
• Valve spring
fr
ee
length "a"
Ou1
of specification
~
Replace t
he
valve
spring.
5-26
Free
length
(
int
ake)
39.31
mm
(1.55
in
)
Li
mit
37
.34
mm
(1.47
in
)
Free
lengt
h (exhaust)
37
.78
mm
(1
.49
In)
Limi
t
35
.89
mm
(1.41
in
)
 Loading...