12000 Pecos Street, Suite 290, Westminster, CO 80234 | www.3xlogic.com | (877) 3XLOGIC
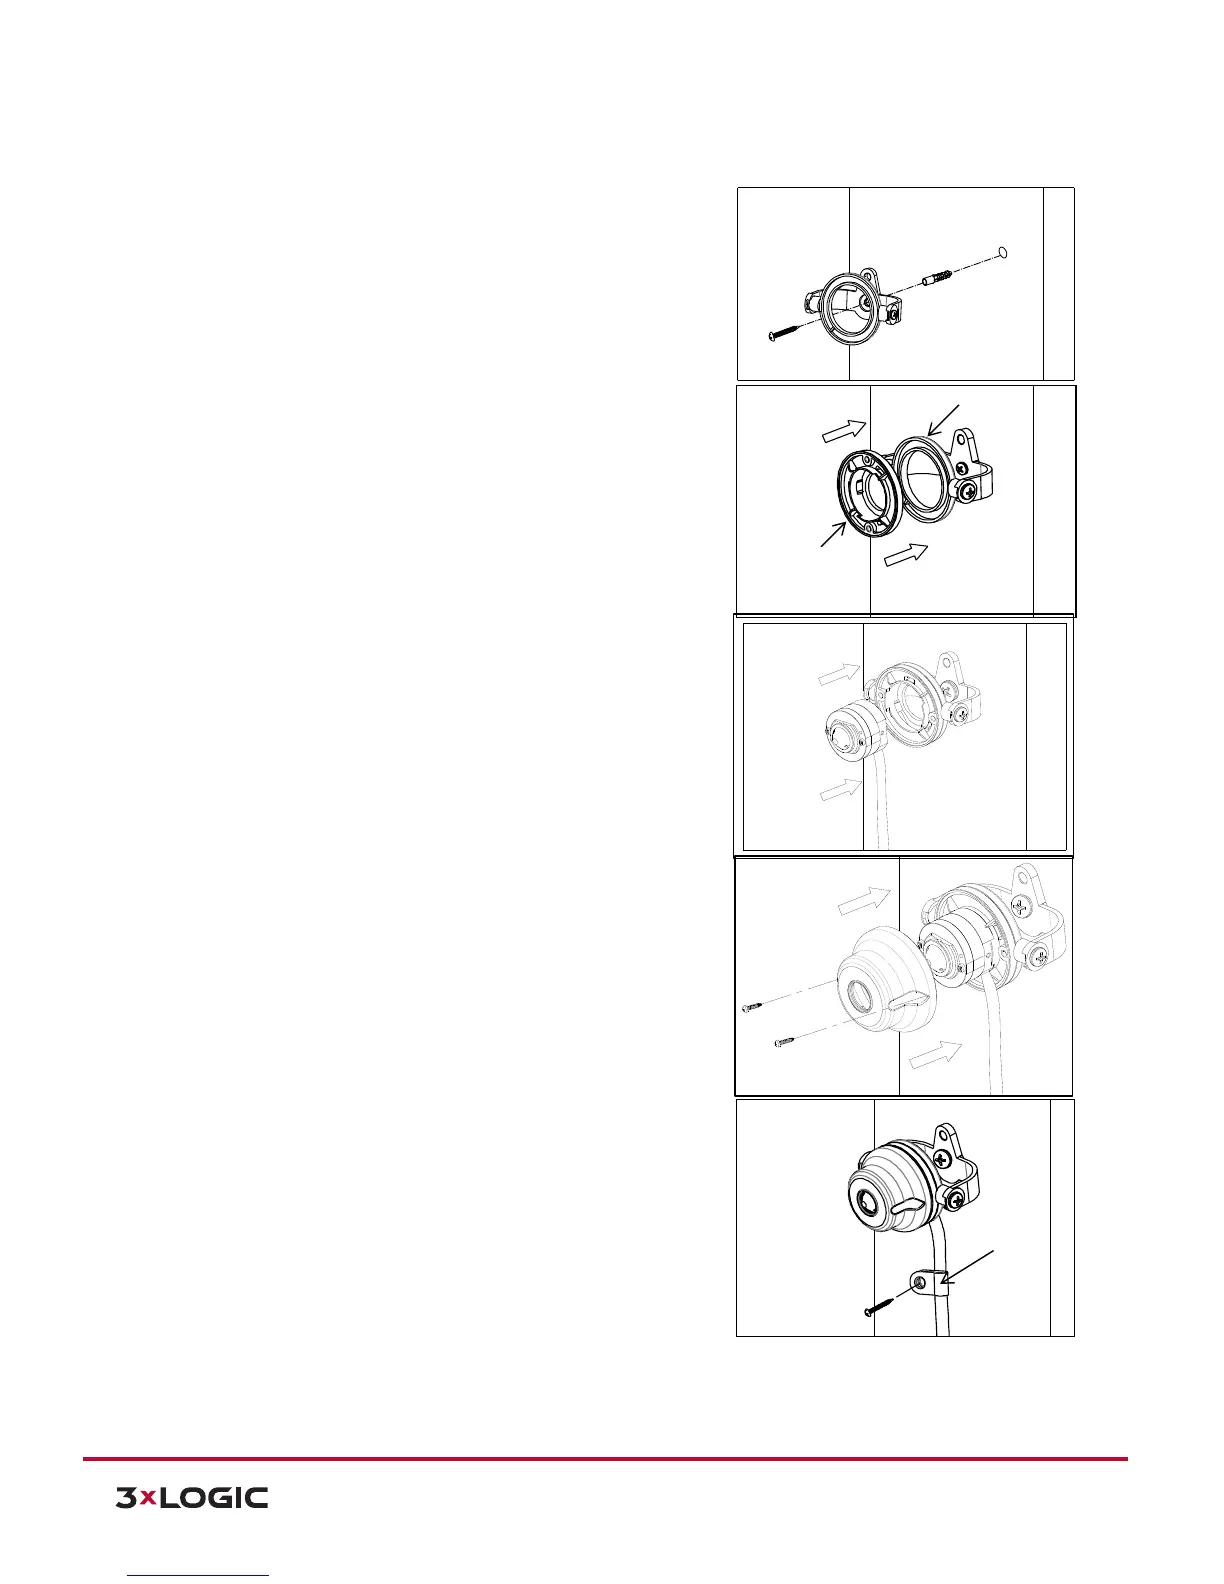
6.4.5 SURFACE INSTALLATION FOR PAN/TILIT
ADJUSTMENT
Steps:
1). Drill a hole on a desired installation surface, and insert
an anchor block into the hole.
2). Fix the pan/tilt bracket by inserting the tapping screw
(M4x25) to be passed through the screw hole on the
bracket and tightening it into the anchor block.
3). Insert the rotate ring into the bracket by pressing it
into the bracket’s mount ring
4). Place the camera unit on the pan/tilt bracket.
5). Place the surface mount bracket on top of the
camera, fix the bracket by inserting the tapping
screws (M3x6) into the screw holes on the bracket by
aligning the screw holes with the holes on the rotate
ring on the pan/tilt bracket, and tighten the screws
6). Use the cable clamp optionally if you want to fix the
camera’s cable to a desired spot with a tapping screw
(M4x20).
 Loading...