20
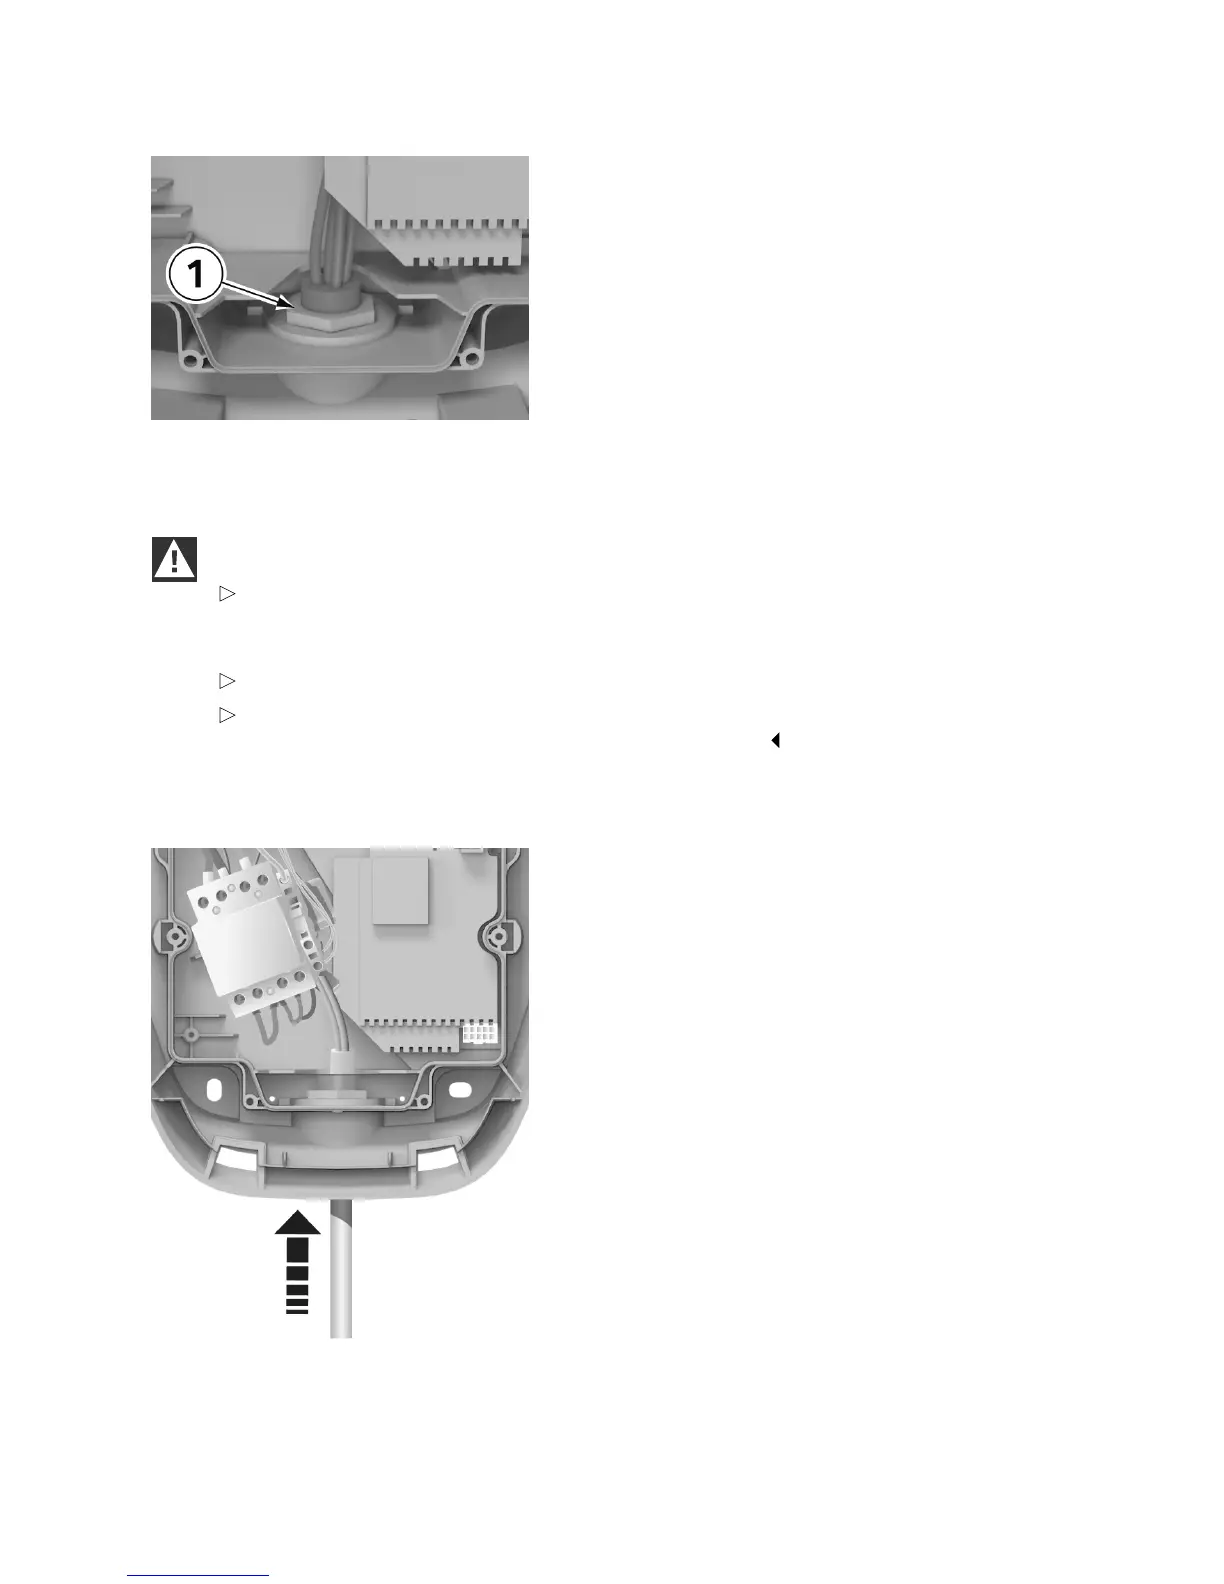
Remove the lock nut on the cable gland
10. Remove the lock nut 1 on the cable gland
using an open-ended spanner.
11. Pull the old charging cable downwards out of
the Wallbox.
Prepare the new charging cable
CAUTION
The design current for the charging cable must not be less than the design current for
the Wallbox. To check this, compare the figures on the model plate of the Wallbox with the
figures on the charging cable.
Check the spare part for possible signs of damage and ensure it is in perfect condition.
The cable gland on the new charging cable must not be opened. The charging cable can
be replaced by opening the lock nut inside the housing.
1. Remove the cable ties holding the new charging cable together.
2. Thread the new charging cable into the
Wallbox.
3. Secure the screw connection using the brass
nut in the package (torque: 4 Nm).
 Loading...