26
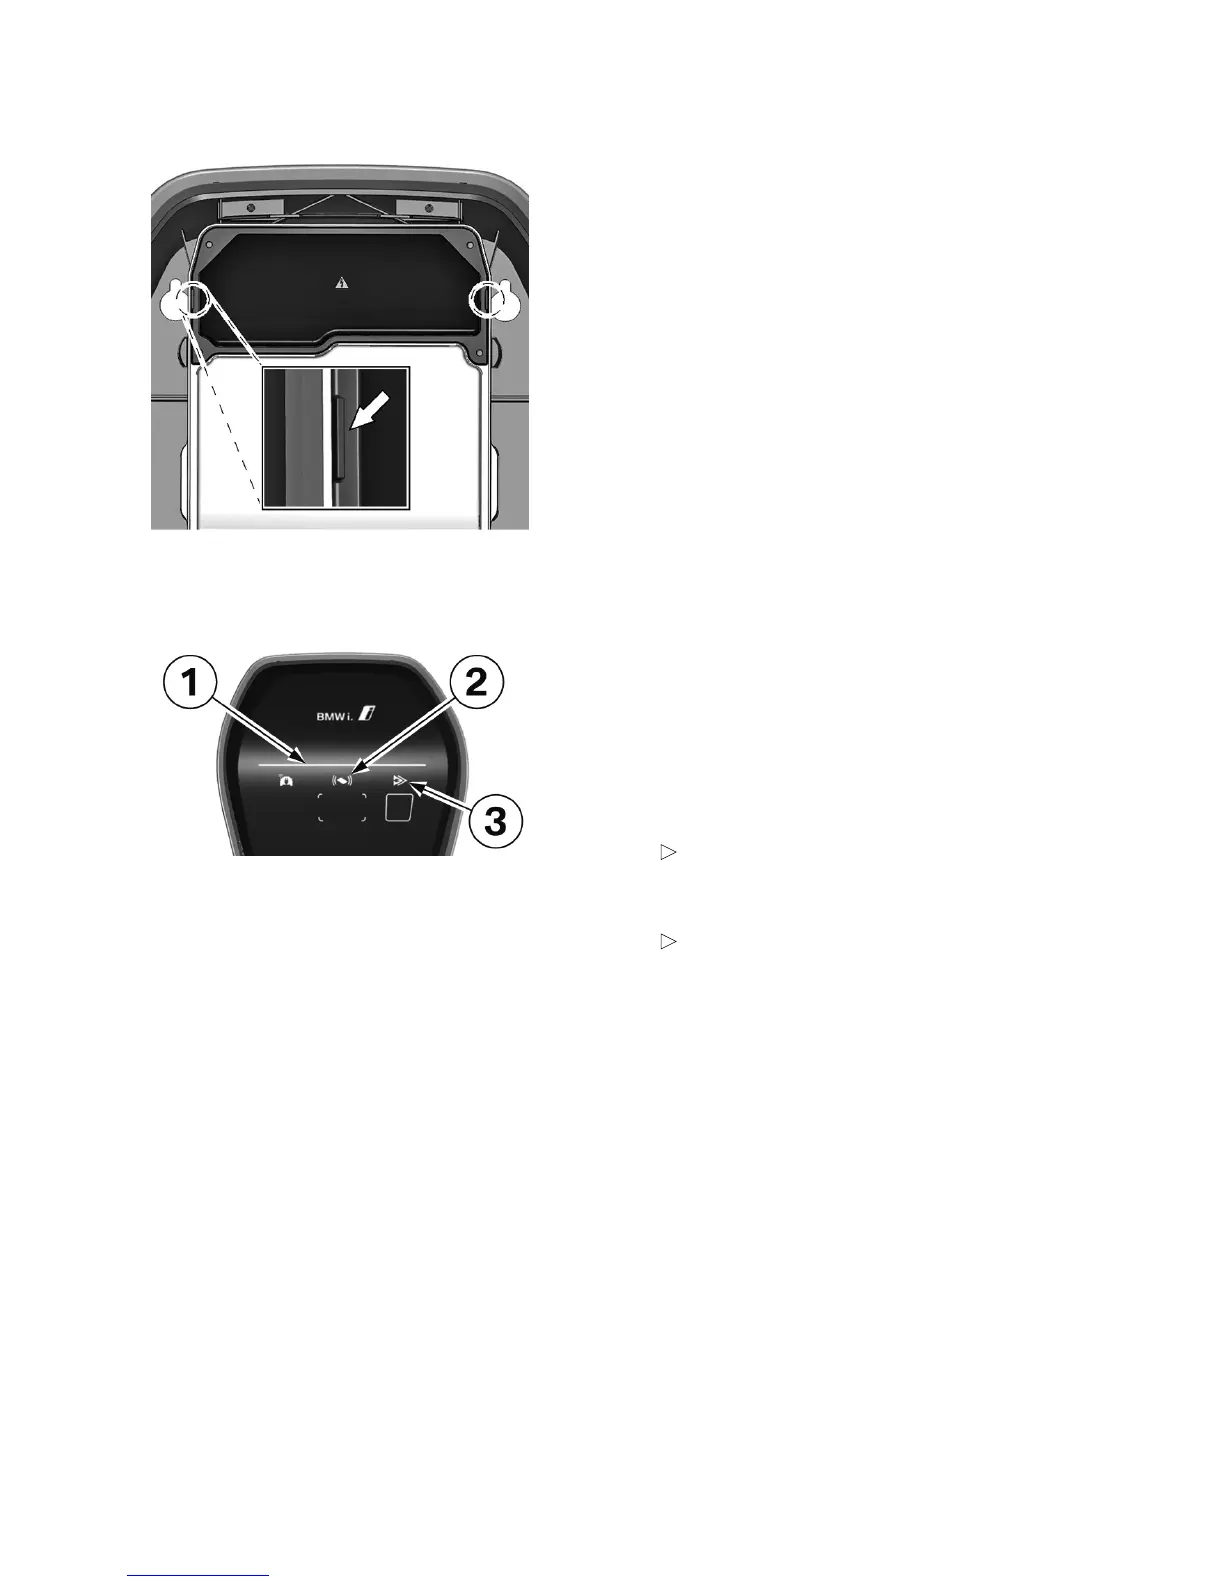
Housing marking
1. Tighten the four screws until the housing
markings on the right and left on the
termination panel cover are flush with the
housing.
2. The termination panel cover must correctly
seal the housing. Increased force is required for
the self-tapping screws: 3.5Nm.
Test the function
1. Reconnect the voltage supply to the Wallbox.
To do this, switch the circuit breaker for the
building installation back on.
2. After the self-test, which is conducted
automatically at the start, the blue
status LED (LED bar) 1 must be lit after
15-20 seconds.
In the event that the RFID authorisation
is active, the RFID status indicator 2 will
pulse instead.
If your Wallbox has a communication
module (Wallbox Connect), the
indicator for charging mode 3 must light
up after 5 minutes.
3. If possible, perform a test charge using an
electric car.
 Loading...