11.67
Checking pistons and cylinders
Reference temperature
for measurements: .....................................20 °C.
•
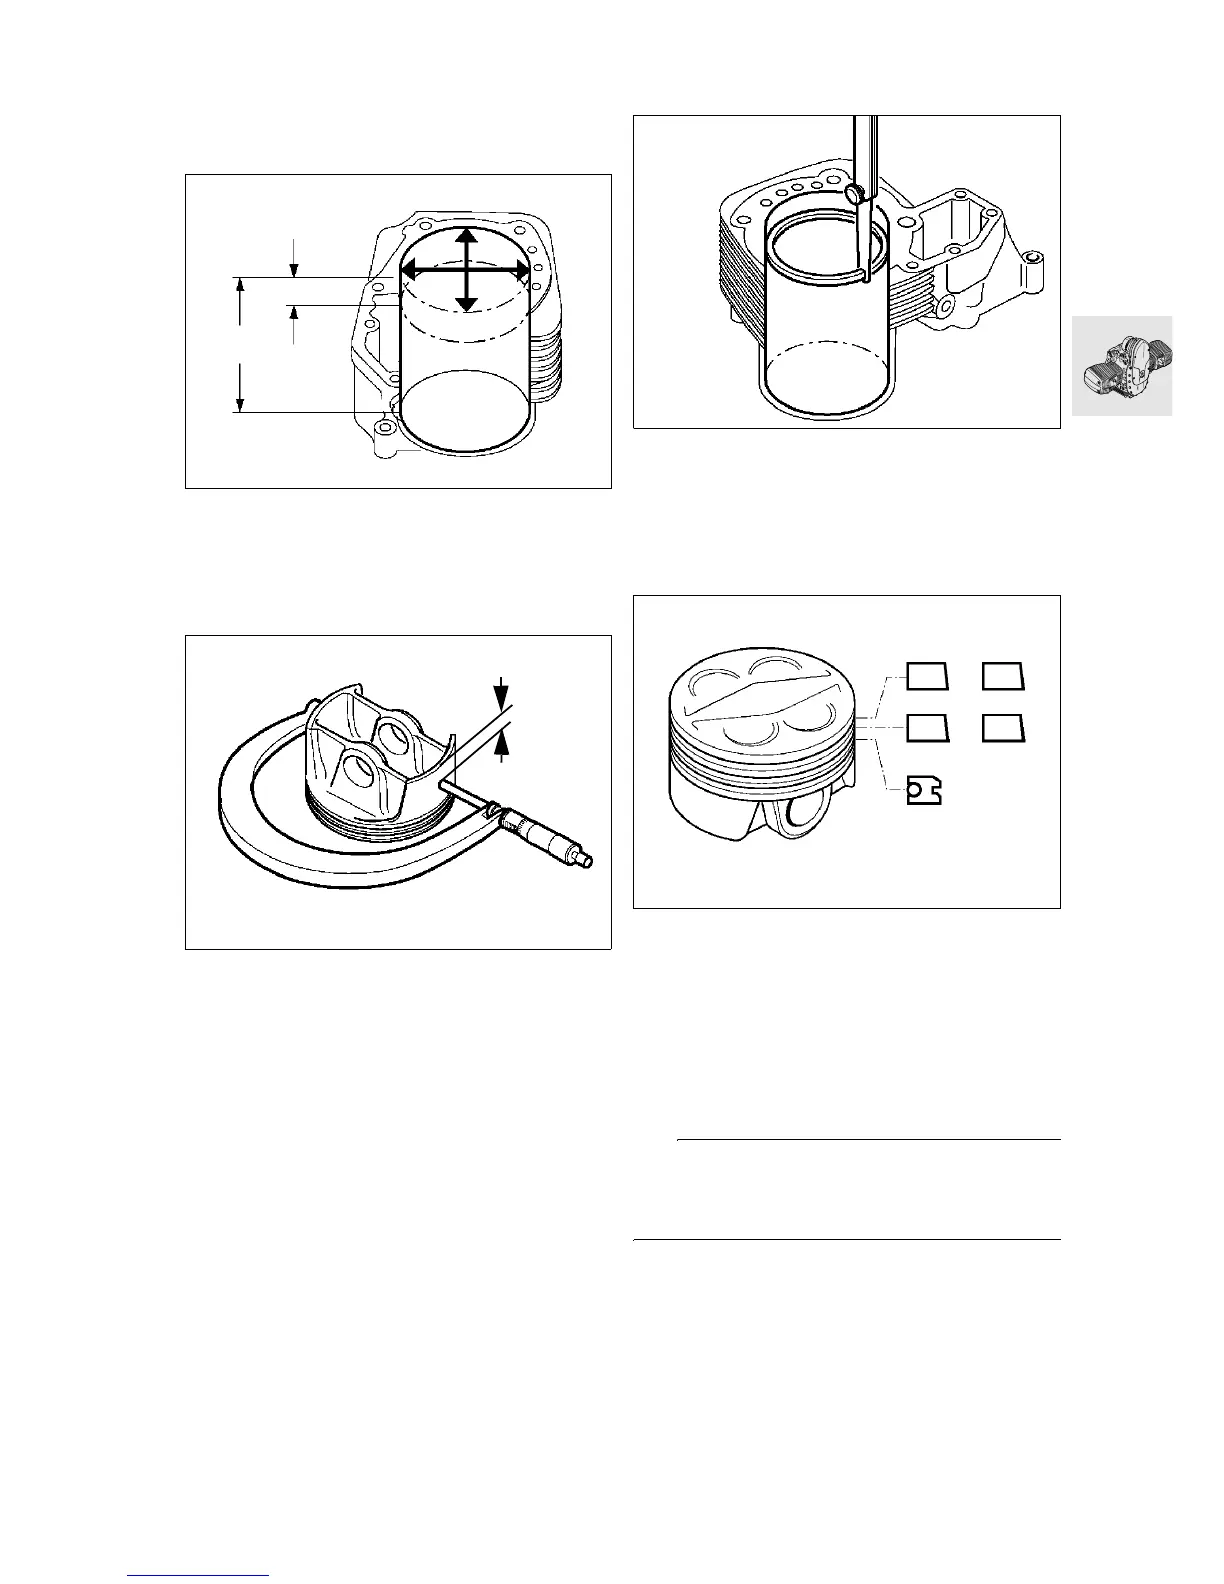
Measure cylinder bore with internal probe at
20 mm (0.787 in) and 100 mm (3.937 in) from the
top in direction of piston pin, and again at a right
angle to the first measurement.
a See Technical Data.
Measuring plane A :...................... 6 mm (0.236 in)
a See Technical Data.
•
Install piston rings in cylinder.
•
Determine piston ring clearance using feeler
gauge.
a See Technical Data
Assemble pistons
•
Carefully fit piston rings to piston in the following
sequence, using piston ring pliers:
3rd grooveEqual-chamfer ring
2nd groove Micro-taper compression ring
M-ring (R 850) m Ø TOP 4 DZ
1st groove Micro-taper compression ring
B-ring (R 850) SPT TOP
•
Determine top runout of piston rings.
a See Technical Data
e Caution:
The tubular-spring ring gap must be at 180° to the
equal-chamfer ring gap.
Install with the "Top" uppermost.
100
20
RS110180
A
RS110970
RS110200
1.
2.
3.
R 850
RS110190

 Loading...