34.24
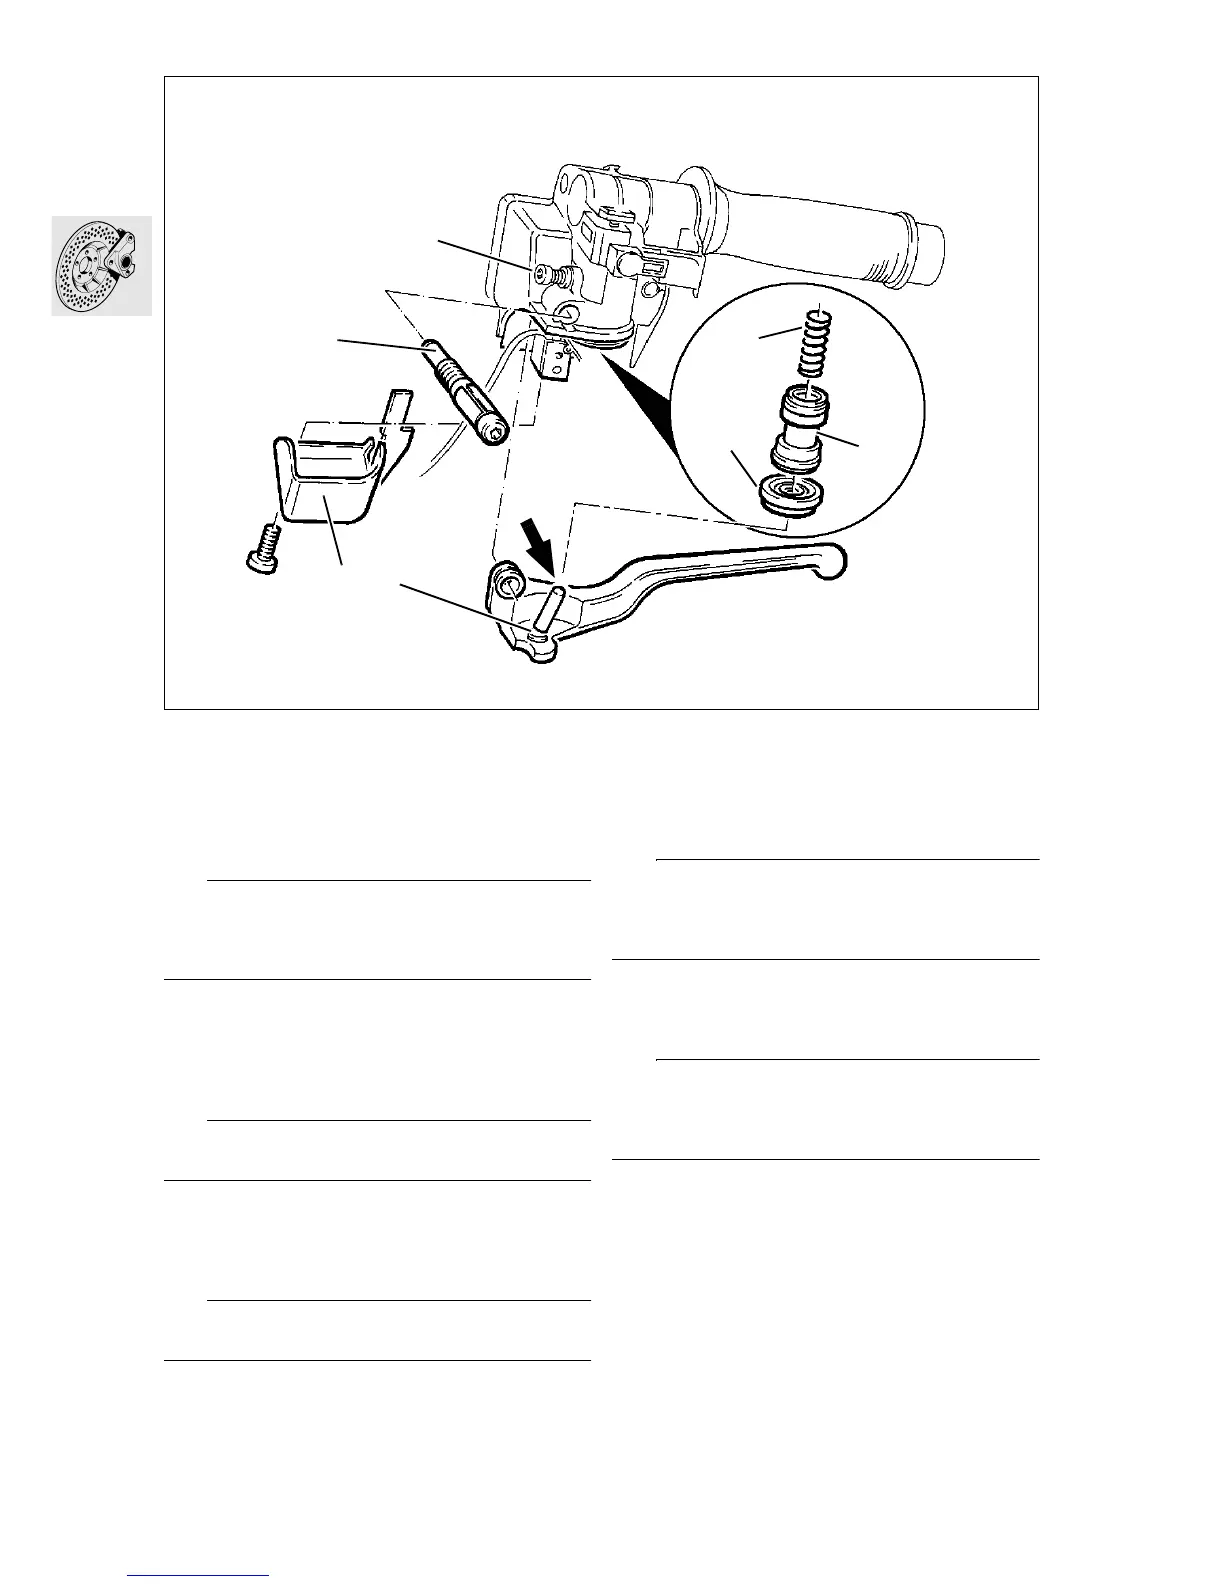
Removing, installing, dismantling and
assembling front brake master cylin-
der
•
Drain fluid from brake system.
e Caution:
Do not allow brake fluid to come into contact with
painted parts of the motorcycle, because brake fluid
destroys paint.
•
Remove cover (1).
•
Remove handbrake lever pivot pin (2).
•
Pull off dust protection sleeve (3).
•
Press piston (4) in slightly.
•
Slacken off stop screw (5).
e Caution:
Piston (4) is spring-loaded.
•
Take out piston (4) with spring (6).
•
Install in the reverse order of work.
•
Coat pistons and sleeves with brake fluid before
installing.
e Caution:
Sealing lips of sleeves face the pressure chamber.
•
Fill/bleed the brake system.
Adjusting specification for handbrake lever
•
Clean grub screw (7), coat it with Loctite 270
and screw it in until there is no play at the
handlebar lever; then tighten it further by pre-
cisely one half-turn.
e Caution:
Never tighten the grub screw by more than this ad-
ditional half-turn, or else the brake could fail or be
locked on.
•
Seal grub screw (7) with paint.
•
Grease thrust pin (arrow) at handlebar lever light-
ly with Shell Retinax A.
L Note:
The pivot pin is secured with Tuflok blue. Threads
secured with this material can be un screwed and
retightened several times.
X Tightening torque:
Pivot pin (2) ................................................... 8 Nm
(Threads secured with Tuflok blue can be un
screwed and tightened several times.)
RS340110
2
5
1
7
4
6
3
 Loading...