[[]
Using
the
program R/W (Read/Write)
switch
I5-No.
7D-?'5~No.
ERROR
No.
PRO.
No.
lilt
POWER
0
lUIS
R/W
t----t---8
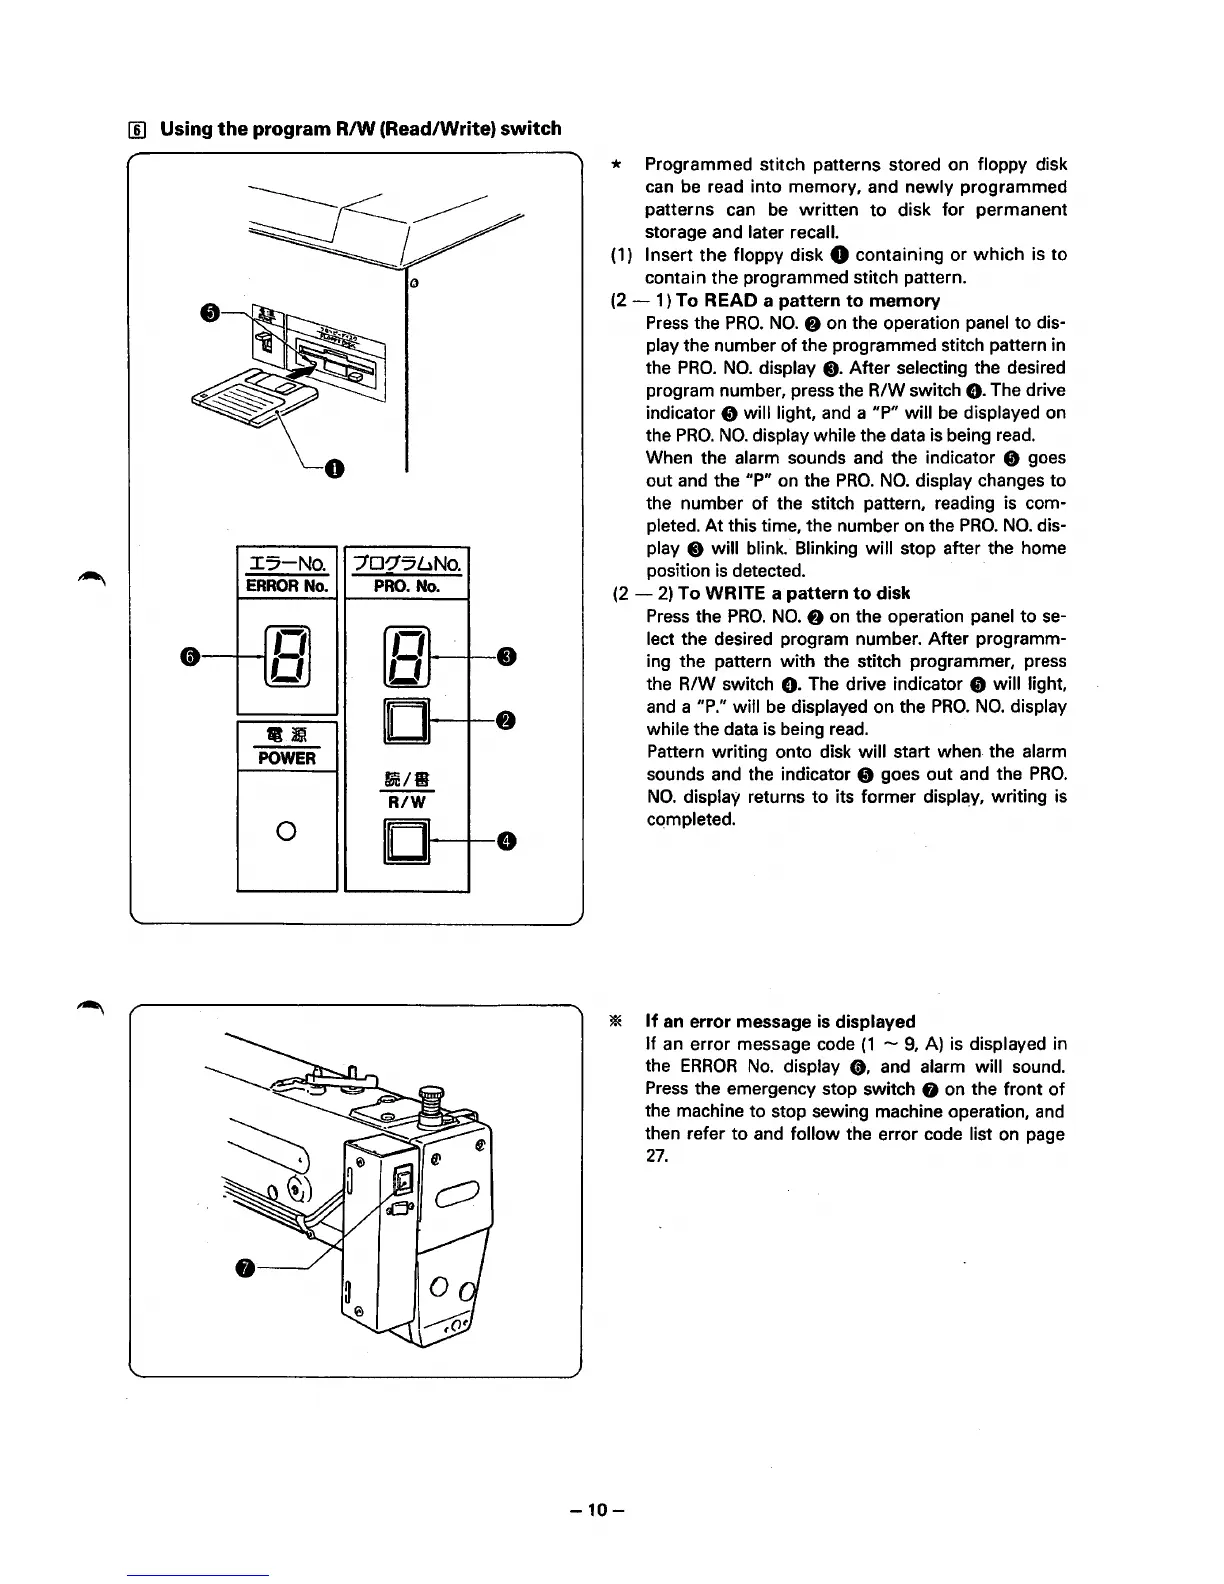
* Programmed stitch patterns stored on floppy disk
can
be
read into memory, and newly programmed
patterns can
be
written
to
disk for permanent
storage and
later recall.
(1)
Insert
the
floppy disk 0 containing or
which
is to
contain the programmed stitch pattern.
(2
- 1)
To
READ
a
pattern
to
memory
Press
the
PRO.
NO.
f)
on the operation panel to dis-
play the number
of
the programmed stitch pattern in
the
PRO.
NO.
display@). After selecting the desired
program number, press the R/W switch
e.
The drive
indicator
8 will light,
and
a "P" will
be
displayed on
the
PRO.
NO.
display while the data is being
read.
When the alarm sounds and the indicator 8 goes
out
and
the "P" on the
PRO.
NO.
display changes to
the number
of
the stitch pattern, reading is com-
pleted.
At
this time, the number on the
PRO.
NO.
dis-
play 8 will blink. Blinking will stop after the home
position
is
detected.
(2-
2)
To
WRITE a
pattern
to
disk
Press
the
PRO.
NO.
f)
on the operation panel to
se-
lect the desired program number. After programm-
ing the pattern with the stitch programmer, press
the R/W switch
e.
The drive indicator 8 will light,
and
a "P." will
be
displayed on the
PRO.
NO.
display
while
the data is being
read.
Pattern writing onto disk will start when the alarm
sounds and the indicator 8 goes out and the
PRO.
NO.
display returns
to
its former display, writing is
cqmpleted.
3iE
If
an error message is displayed
-10-
If an error message code
(1
-
9,
A) is displayed in
the
ERROR
No.
display
8.
and alarm will sound.
Press
the emergency stop switch 0 on the front
of
the machine to stop sewing machine operation,
and
then refer to and follow the error code list
on
page
27.
 Loading...