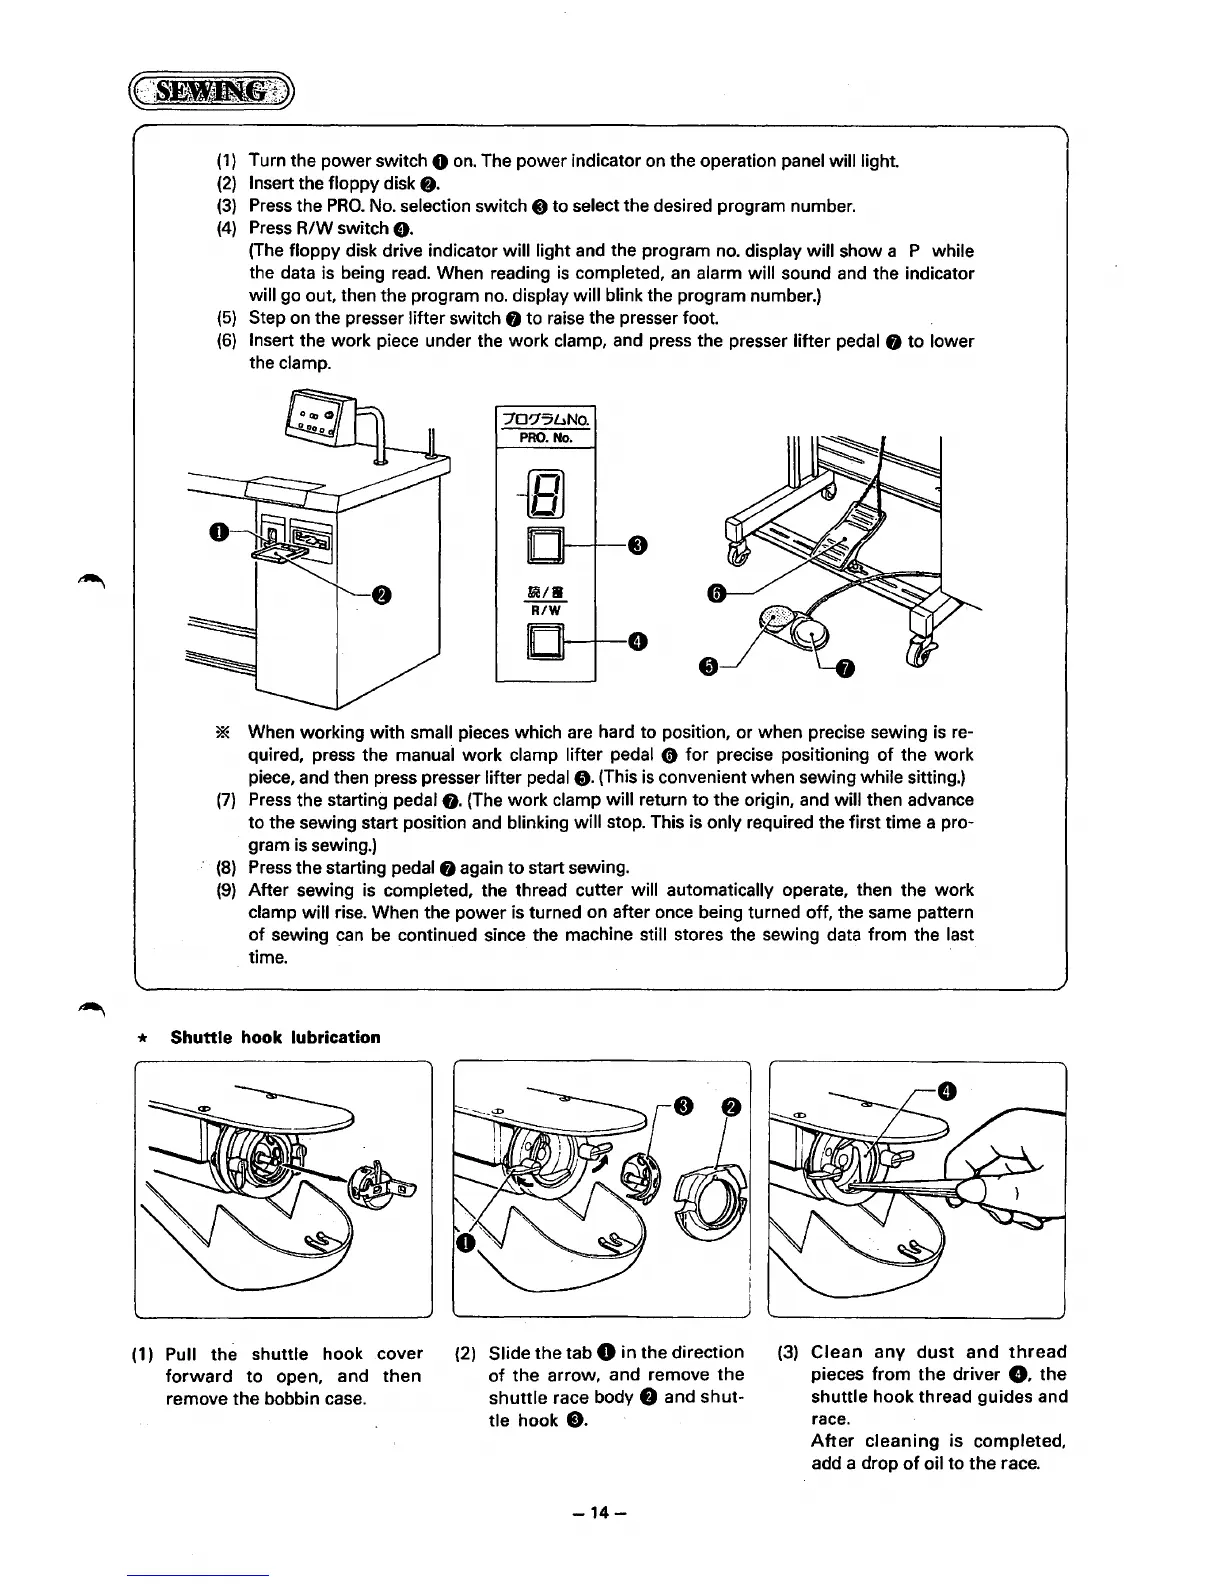
(1)
Turn the power switch 0
on.
The power indicator
on
the operation panel will light.
(2)
Insert the floppy disk
o.
(3)
Press
the
PRO.
No.
selection switch
@)
to select the desired program number.
(4)
Press
R/W switch
o.
(The
floppy disk drive indicator will light
and
the program
no.
display will show a P while
the data
is
being
read.
When reading
is
completed,
an
alarm will sound
and
the indicator
will go out, then the program
no.
display will blink the program number.)
(5)
Step on the presser lifter switch
f)
to
raise
the presser foot.
(6)
Insert the work piece under the work clamp, and press the presser lifter pedal
f)
to lower
the clamp.
7D'75l..1No.
PRO.
No.
-a
,
I
IC/8
R/W
0
e
* When working with small pieces which
are
hard to position, or when precise sewing
is
re-
quired, press the manual work clamp
lifter pedal 0 for precise positioning
of
the work
piece, and then press presser lifter pedal
f).
(This
is
convenient when sewing while sitting.)
(7)
Press
the starting pedal
f).
(The work clamp will return to the origin, and will then advance
to the sewing start position and blinking
will stop. This is only required the first time a pro-
. gram
is
sewing.)
(8)
Press
the starting pedal
f)
again to start sewing.
(9)
After sewing
is
completed, the thread cutter will automatically operate, then the work
clamp
will
rise.
When the power is turned
on
after once being turned off, the same pattern
of
sewing
can
be
continued since the machine still stores the sewing data from the last
time.
* Shuttle hook lubrication
(1)
Pull the shuttle hook cover
forward
to open, and then
remove the bobbin case.
(2)
Slide the tab 0 in the direction
of the arrow, and remove the
shuttle race body
8 and shut-
tle hook
e.
-14-
(3)
Clean
any
dust
and
thread
pieces from
the
driver
e.
the
shuttle hook thread guides and
race.
After
cleaning
is completed,
add a drop
of
oil to the race.
 Loading...