 Loading...
Do you have a question about the Brother GTX-4 and is the answer not in the manual?
Explains the meaning of safety indications and symbols used in the manual.
Provides crucial safety precautions regarding electrical hazards and handling.
Covers general safety guidelines for using the printer, including avoiding modifications and handling power cords.
Details safety measures during printer installation, such as environment and grounding.
Outlines safety precautions related to the printing process, including foreign objects and liquids.
Specifies the necessary environmental conditions for safe and optimal printer operation.
Addresses safety precautions during maintenance procedures, like handling ink and parts.
Describes the warning labels displayed on the printer and their significance for safe operation.
Essential introductory notes and precautions for new users before operating the printer.
Provides instructions and precautions for handling and inserting ink cartridges.
Explains the process and precautions for applying pretreatment to print media.
Guides users on performing regular maintenance for optimal printer performance and longevity.
Details the proper procedures for disposing of printer waste and ink according to regulations.
Lists all the components that are included in the printer package for the user.
Specifies additional items and supplies required for printer setup and operation.
Information about the printer's proprietary software and the need for user agreement.
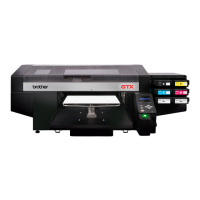
Identifies and describes the components located on the front of the printer.
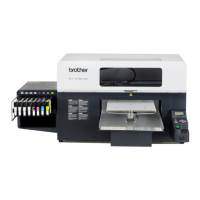
Identifies and describes the components visible from the right side of the printer.
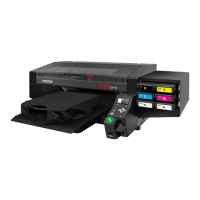
Identifies and describes the components located on the left side and rear of the printer.
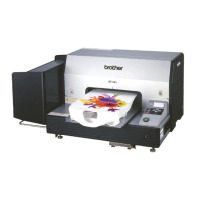
Details the components visible on the inner side of the front cover of the printer.
Describes the components located on the bottom view of the printer's platen.
Explains the function of each button and indicator on the printer's operation panel.
Describes the indications and information displayed on the printer's liquid crystal panel.
Explains how to navigate and operate the printer's on-screen menu system.
Outlines the hierarchical structure of the printer's menu options for various functions.
Provides detailed instructions and considerations for the proper installation of the printer.
Guides users on connecting and managing the printer's power supply for optimal operation.
Step-by-step instructions for safely powering on the printer.
Explains the procedures for turning off the printer in both normal and emergency modes.
Covers the procedures for connecting the printer to a PC via USB or LAN.
Detailed guide for installing the necessary printer driver software onto a computer.
Instructions for establishing a connection between the printer and PC using a USB 2.0 cable.
Steps for configuring a static IP address for network connection via LAN.
Guide on how to add the printer to a PC when connected via a LAN network.
Outlines various adjustment procedures for optimizing printer performance after connection.
General guidelines and best practices for creating print data applicable across different software.
Specific instructions for creating print data using the Graphix Lab software.
Introduces the Graphix Lab software and its capabilities for layout and print data creation.
Details the process of editing text objects within the print data creation software.
Explains how to edit image objects to prepare them for printing.
Guides on saving print data in the ARX4 file format for direct printing from USB.
Covers the configuration settings within the printer driver when using Graphix Lab.
Instructions on how to select the correct printer destination within Graphix Lab settings.
Details on adjusting white ink volume and settings within Graphix Lab for optimal print quality.
Instructions for creating print data using applications other than Graphix Lab.
Specific guidance for creating print data using CorelDRAW software.
Specific guidance for creating print data using Adobe Photoshop software.
Specific guidance for creating print data using Adobe Illustrator software.
Specific guidance for creating print data using Adobe Photoshop Elements software.
Covers printer driver configuration for applications other than Graphix Lab.
Explains how to select the appropriate platen size in the printer driver for various applications.
Introduces and explains the utility of provided tools for color adjustment and print settings.
Outlines the sequential steps involved in the printer's basic printing workflow.
Details essential checks and preparations required before initiating any printing job.
Instructions for checking and properly disposing of waste ink from the printer.
Guidance on checking and refilling the printer's cleaning solution tank.
Explains the necessary daily procedure for stirring white ink to prevent sedimentation.
Covers the process of applying pretreatment to print media for optimal white ink adhesion.
Lists the items required and precautions for the pretreatment process.
Details the methods and amounts for applying pretreatment to various print media.
Explains the process of fixing the applied pretreatment using heat press or oven.
Instructions on how to adjust or replace the printer's platens for different media.
Step-by-step guide for removing and installing different platen types.
Details how to adjust the platen height for different material thicknesses.
Specific instructions for handling and using the 16X21 platen.
Guides on correctly positioning the print medium (e.g., T-shirt) on the platen for printing.
Explains the methods for transferring print data to the printer.
Instructions for sending print data stored in ARX4 format using the file viewer.
Guides on sending print data from applications like CorelDRAW, Photoshop, and Illustrator.
Covers the procedures for starting and managing print jobs.
Details how to perform a single print job for one piece of media.
Instructions for executing the same print job multiple times for batch printing.
Guides on how to safely remove printed media from the platen.
Explains the methods for fixing the ink onto the print media using heat press or oven.
Lists routine maintenance tasks to ensure consistent print quality and printer longevity.
Step-by-step guide for replacing an ink pouch when it is empty or needs replacement.
Detailed instructions for cleaning critical components of the print head assembly.
Guide on how to replace the wiper cleaner component of the printer.
Instructions for replacing the flushing foam component in the printer.
Procedures for cleaning the internal parts of the printer to maintain optimal performance.
Guide on how to replace the printer's fan filter for maintaining air quality.
Covers maintenance tasks that are performed based on specific printer needs or issues.
Instructions for printing a nozzle check pattern to verify print head functionality.
Details the process of performing head cleaning to resolve print quality issues.
Explains how to circulate white ink to maintain its quality and prevent clogs.
Guides on cleaning the carriage plate to remove ink contamination.
Instructions for replacing the platen sheet when it becomes soiled or damaged.
Procedures for managing the printer when white ink usage is temporarily paused.
Steps to disable white ink usage for extended periods to save ink and maintenance.
Instructions for reactivating white ink usage after it has been paused.
Covers various printer adjustments to ensure optimal print quality and performance.
Details how to adjust the carriage speed for proper print head movement.
Explains the V-rating setting procedure for print head replacement or setup completion.
Covers adjusting the ejection timing of each print head for optimal performance.
Guides on adjusting the platen feed for consistent media handling during printing.
Instructions for aligning white and color ink print positions for accurate color output.
Provides procedures for storing the printer properly based on the duration of non-use.
Describes the menu structure and navigation for printer settings.
Explains how to configure the print direction for the print heads.
Covers the configuration of automatic head cleaning frequency and timing.
Details how to adjust the flushing interval to maintain print quality.
Explains how to adjust the ink volume ejected during flushing operations.
Configuration for low-temperature operation mode to ensure print quality in cold environments.
Allows adjustment of the brightness for the printer's liquid crystal panel.
Configures the time before the screen and buttons automatically turn off.
Sets the duration before the display returns to the standby screen.
Allows adjustment of the printer's speaker volume.
Configures the unit for displaying ambient temperature.
Enables automatic deletion of print data after a specified number of jobs.
Allows starting print operations before data reception is fully completed.
Procedure for setting a static IP address for network configuration.
Shows the total count of successful print operations.
Displays the ambient temperature and humidity information.
Allows verification of network configuration details like IP address and MAC address.
Enables selection of the desired language for the printer display.
Shows the firmware version, data information, and serial number.
Guides on updating the printer's firmware with new releases.
Provides general guidance and a list of common problems with their remedies.
Addresses issues related to sending print data from a PC to the printer.
Helps diagnose and resolve issues where the printer does not start printing.
Troubleshooting steps for when the printer does not power on.
Guidance for resolving errors that appear right after turning on the printer.
Troubleshooting steps for issues loading data from a USB flash memory.
Addresses problems with the printer not detecting ink pouch status correctly.
Provides solutions for various print quality issues like light prints, banding, and blurring.
Solutions for printouts that are too light or lack color saturation.
Addresses issues causing horizontal stripes or banding in print results.
Solutions for blurring issues when printing with color ink only.
Solutions for blurring issues when printing with both color and white ink.
Troubleshooting for unwanted ink marks or stains on the print.
Solutions for issues causing blurred edges, double printing, or grainy results.
Addresses problems with printing light or gradient colors effectively.
Solutions for uneven printing of white ink.
Troubleshooting steps when the whiteness of the printed output is inadequate.
Addresses issues related to excessive gloss or luster on the printed surface.
Troubleshooting for print fuzziness, potentially caused by pretreatment or drying issues.
Solutions for white ink spreading into the colored areas.
Addresses issues where the printed surface cracks after the fixation process.
Detailed steps for troubleshooting and resolving issues with non-ejecting ink nozzles.
Guides on printing and analyzing nozzle check patterns to identify issues.
Instructions for performing head cleaning as a troubleshooting step.
Guides on replacing the printer's print heads if other troubleshooting steps fail.
Specific instructions for performing white head cleaning to resolve printing problems.
Procedure for replacing color filters in the print head assembly.
Detailed instructions for replacing the printer's print heads.
Steps for re-installing ink cartridges, often required after print head replacement.
A comprehensive list of printer error messages and their corresponding remedies.
Provides technical specifications for the printer's hardware and environmental requirements.
Lists the software requirements, compatible operating systems, and recommended applications.
Details the specifications and handling precautions for various ink and solution consumables.
Information on ordering consumable supplies, optional items, and replacement parts.