– 53 –
DT-X200/DT-X8
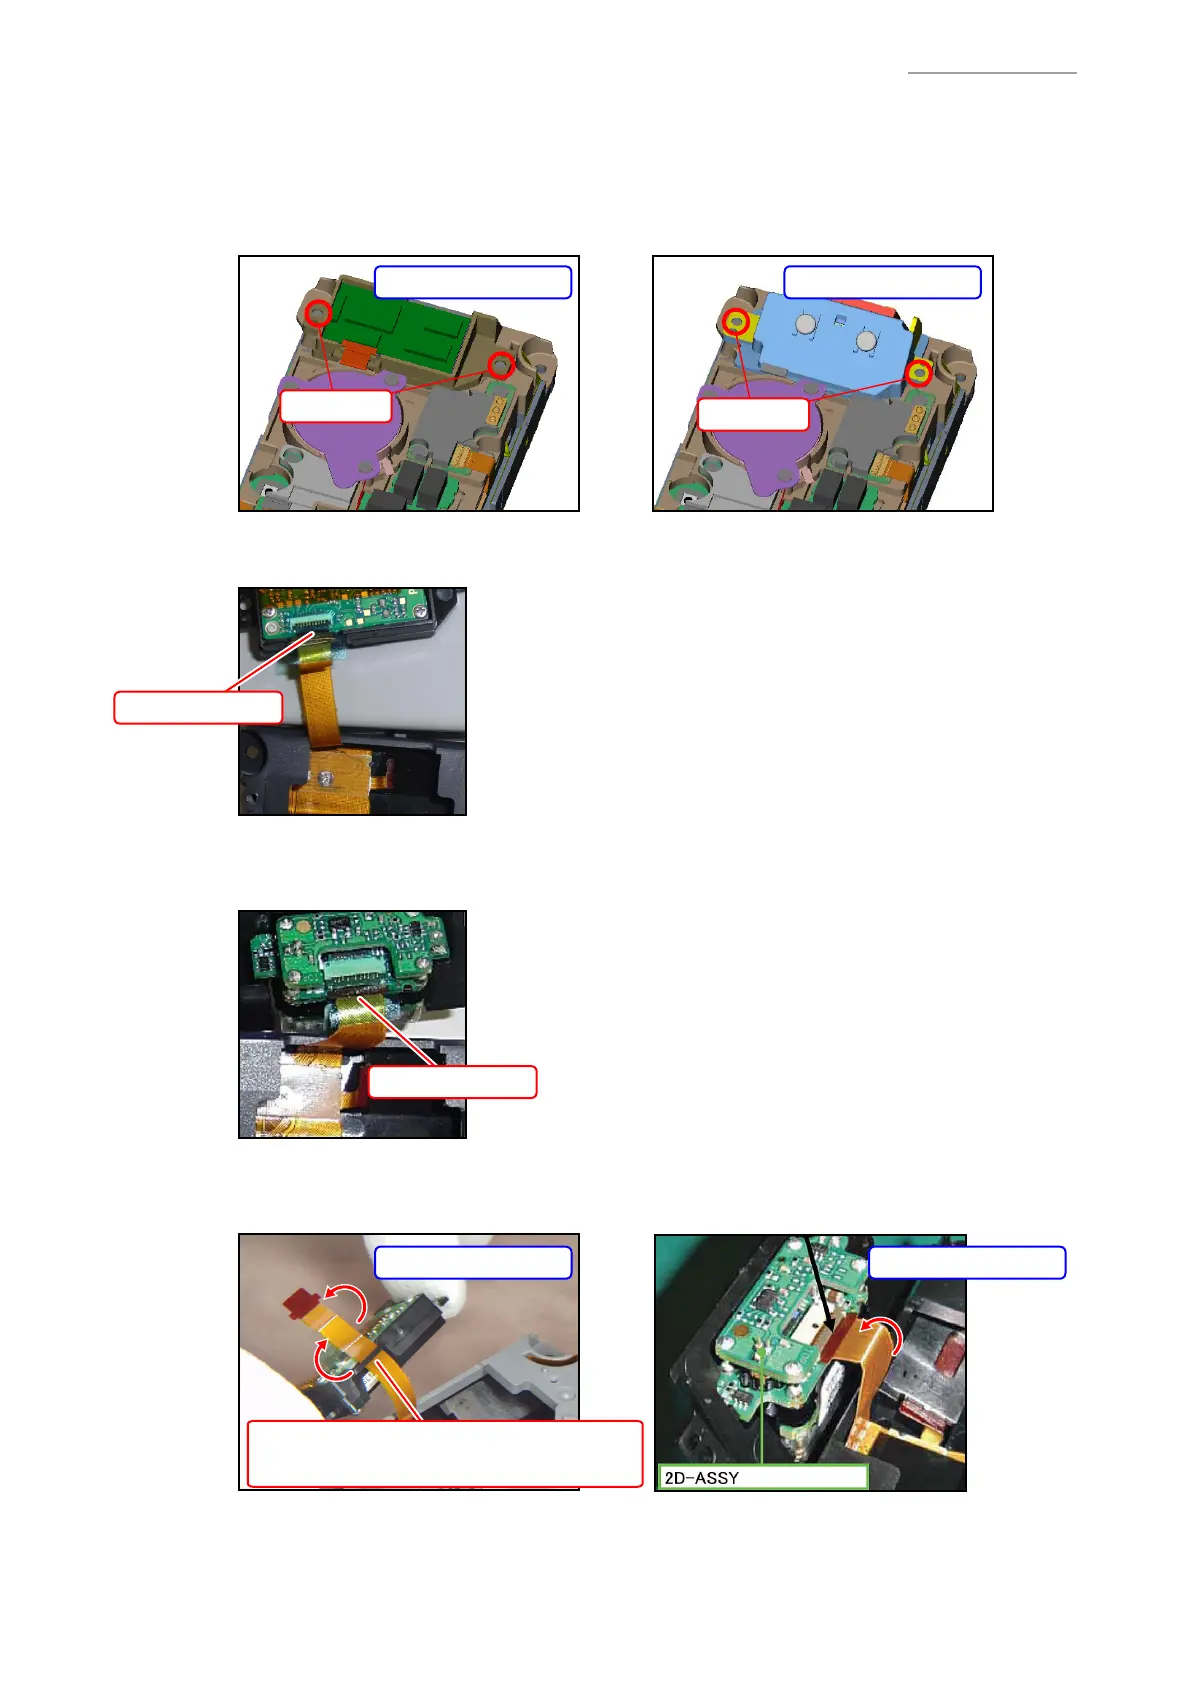
2. 1D Laser model:
Peel off the tape, unlock the connector lock, and remove the FPC.
3. 2D Scanner model:
Peel off the tape, unlock the connector lock, and remove the FPC.
FPC
FPC
Note on reassembling:
• When the SCANNER-UNIT is replaced with a new one, form its shape as shown below.
Note on reassembling:
Pass the FPC into the groove of the case.
6-3. INNER-CASE-UNIT
6-3-1. 1D LASER / 2D SCANNER MODEL
(1) Removing the 1D Laser or 2D Scanner
1. Remove the screws (2 pcs.) and detach the SCANNER-UNIT.
Screws
Screws
1D Laser model 2D Scanner model
1D Laser model 2D Scanner model
 Loading...