•
For n+1 power redundancy, connect two power supplies to one or two power sources.
•
For n+n power redundancy, connect each of two power supplies to a different power source.
Depending on the outlet receptacle on your power distribution unit, you might need the optional jumper cable
to connect the switch to your outlet receptacle.
Note
Step 6
Verify that the power supply is operational by verifying that the power supply LED is green. For information on
what the power supply LEDs indicate, see Power Supply LEDs, on page 52.
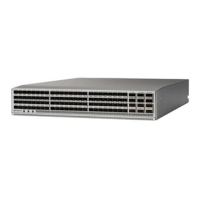
Installing a DC Power Supply
This topic is for installing the 48-V DC power supply into switch chassis. If you need to install a high voltage
(HVAC/HVDC) power supply, see Installing an HVAC/HVDC Power Supply, on page 38.
If the switch has two power supplies, you can replace one power supply while the other one provides power
to the switch. If you have only one power supply in the switch, install the replacement power supply in the
open slot before removing the original power supply.
Before You Begin
•
The circuit breaker for the DC power source for the power supply must be turned off.
•
The power supply that you are installing must be capable of using the same airflow direction as the fan
trays installed in the same switch
•
A DC power source must be within reach of the power cable that will be used with the replacement
power supply. If you are using n+n power redundancy, there must be a separate power source for each
power supply installed in the chassis. Otherwise, only one power source is required.
•
There must be an earth ground connection to the chassis that you are installing the replacement module.
To ground the chassis, see Grounding the Chassis, on page 21.
Step 1
If the power supply slot has a blank filler panel, remove it from the slot by moving its release latch to the left and pulling
the panel out of the slot.
Step 2
Holding the replacement power supply with one hand underneath the module and the other hand holding the handle,
align the back end of the power supply (the end with the electrical connections) to the open power supply slot and slide
the power supply all the way into the slot until it clicks into place.
Step 3
If the DC power cables and a grounding cable are already connected to an electrical connector block, insert the block
into the power receptacle on the power supply.
If the electrical cables have not been connected to the electrical connector block, wire them as described in Wiring a 48
V DC Electrical Connector Block, on page 41.
Step 4
Turn on the circuit breaker for the DC power source connected to the power supply.
Step 5
Verify that the power supply LED turns on and becomes green.
Cisco Nexus 9336PQ ACI-Mode Switch Hardware Installation Guide
40
Replacing Modules
Installing a DC Power Supply
 Loading...