4-14
Cisco PIX Security Appliance Hardware Installation Guide
78-15170-03
Chapter 4 PIX 515/515E
Removing and Replacing the PIX 515/515E Chassis Cover
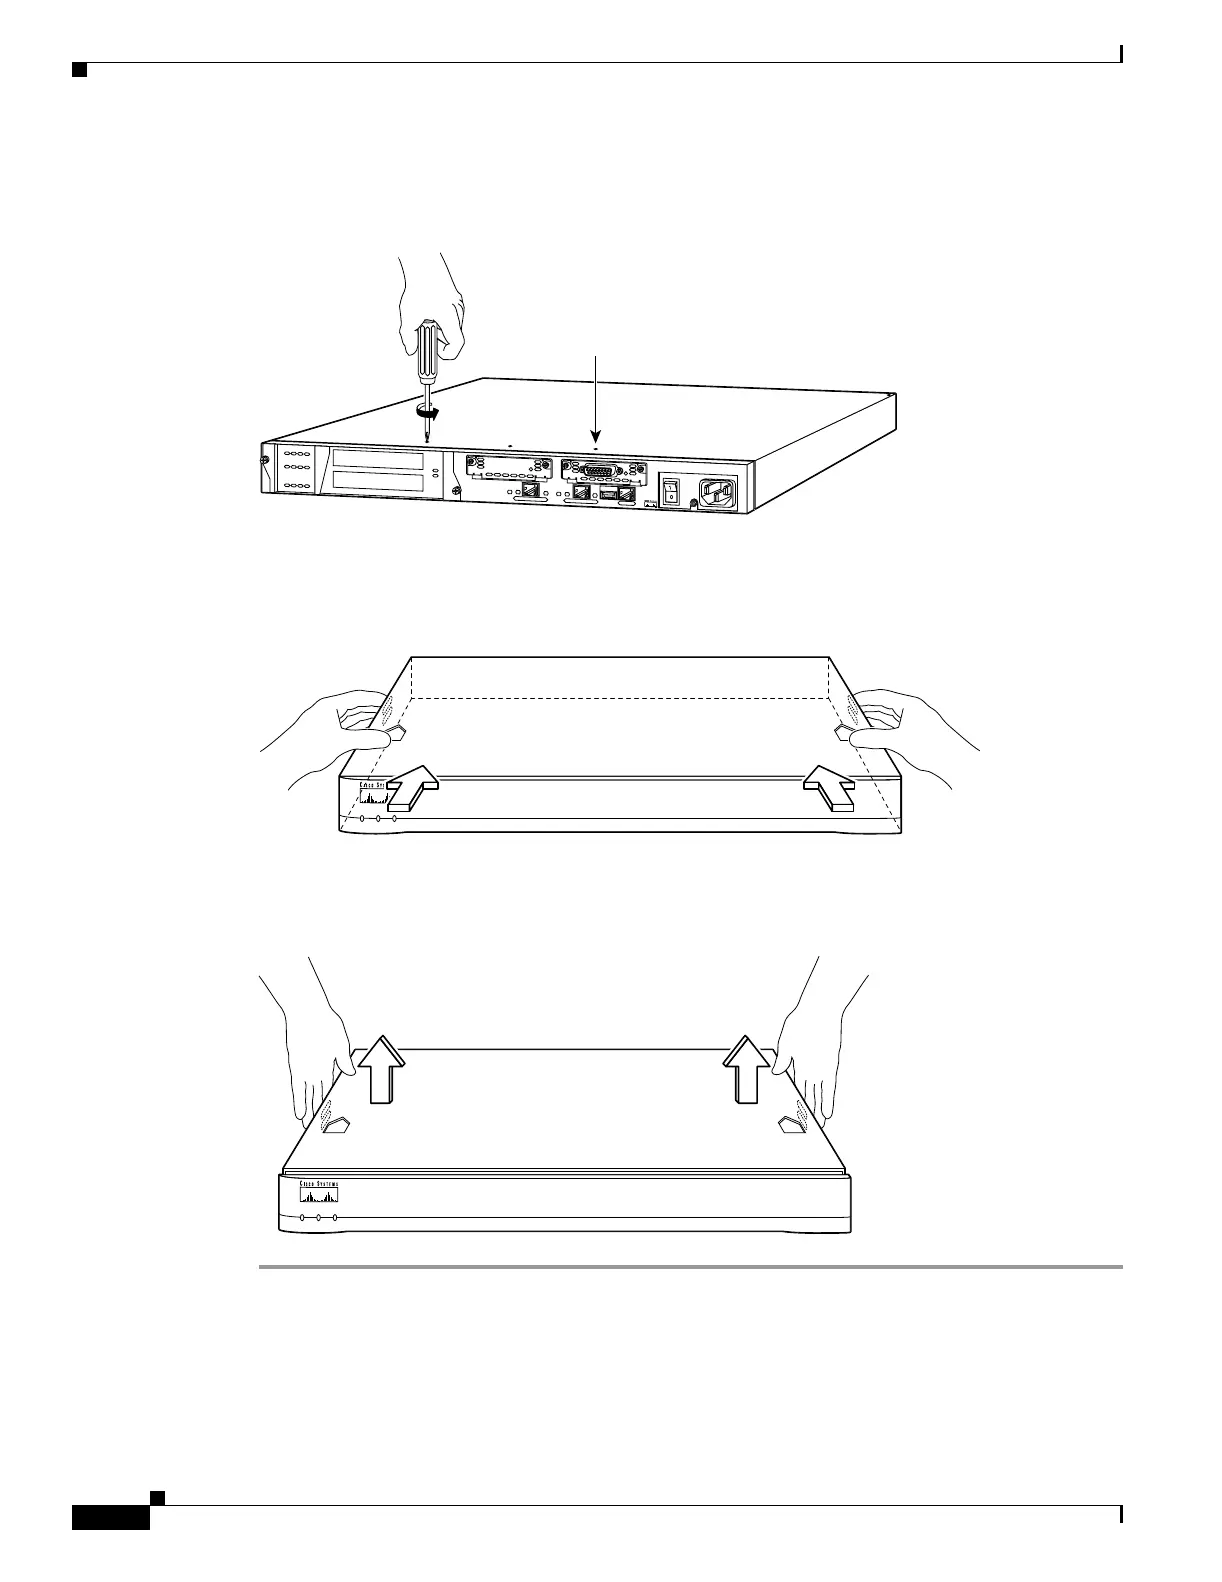
Step 3 Remove the screws from the front of the chassis on the PIX 515/515E (Figure 4-13).
Figure 4-13 Removing PIX 515/515E Chassis Cover Screws
Step 4 With the front of the unit facing you, push the chassis cover back by about one inch as shown in
Figure 4-14.
Figure 4-14 Pushing Back the Chassis Cover
Step 5 Pull the chassis cover up as shown in Figure 4-15. Put the chassis cover in a safe place.
Figure 4-15 Pull the Chassis Cover up to Remove
24305
D
O
N
O
T
I
N
S
T
A
L
L
I
N
T
E
R
F
A
C
E
C
A
R
D
S
W
I
T
H
P
O
W
E
R
A
P
P
L
I
E
D
C
O
N
S
O
L
E
1
0
/1
0
0
E
T
H
E
R
N
E
T
0
/0
L
in
k
F
D
X
F
D
X
1
0
0
M
b
p
s
L
in
k
1
0
0
M
b
p
s
F
A
IL
O
V
E
R
1
0
/
1
0
0
E
T
H
E
R
N
E
T
0
/
0
PIX-515
Top panel screws (4)
P
O
W
E
R
ACT NETWORK
PIX Firewall
SERIES
24285
24286
P
O
W
E
R
ACT NETWORK
PIX Firewall
SERIES
 Loading...