fromthe restofthe gun.Thispermitsthe
operatorto actuallyrestthe nozzleonthe
workpieceanddragitalongwhilewelding.
Thiscanbeveryhelpfultobeginningwelders
to steadythe gun,allowingthe welderto con-
centrateonweldingtechnique.Ifthe nozzleis
heldoffthe workpiece,thedistancebetween
the nozzleandtheworkpieceshouldbekept
constantandshouldnotexceed1/4inchor
thearcmaybeginsputtering,signalinga loss
inweldingperformance
LAYING A BEAD
EXPOSURE TO A WELDING ARC IS
EXTREMELY HARMFUL TO THE EYES
AND SKIN! Prolonged exposure to the weld-
ing arc can cause blindness and burns.
Never strike an arc or begin welding until you
are adequately protected. Wear flameproof
welding gloves, a heavy long sleeved shirt,
cuffless trousers, high topped shoes and a
welding helmet.
_ WARNING
ELECTRIC SHOCK CAN KILL! To prevent
ELECTRIC SHOCK, do not perform any
welding while standing, kneeling, or lying
directly on the grounded work.
WELDING TECHNIQUES
TRAVELING THE GUN
Gun travel refers to the movement of the gun
along the weld joint and is broken into two ele-
ments: Direction and Speed. A solid weld bead
requires that the welding gun be moved
steadily and at the right speed along the weld
joint. Moving the gun too fast, too slow, or
erratically will prevent proper fusion or create a
lumpy, uneven bead.
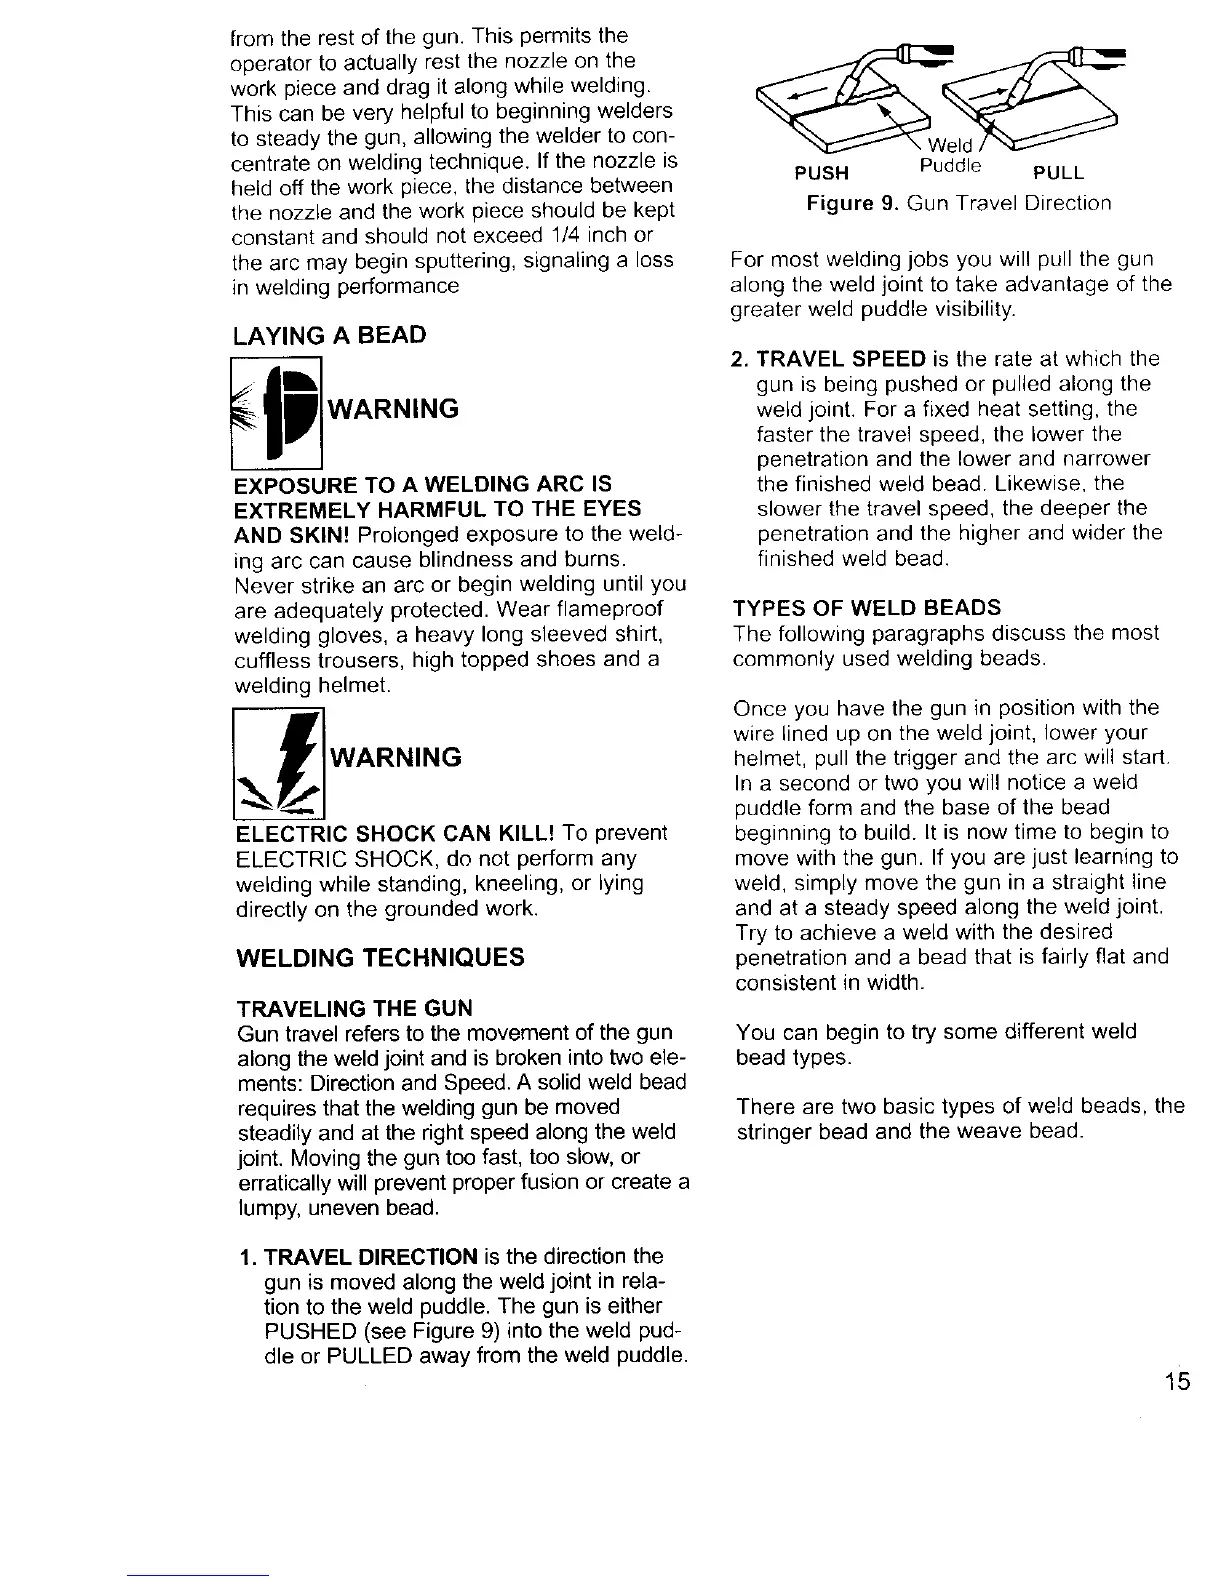
1. TRAVEL DIRECTION is the direction the
gun is moved along the weld joint in rela-
tion to the weld puddle. The gun is either
PUSHED (see Figure 9) into the weld pud-
dle or PULLED away from the weld puddle.
PUSH Puddle PULL
Figure 9. Gun Travel Direction
For most welding jobs you will pull the gun
along the weld joint to take advantage of the
greater weld puddle visibility.
, TRAVEL SPEED is the rate at which the
gun is being pushed or pulled along the
weld joint. For a fixed heat setting, the
faster the travel speed, the lower the
penetration and the lower and narrower
the finished weld bead. Likewise, the
slower the travel speed, the deeper the
penetration and the higher and wider the
finished weld bead.
TYPES OF WELD BEADS
The following paragraphs discuss the most
commonly used welding beads.
Once you have the gun in position with the
wire lined up on the weld joint, lower your
helmet, pull the trigger and the arc will start.
In a second or two you will notice a weld
puddle form and the base of the bead
beginning to build. It is now time to begin to
move with the gun. If you are just learning to
weld, simply move the gun in a straight line
and at a steady speed along the weld joint.
Try to achieve a weld with the desired
penetration and a bead that is fairly flat and
consistent in width.
You can begin to try some different weld
bead types.
There are two basic types of weld beads, the
stringer bead and the weave bead.
15
 Loading...