4-8
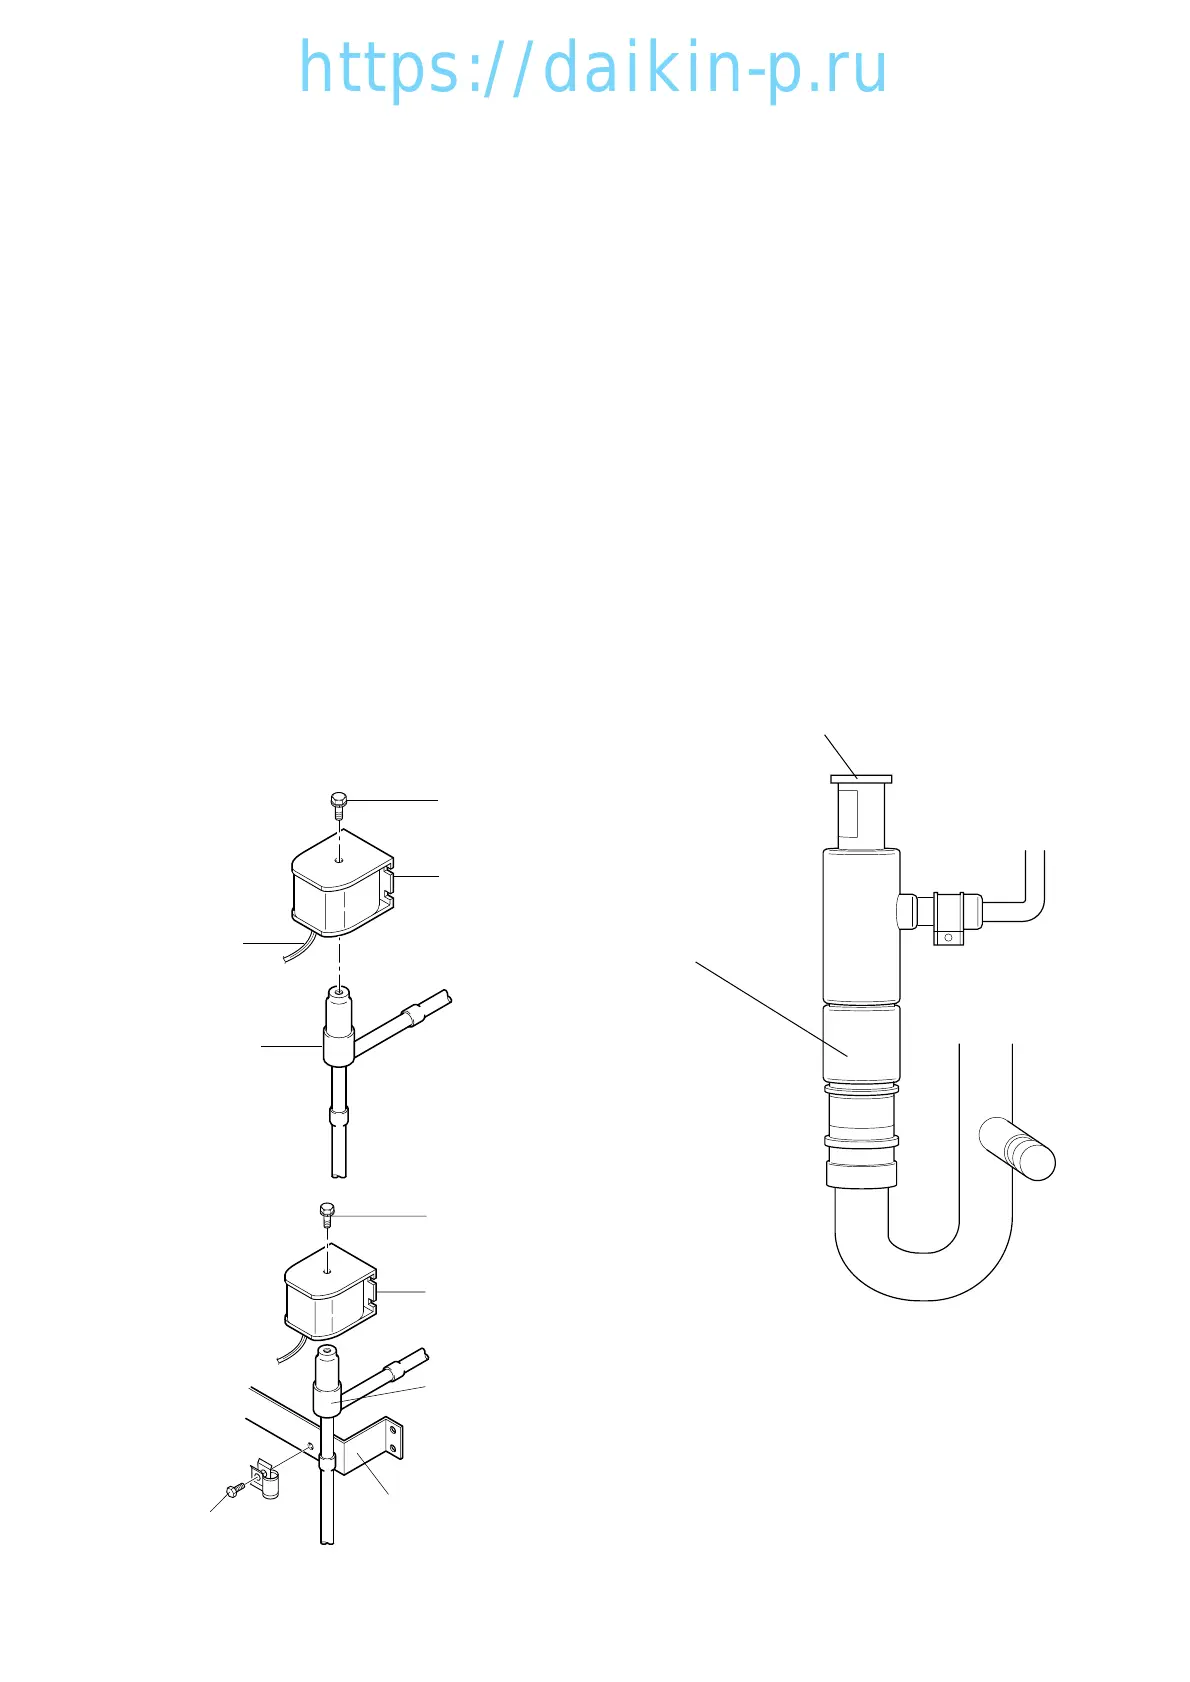
(1) Replacing the coil
q Remove the lead wire connector from the inside
of the control box, and cut and recover the binding
band which fastens the lead wire.
w Remove the hexagonal head bolt on the top of the
coil to pull the coil out.
e Replace the coil with a new one and restore the
hexagonal head bolt, the binding band and
connector on the original position.
When reassembling the coil, the tightening torque
should be 2.9 N m (30 kg cm).
(2) Replacement of valve body
q Remove the hexagonal head bolt on the top of the
coil to pull the coil out.
w Remove the hexagonal head bolt of the fixing
plate, and cut the two pipes at the side of the
valve body.
Disconnect the remaining pipes at the brazed joint
sections.
e Insert the new valve body into the pipe and
conduct brazing while keeping the temperature of
the valve body below 120 ˚C (248 ˚F) by cooling.
r Install the coil and restore the hexagonal head bolt
of the fixing plate and the connector into their
original position.
4.1.9
Discharge pressure regulating valve
● Model KVR15
(1) Replacing the valve
q Remove the protection cap to conduct brazing
for the valve body.
Be sure not to turn the regulating screw inside
the valve, since the pressure has been
adjusted to 690 kPa (7.0 kg/cm
2
).
w When brazing, it is required to cool the valve
body in order to keep the temperature of
valve body below 140 ˚C by covering the body
with wet cloth or the like.
e After brazing work, set and tighten the
protection cap.
The tightening torque should be 8 to 10 N m.
Apply lock-tight, etc. on the screw section to
avoid loosening of the cap.
r After replacement, carry out refrigerant
leakage check, and make sure there are no
leaks.
 Loading...