(2) Heating operation
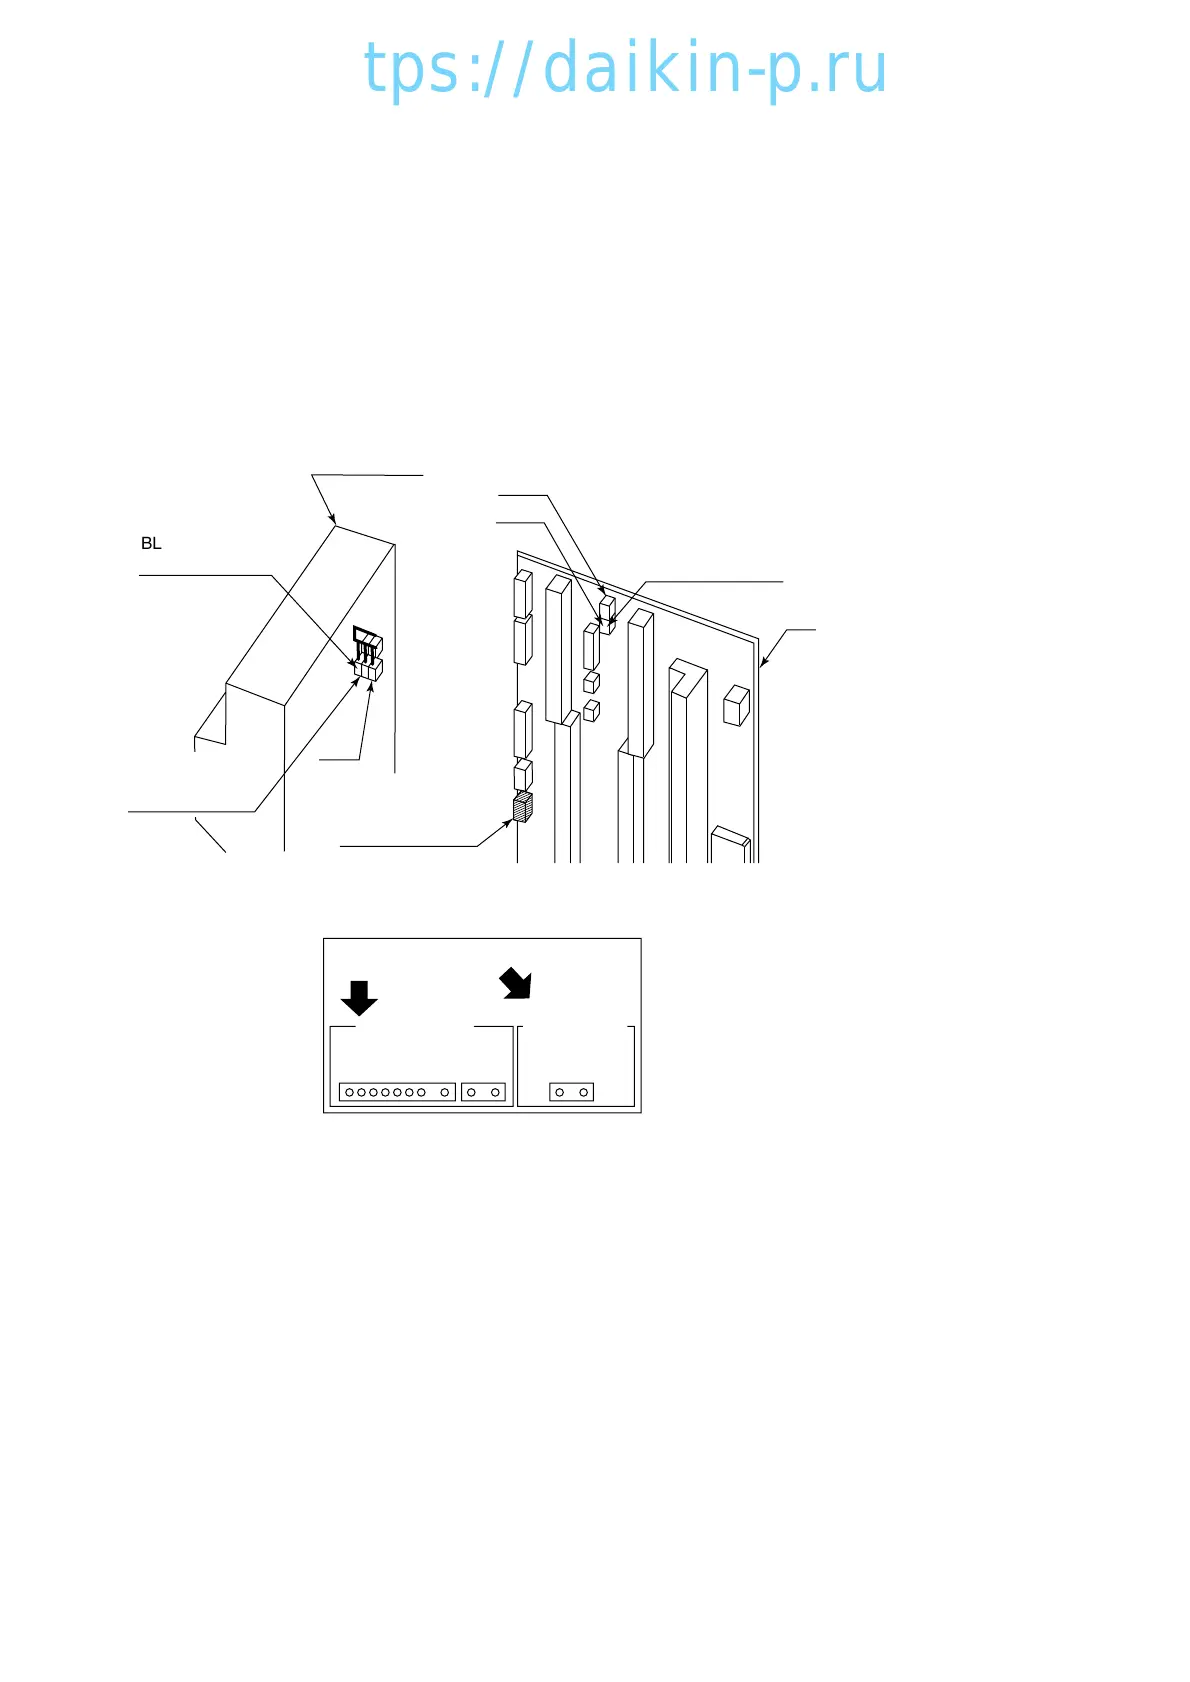
1. Disconnect the power supply connector CN5 (red connector).
2. Remove short circuit connector on the back of CPU/IO board case.
3. Connect the red 8-pin short circuit connector (SCC1-2) with emergency 8-pin port (CN8) on the
terminal board.
Connect blue 2-pin short circuit connector (SCC2) with "heat" side of emergency connector (CN10).
4. If the ventilation air flow is discharged in reverse direction, evaporator fan should turn in reverse
direction.
In this case, change connection of white connector SCC3 with CN-C1 to connection with CN-C2.
6-15
BLUE CONNECTOR
SCC1-1
RED CONNECTOR
SCC1-2
WHITE CONNECTOR
SCC3
TB1
RED CONNECTOR
CN5
CN7
TeS1
TeS2
TeS3
TeS4
TeS5
EC0110
EMERGENCY(HEAT) EMERGENCY
(COOL):BLUE
(HEAT):RED (COOL)
CN4 CN1 CN2 CN3
CN8CN9
CN10
SCC1 :
SHORT CIRCUIT CONNECTOR 1
SCC2 :
SHORT CIRCUIT CONNECTOR 2
SCC3 :
SHORT CIRCUIT CONNECTOR 3
SCC2
CN-C2
CN-C1
CONNECT
RED CONNECTOR
(SCC1-2)
(HEAT):RED
CN8 CN9 CN10
EMERGENCY
(HEAT)
EMERGENCY
(SCC2)
CPU/IO
BOARD CASE
 Loading...