6. Return the pump to its neutral (zero flow) position and adjust the pressure limiter setting by rotating
the pressure adjusting screw with an internal hex wrench.
Clockwise rotation of the pressure adjustment screw increases the pressure setting, and
counterclockwise rotation decreases the pressure setting. Each complete rotation of the pressure
adjusting screw changes the pressure as shown in the following table.
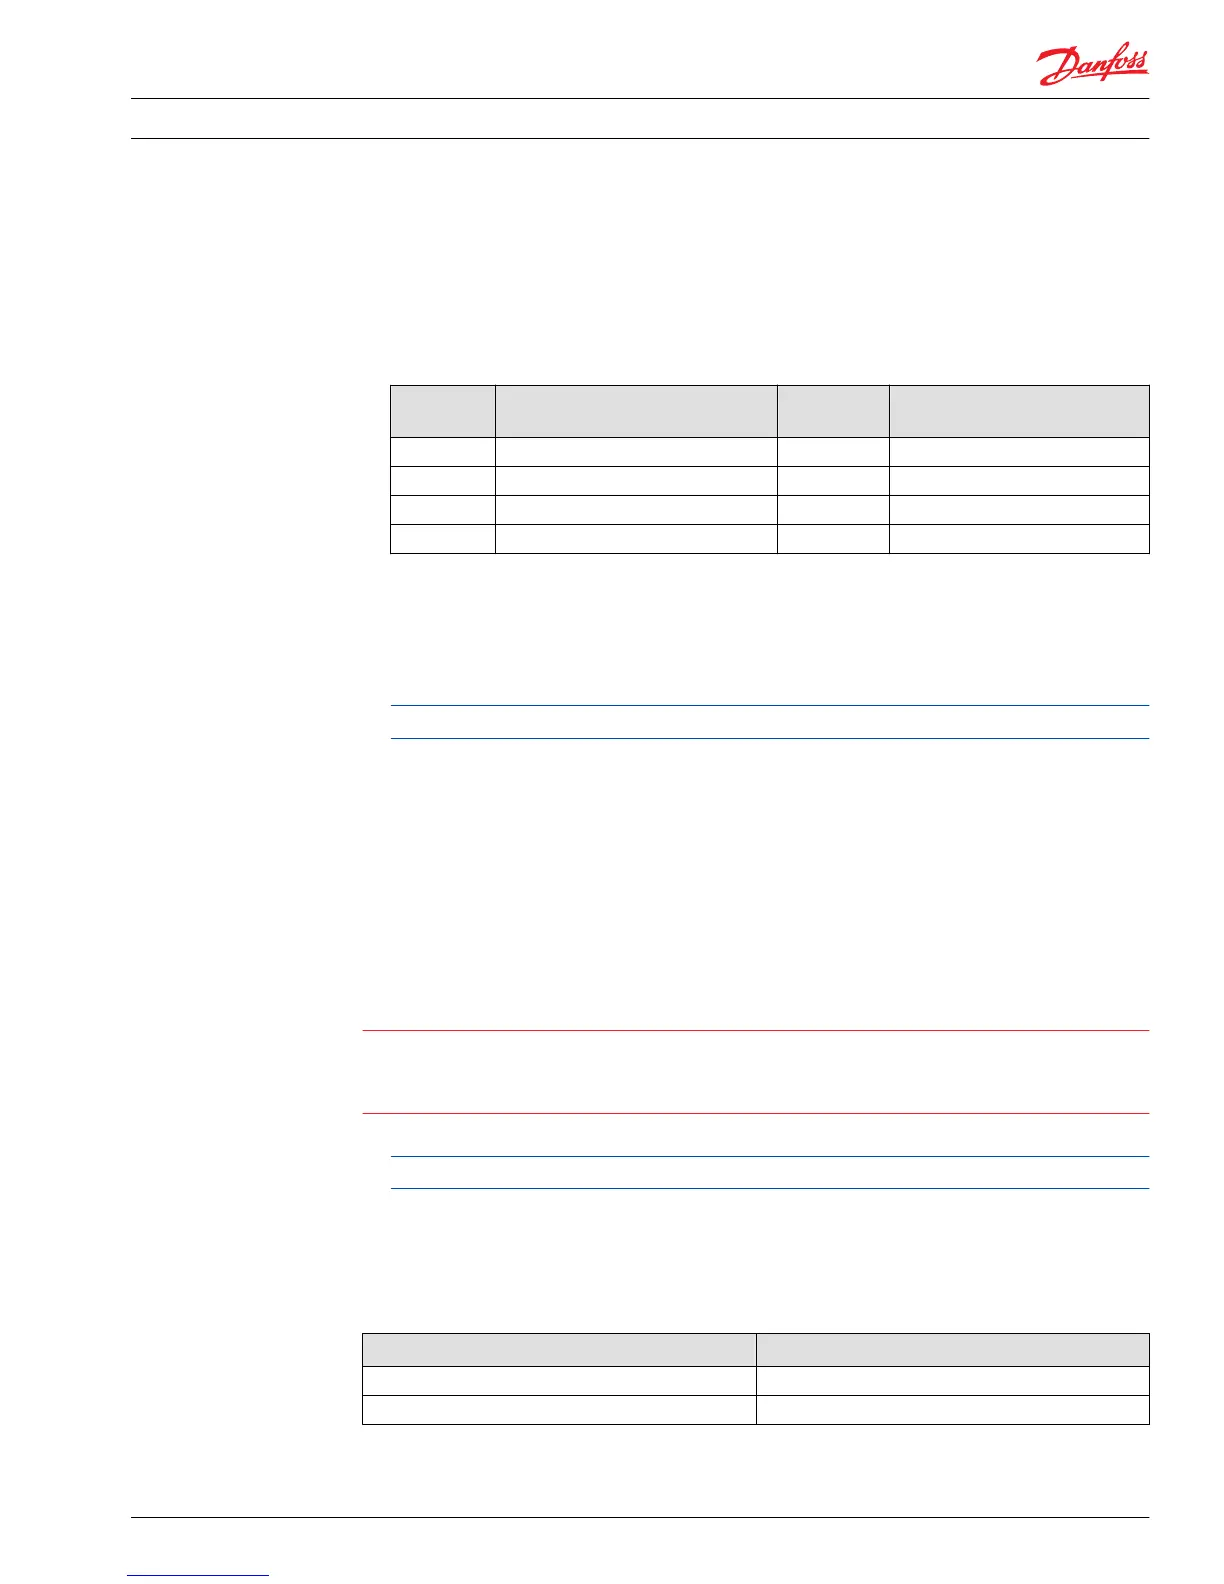
Pressure limiter adjustment data
Frame size Lock nut wrench size and torque Adjusting
screw size
Approximate pressure change per
revolution of adjusting screw
early 042-100 10 mm 3 N•m [26 lbf•in] 3 mm 80 bar [1157 psi]
030-100 19 mm 20 N•m [15 lbf•ft] 5 mm 90 bar [1300 psi]
early 130 13 mm 20 N•m [15 lbf•ft] 4 mm 80 bar [1157 psi]
130-250 24 mm 40 N•m [30 lbf•ft] 8 mm 80 bar [1157 psi]
7. To verify the actual pressure setting, actuate or move the control input so that the pump again
develops pressure in the high pressure circuit to the newly adjusted pressure limiter pressure setting:
then read the high pressure gauge. Allow the pump to return to its neutral position. The pressure in
the high pressure circuit should return to the charge pressure setting.
8. While holding the pressure adjusting screw stationary, tighten the pressure adjusting screw lock nut.
Torque as shown in the table.
Do not overtorque.
9. Shut down the prime mover, remove the gauges and install the gauge port plugs. Replace the plastic
dust plugs (if used).
Use the same procedure for setting the pressure limit of the other multi-function valve. Move or activate
the control input signal in the opposite direction so that high pressure develops in the opposite side of
the closed circuit.
Engaging the bypass function
The multi-function valve cartridges perform the bypass function. Shut down the prime mover when
engaging the bypass function. Open both the bypass valves to engage the bypass function.
Caution
Damage to the pump and motor can result from rotating these components without charge flow for
lubrication. Bypass valves are intended for moving a machine or vehicle for very short distances at very
slow speeds. They are not tow valves.
1. loosen the bypass actuator three turns. Refer to table for wrench size.
Do not rotate more than 3-1/2 revolutions, as additional rotation will permit external leakage.
2. For units with an MDC-type control, prior to moving the vehicle or otherwise causing the motor shaft
to turn, move the control handle of the manual displacement control on the pump to the maximum
full forward position. Hold the handle in this position during bypass valve operation.
3. To close the bypass valve, tighten the bypass actuator. See table provided for proper torque.
Bypass actuator wrench size
Frame size Wrench size
newer 030 – 100 1-1/16 inch
130 – 250 1-3/8 inch
Service Manual Series 90 Pumps
Adjustments
520L0818 • Rev 0101 • August 2015 31

 Loading...