4. Align the control gasket and install the screws. Torque the screws to 16 N•m [12 lbf•ft].
Install a sealing washer under the head of any mounting screws that are installed into through holes
in the housing.
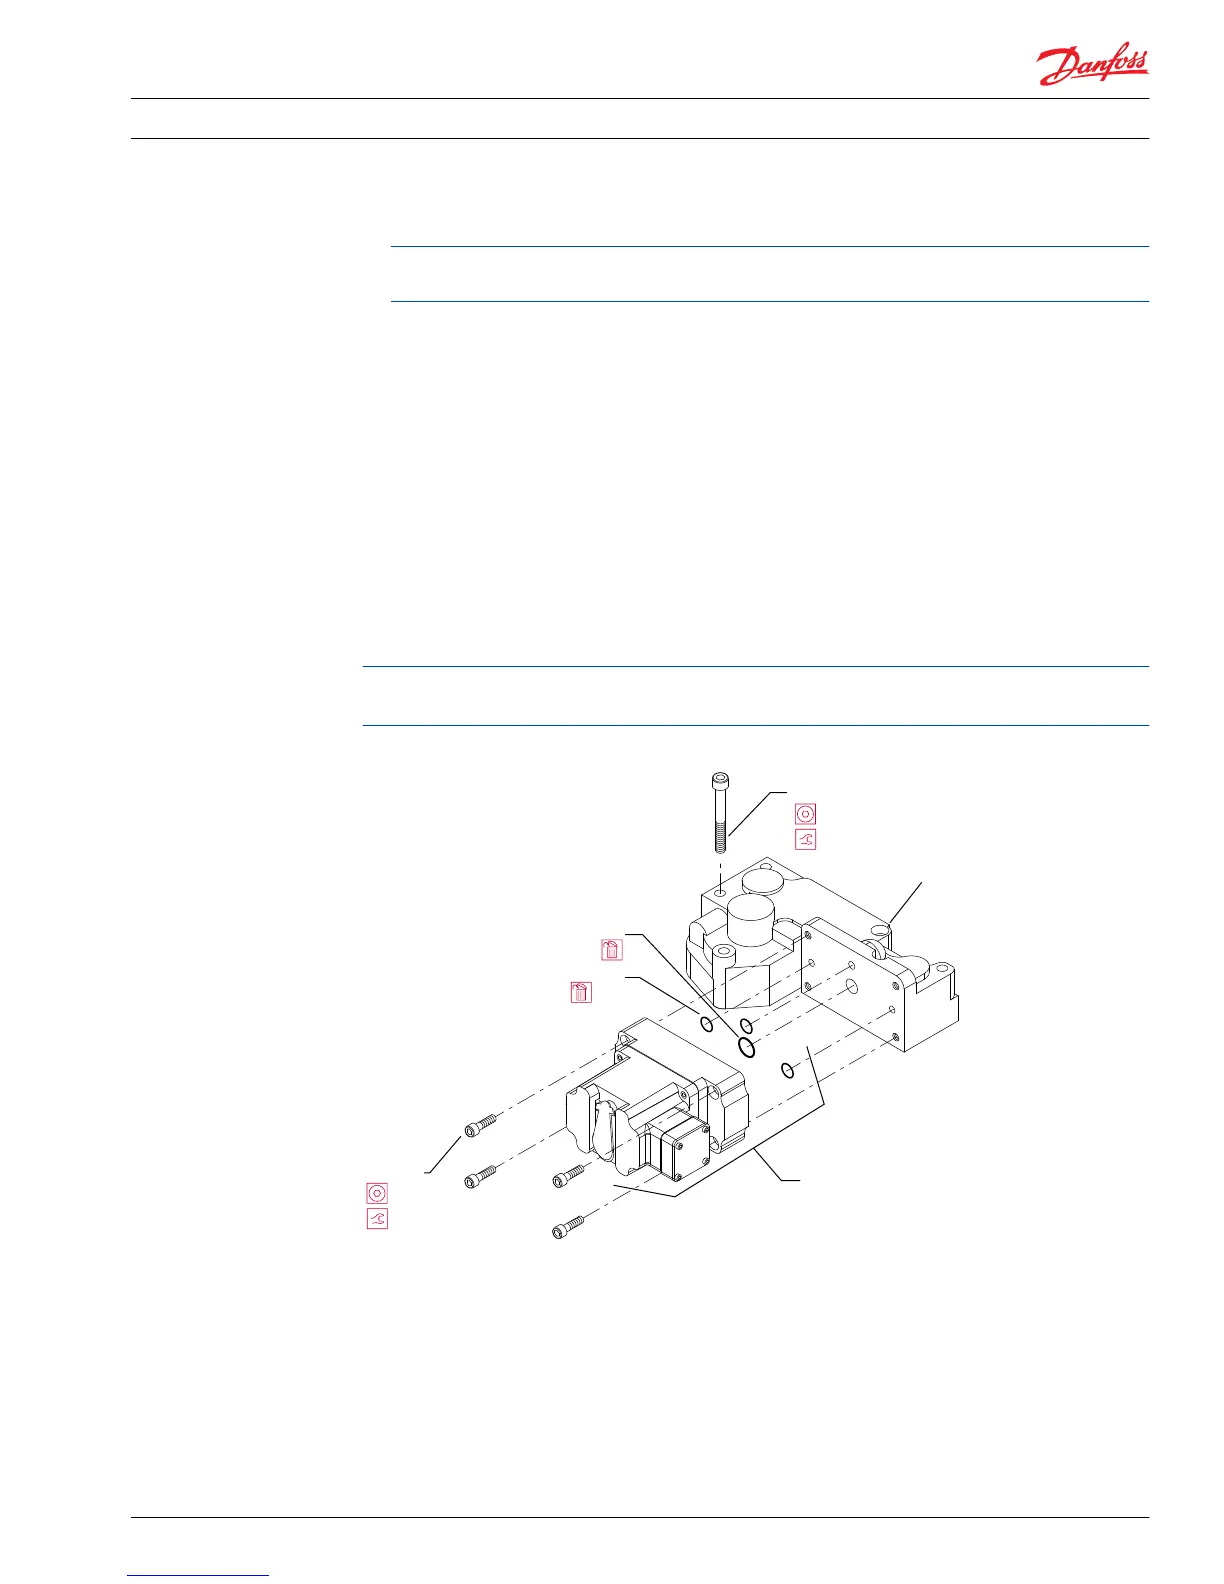
Pressure control pilot (PCP) for electric displacement control (EDC)
Removal
1. Thoroughly clean external surfaces of control.
2. Using a 4 mm internal hex wrench, remove the four screws (M98) and remove the PCP (M9).
Inspection
Check surfaces for nicks or damage. Clean internal screens.
Reassembly
Install new O-rings (M96 and M97) in PCP Housing. Place PCP against EDC housing and install the
screws (M98). Torque to 5.4 N•m [4 lbf•ft].
Do not remove black plastic cover from the aluminum plate. This is not a serviceable item and will void
the product warranty.
PCP removal/installation
3-Position (FNR) electric control
Removal
1. Thoroughly clean external surfaces prior to removal of control.
2. Using a 4 mm internal hex wrench, remove the four solenoid valve mounting screws (W702). Remove
the solenoid valve (W701) (with O-rings (W701A) and orifice) from the adapter plate.
Service Manual
Series 90 Pumps
Minor repair
520L0818 • Rev 0101 • August 2015 63

 Loading...