2. Install poppet seat (P1).
3. Install retaining ring (P22).
4. If previously removed, lubricate and install O-ring (P19).
5. If previously removed, reassemble and install bypass actuator (P14). Torque to 40 N•m [30 lbf•ft].
6. Lubricate and install new O-rings (P06, P13).
Caution
If pressure limiter was removed from bypass actuator (P14), adjust pressure limiter to model code
specifications.
7. Install cartridges and torque as shown in the table below.
Warning
Do not overtorque the multi-function valve cartridges
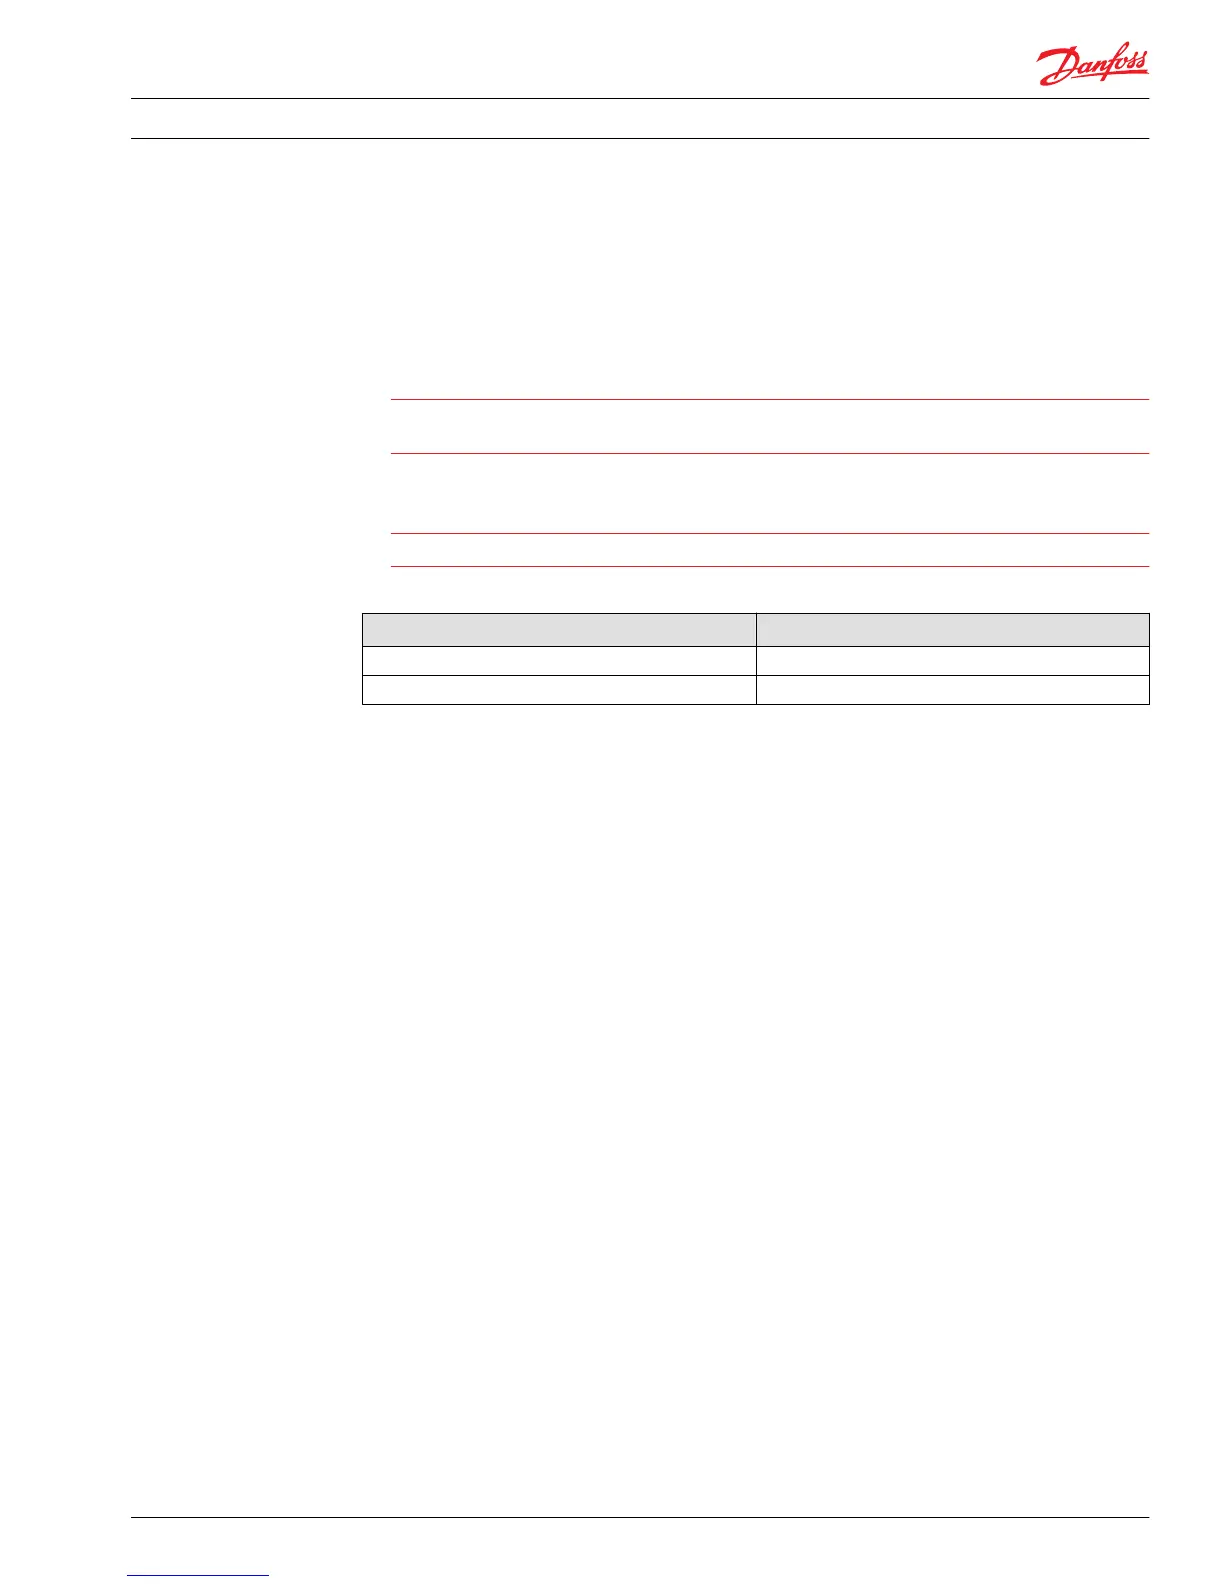
Multi-function valve torque
Frame size Torque
030 – 100 89 N•m [66 lbf•ft]
130 – 250 210 N•m [155 lbf•ft]
Pressure override valve (option for 180 frame size)
Removal
Remove the four screws attaching the pressure override valve to the pump end cap with a 5 mm
internal hex wrench. Remove and discard the O-rings.
Inspection
Clean and inspect valve for damage to parts.
Reassembly
Install new O-rings. Install the valve onto the pump end cap and torque the screws to 16 N•m [12
lbf•ft].
Service Manual
Series 90 Pumps
Minor repair
520L0818 • Rev 0101 • August 2015 47

 Loading...