4. Lubricate and install a new O-ring (L50) on the seal carrier. Lubricate the seal with clean petroleum
jelly.
5. Assemble the seal carrier and seal over the shaft and into the housing bore. Install the retainer plate
(if used).
6. Install the screws and torque to the appropriate value in the table to the right.
Torque the screws in a sequenced pattern then recheck.
Shaft retainer screw torque
Frame size Torque
030 – 042 12 N•m [9 lbf•ft]
055 – 100 16 N•m [12 lbf•ft]
130 – 250 32 N•m [24 lbf•ft]
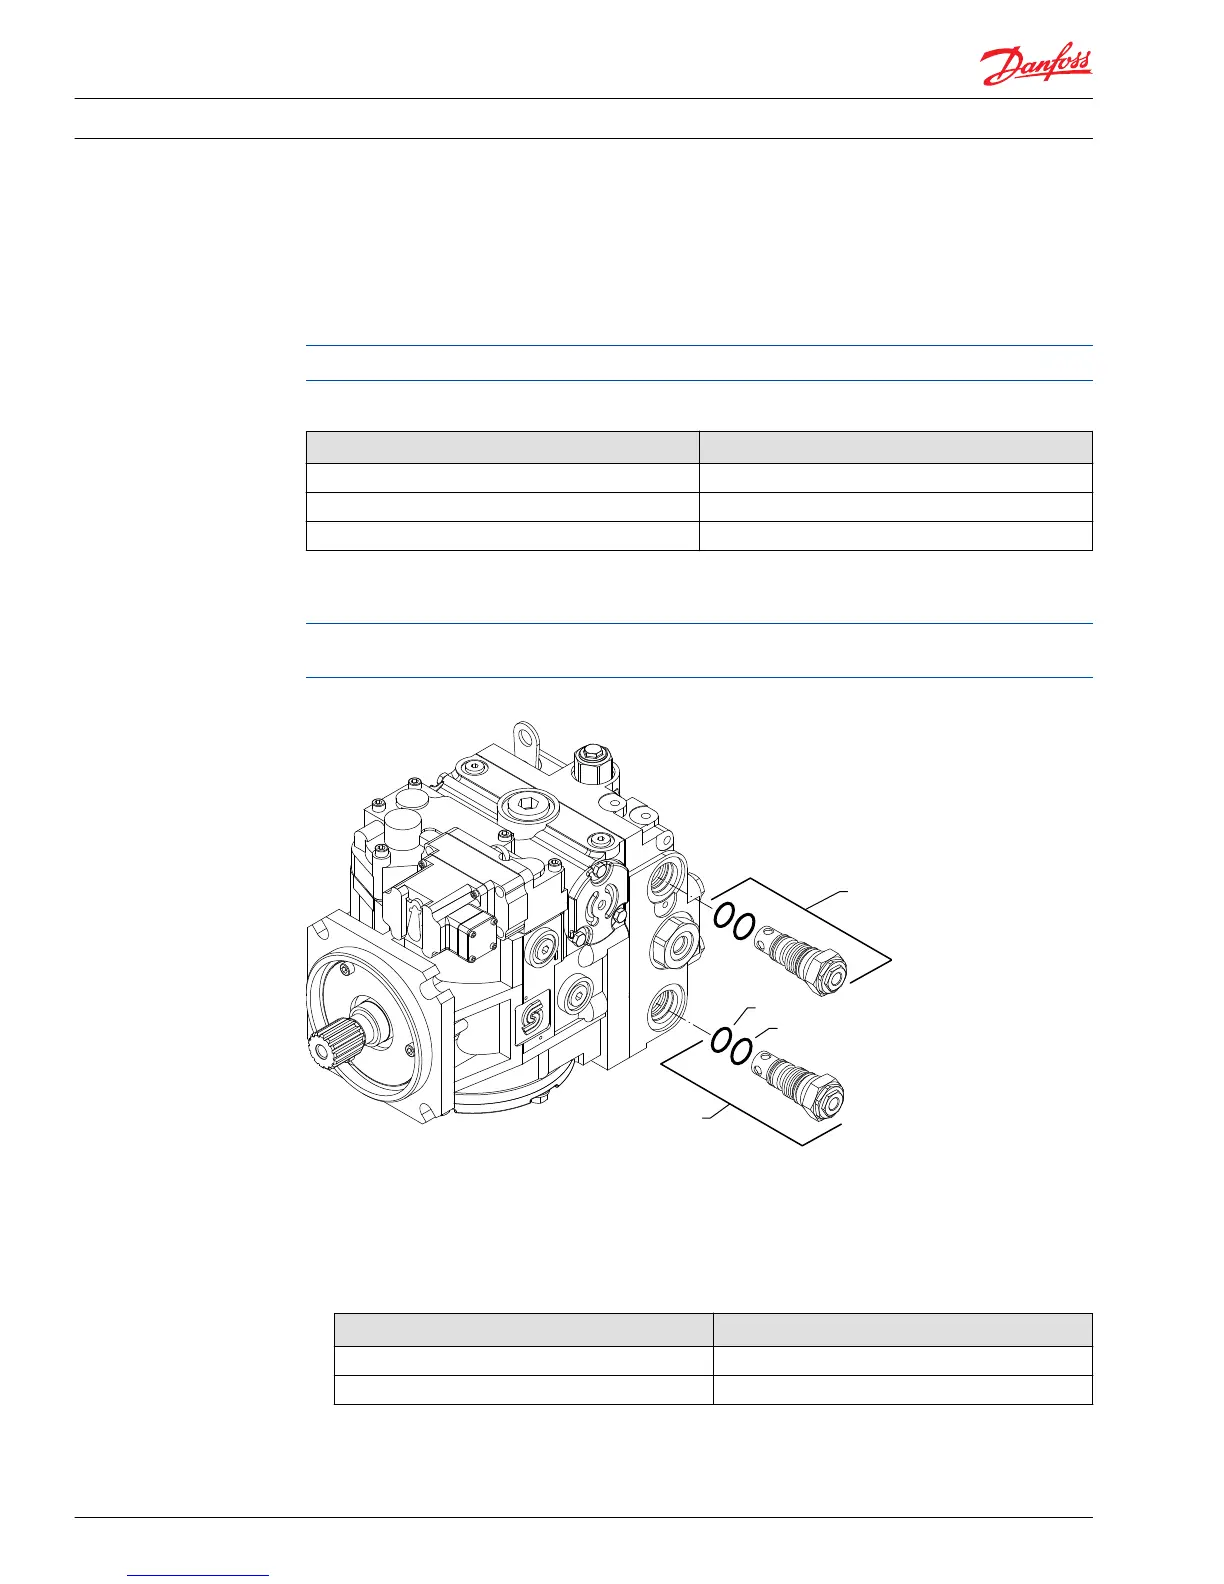
Multi-function valve cartridges
Older multifunction valves (pre 1988) contain different components. See multifunction valves - Pre 1988
for disassembly instructions.
Multi-function valve removal / installation
Removal
1. Remove multi-function valves (P2A1 and P2B1) using hex wrench listed in table.
Multi-function valve wrench size
Frame size Wrench size
030 – 100 1-1/4 inch
130 – 250 1-5/8 inch
2. Remove and discard O-rings (P13 and P06).
3. Relieve spring pressure by removing bypass actuator (P03), using a 1-1/16 wrench. To retain pressure
setting, do not separate adjusting screw (P01), and locknut (P04) from bypass actuator (P03).
Service Manual
Series 90 Pumps
Minor repair
44 520L0818 • Rev 0101 • August 2015

 Loading...