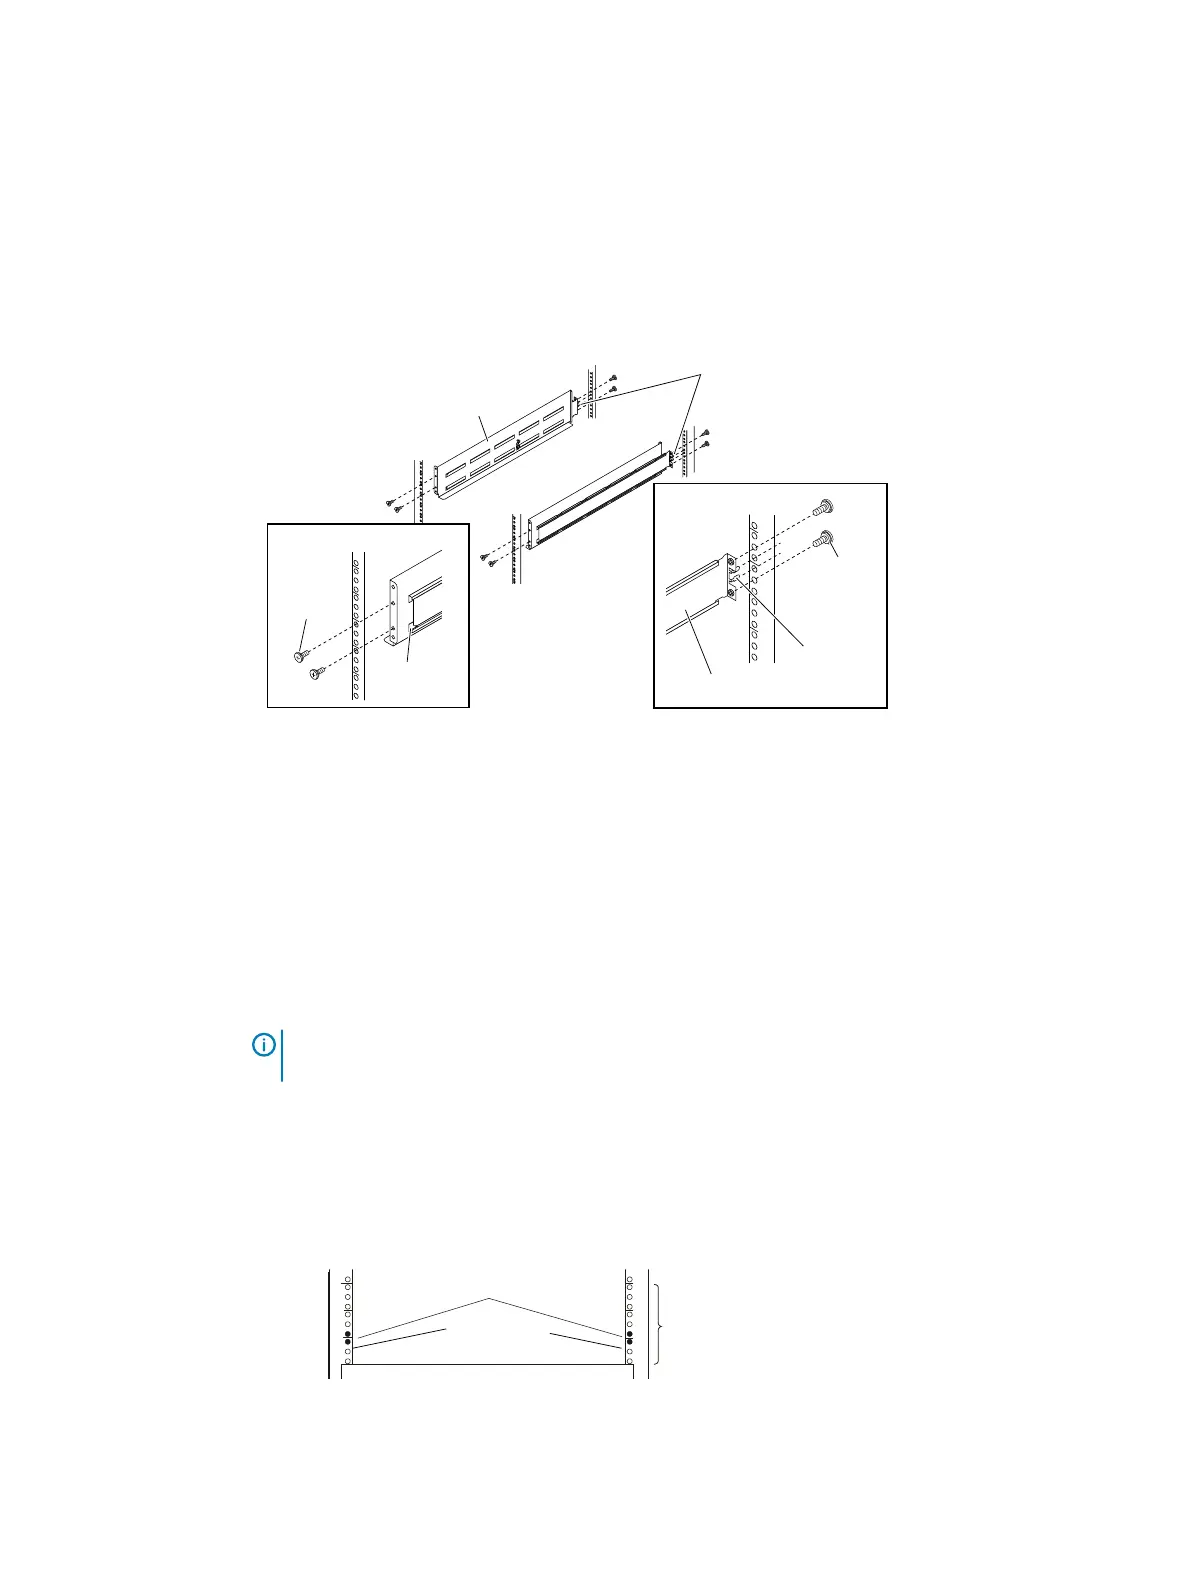
Removing the rails
This procedure describes how to remove the universal rails from a Data Domain or third-party rack.
This procedure assumes the shelf that was installed in the rails has been removed.
About this task
Figure 56 Removing rails
EMC3452
Right rear
Screw (2)
Alignment
pin (2)
Mounting rail
Alignment pins
Adjustable rail
Right front
Mounting rail
Screw (2)
Procedure
1.
Remove the two screws from the front channel.
2. Remove the two screws from the rear channel.
3. Push in the alignment pins on the rear channel and remove the rail.
4. Repeat for other rail.
Installing the rails in the cabinet
About this task
Note: The front edge of each rail is stamped L or R for left or right side, when the rail faces the
cabinet front.
Install each rail in the cabinet.
Procedure
1.
From the front of the cabinet, insert the rail alignment pins above and below the bottom U
mark on the rear cabinet channel.
Figure 57 Holes for alignment pins
Alignment pins
here
EMC2892b
3U
Rear channels
2. Pull the sliding rail to the front of the cabinet, and secure it to the front channel at the
middle two holes of the rail using two of the provided screws.
Removing and replacing FRUs
Dell EMC ES40 Expansion Shelf Guide Field Replacement Unit Guide 61
 Loading...