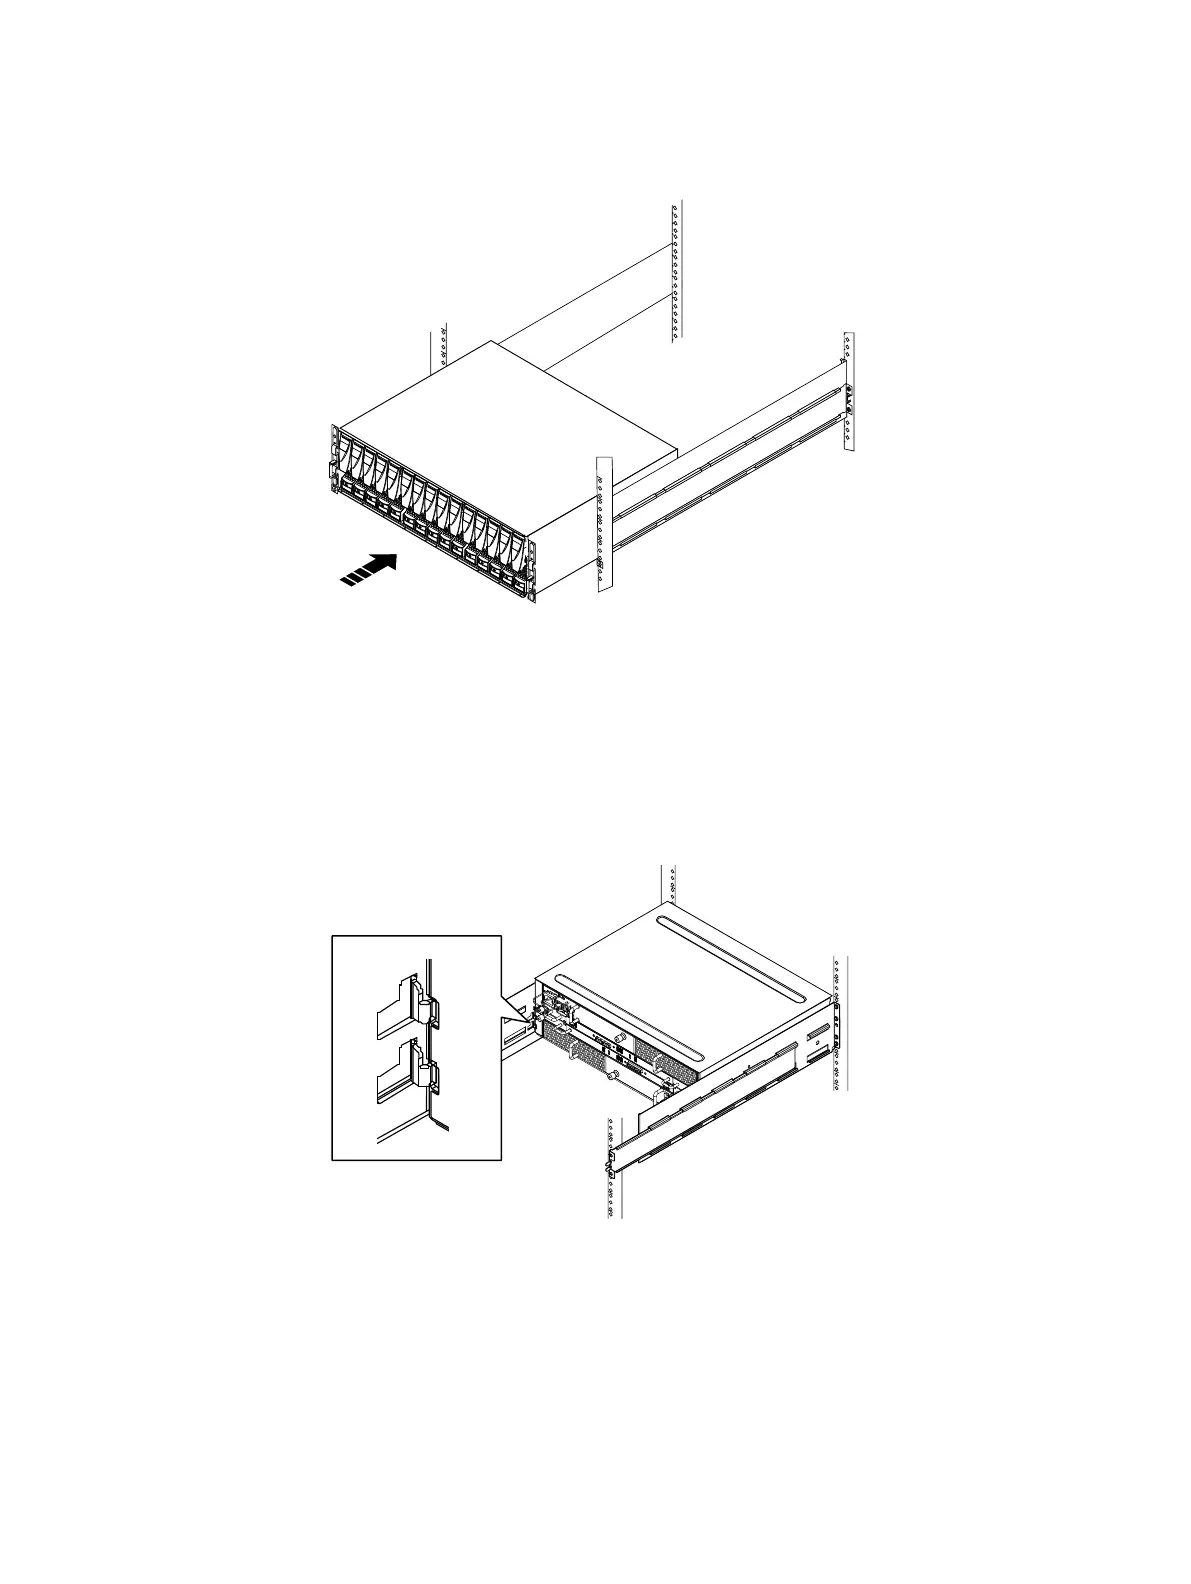
Figure 60 Sliding the enclosure onto the rails
When the enclosure slides to the back of the cabinet, the rear tabs on the rails insert into
the two notches in the rear of the enclosure. The tabs secure and support the rear of the
enclosure (Figure 61 on page 65).
If the chassis does not slide all the way into the cabinet, you may need to further loosen the
screws that hold the rear of the rails in place, then adjust the rails to allow the tabs to fit
into the notches.
Figure 61 Rail tabs securing the rear of the enclosure
2. Once the enclosure is completely seated into the rear tabs, secure the enclosure, tighten
the screws (two on each rail) that secure the rails to the channels.
3.
Secure the front of the enclosure to the front vertical channels with four screws (two per
side), but do not tighten the screws until they are all in place (Figure 62 on page 66).
Removing and replacing FRUs
Dell EMC ES40 Expansion Shelf Guide Field Replacement Unit Guide 65