EasyManua.ls Logo

Dell G3 15 User Manual

Dell G3 15
129 pages
To Next Page IconTo Next Page
To Previous Page IconTo Previous Page
Page #80 background imageLoading...
Page #80 background image
Identifier GUID-43423BFB-7BAA-4C7E-BA7A-12118E225EBA
Status Released
Removing the power button with ngerprint
reader
WARNING: Before working inside your computer, read the safety information that shipped with your computer and follow the
steps in Before working inside your computer. After working inside your computer, follow the instructions in After working inside
your computer. For more safety best practices, see the Regulatory Compliance home page at www.dell.com/
regulatory_compliance.
NOTE: Applicable only for computers that are shipped with ngerprint reader.
Identifier GUID-0FDACDDE-9CD6-418D-ABA7-AB8694DDACF0
Status Released
Prerequisites
1 Remove the base cover.
2 Remove the battery.
3 Remove the solid-state drive/Intel Optane.
4 Remove the fan.
5 Remove the heat sink.
6 Remove the wireless card.
7 Remove the power-button board.
8 Remove the system board.
9 Remove the display assembly.
Identifier GUID-EAF2DAD2-3A48-4CE0-B127-8F007A30D0F2
Status Released
Procedure
1 Peel the ngerprint reader cable o the palm rest and keyboard assembly.
2 Remove the screw (M2x2) that secures the power button to the palm rest and keyboard assembly.
3 Using a plastic scribe, release the ngerprint-reader board from the palm rest and keyboard assembly.
4 Lift the power button, along with its cable, o the palm rest and keyboard assembly.
37
80 Removing the power button with ngerprint reader

Table of Contents

Other manuals for Dell G3 15

Question and Answer IconNeed help?

Do you have a question about the Dell G3 15 and is the answer not in the manual?
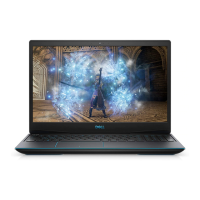
Dell G3 15 Specifications

General IconGeneral
Display Size15.6 inches
Resolution1920 x 1080 pixels
ProcessorIntel Core i5/i7
GraphicsNVIDIA GeForce GTX/RTX
RAM8GB/16GB DDR4
Storage256GB/512GB SSD, 1TB HDD
Operating SystemWindows 10
PortsHeadphone/microphone combo jack, SD card reader
Wireless802.11ac Wi-Fi, Bluetooth

Summary

Before working inside your computer

Before you begin

Essential steps to prepare the computer before internal servicing.

Safety instructions

Critical guidelines to prevent damage and ensure personal safety during service.

After working inside your computer

Removing the base cover

Replacing the base cover

Removing the battery

Replacing the battery

Removing the memory modules

Replacing the memory modules

Removing the wireless card

Replacing the wireless card

Removing the fan

Replacing the fan

Removing the processor fan

Replacing the processor fan

Removing the solid-state drive/Intel Optane

Replacing the solid-state drive/Intel Optane

Removing the hard drive

Replacing the hard drive

Removing the touchpad

Replacing the touchpad

Removing the heat sink

Replacing the heat sink

Removing the display assembly

Replacing the display assembly

Removing the I/O board

Replacing the I/O board

Removing the system board

Prerequisites

Tasks that must be completed before removing the system board.

Replacing the system board

Procedure

Instructions for installing the system board.

Entering the Service Tag in the BIOS setup program

Guide to entering the computer's Service Tag in the BIOS.

Removing the palm-rest and keyboard assembly

Replacing the palm-rest and keyboard assembly

Removing the display panel

Prerequisites

Tasks that must be completed before removing the display panel.

Replacing the display panel

Post-requisites

Tasks to perform after the display panel has been replaced.

Removing the display back-cover and antenna assembly

Prerequisites

Tasks that must be completed before removing the display back-cover and antenna assembly.

Replacing the display back-cover and antenna assembly

Procedure

Instructions for installing the display back-cover and antenna assembly.

System setup

Boot Sequence

Configuring the order of devices the computer attempts to boot from.

System and setup password

Troubleshooting

Flashing the BIOS

Process for updating the computer's Basic Input/Output System firmware.

Flashing BIOS (USB key)

Steps to update the BIOS using a bootable USB drive.

Reinstall Windows using a USB recovery drive

Procedure

Guide to reinstalling the operating system from a USB recovery drive.

Enhanced Pre-Boot System Assessment (ePSA) diagnostics

Related product manuals