 Loading...


Do you have a question about the Dell OPTIPLEX 740 and is the answer not in the manual?
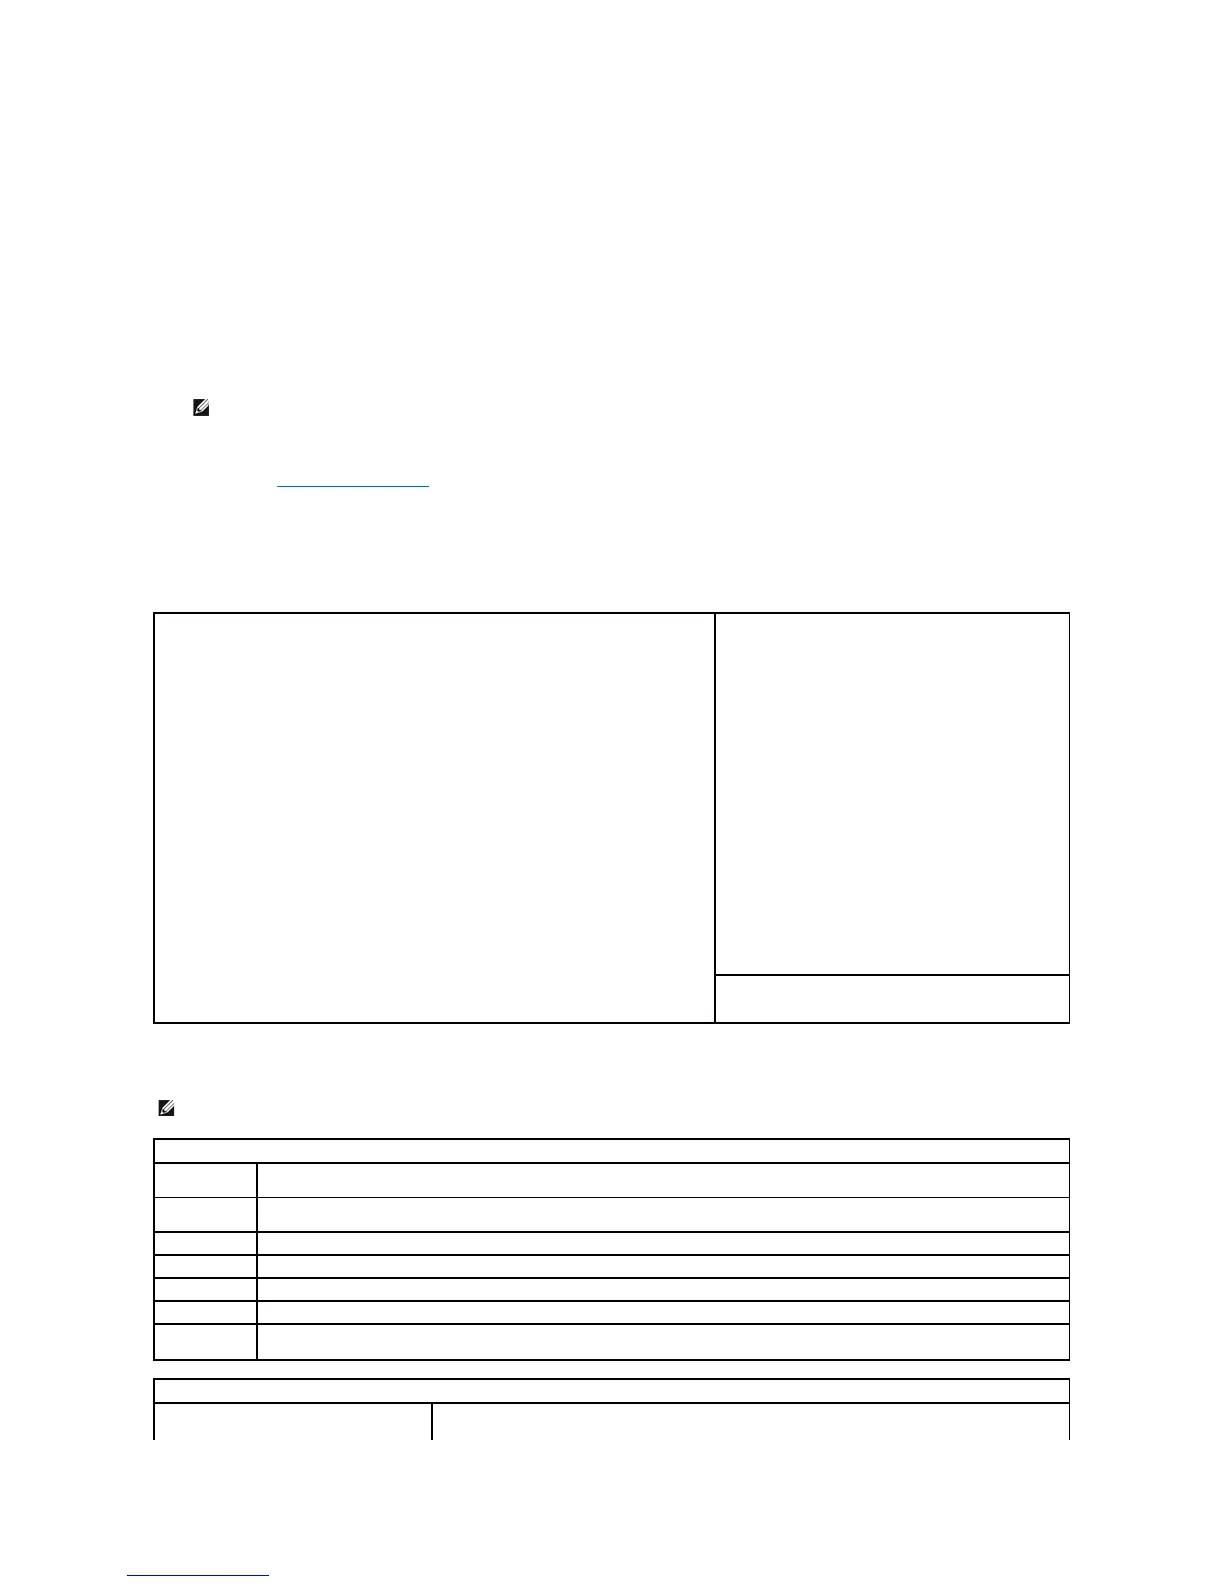
| Audio | Integrated High Definition Audio |
|---|---|
| Processor | AMD Athlon 64 X2, AMD Sempron |
| Memory | Up to 8GB DDR2 |
| Storage | SATA HDD |
| Graphics | Optional discrete graphics |
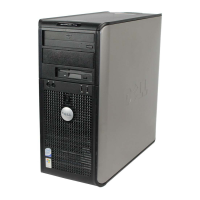
| Form Factor | Mini Tower |
| Expansion Slots | 1 PCI-e x16 |
| Optical Drive | DVD-ROM, DVD+/-RW |
| Network | Integrated 10/100/1000 Ethernet |
| Power Supply | Mini-Tower: 305W |
| Ports | USB 2.0, serial, parallel, VGA, audio |
| Operating System | Windows XP |
Control over connectors and media devices via system setup or IT Assistant.
Alert Standard Format (ASF) and Dell OpenManage IT Assistant for network management.
Covers security features like Chassis Intrusion Detection and Password Protection.
Detects if the computer chassis has been opened and alerts the user.
Physical security methods to prevent unauthorized access or movement.
System and administrator password settings for computer security.
List of tools necessary for performing hardware procedures.
Steps for safely shutting down the computer before maintenance.
Essential safety precautions to prevent injury and component damage.
Instructions for cleaning external computer components.
Procedures for cleaning both optical and non-optical mice.
How to clean a floppy drive using a commercial kit.
Guidelines for connecting SATA hard drives, optical drives, and drive cables.
Description of drive interface and power cable connectors.
Steps to remove the computer's Input/Output panel.
Steps to install the Input/Output panel in reverse order.