Processor Thermal-Cooling Assembly: Dell XPS M1710 Service Manual
file:///C|/Users/santhosh_v.ASIA-PACIFIC/Desktop/Hawke/New%20folder/cpucool.htm[2/21/2014 11:23:28 AM]
Replacing the Processor Thermal-Cooling Assembly
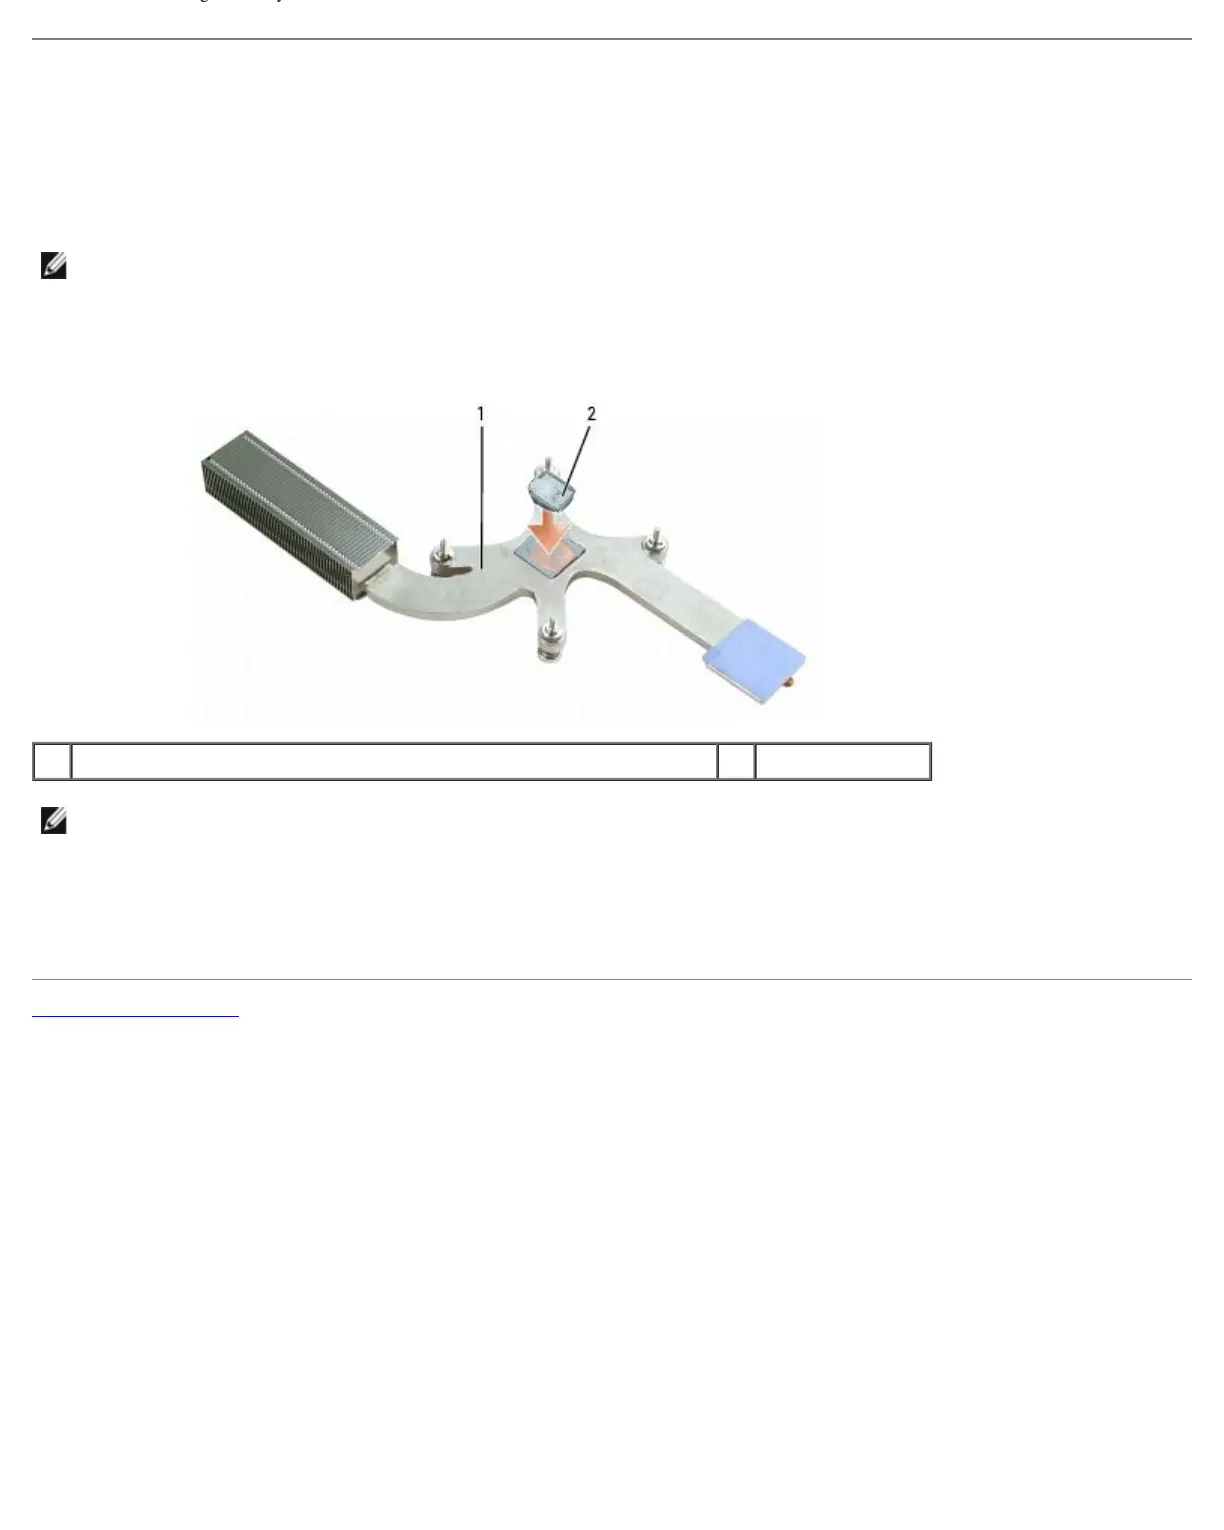
1. Place a new thermal pad over the old thermal pad on the thermal-cooling assembly:
a. Remove the backing from the new thermal pad, taking care not to tear the pad.
NOTE: You can place the new thermal pad directly on any existing thermal pad already installed on the thermal-cooling
assembly. It is not necessary to remove an existing pad or to clean the surface.
b. On the underside of the thermal-cooling assembly, place the thermal pad's adhesive-side on top of the old pad,
and press it into place.
1 underside of processor thermal-cooling assembly 2 thermal pad
NOTE: When replacing the processor thermal-cooling assembly, hold up the mylar flap on the processor thermal-
cooling assembly so that the flap rests on top of the fan when the thermal-cooling assembly is in place.
2. Place the processor thermal-cooling assembly over the processor.
3. Tighten the four captive screws, labeled "1" through "4," in consecutive order.
Back to Contents Page
 Loading...