Display: Dell XPS M1710 Service Manual
file:///C|/Users/santhosh_v.ASIA-PACIFIC/Desktop/Hawke/New%20folder/display.htm[2/21/2014 11:23:47 AM]
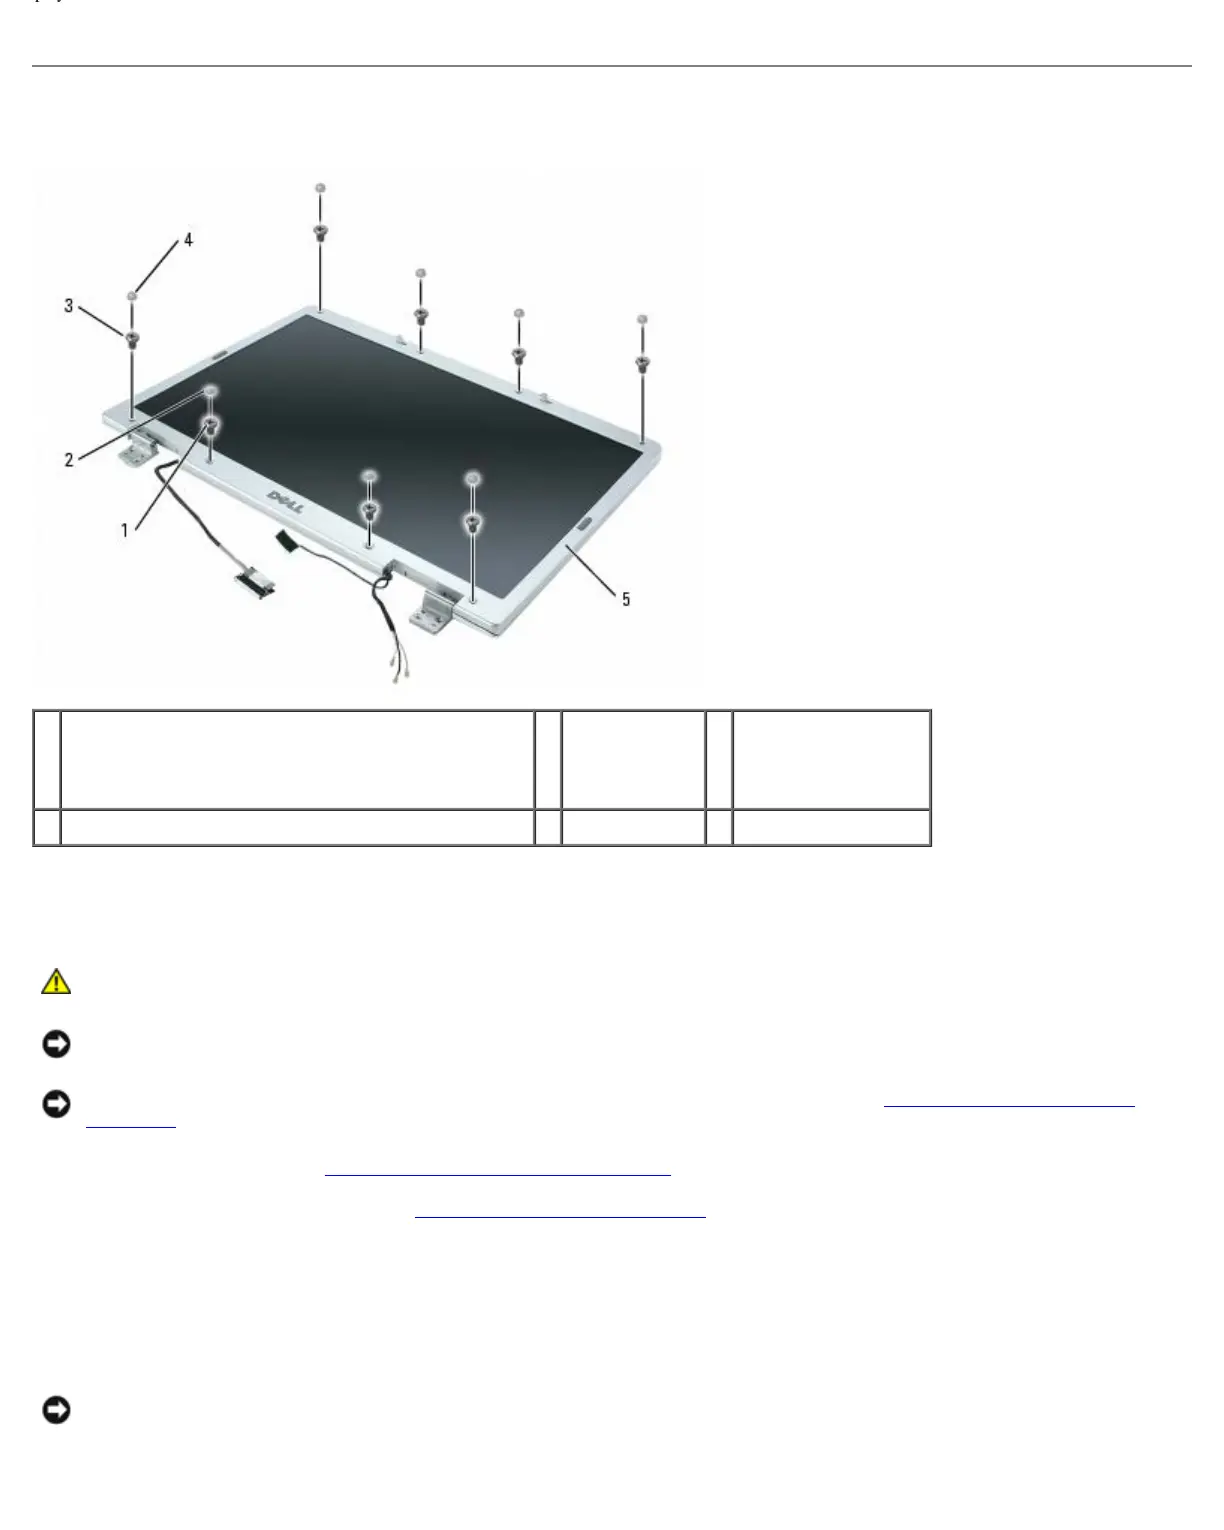
Display Bezel
1 shoulder screws (4, two at the top and two at the
bottom)
2 screw covers
(2)
3 M2.5 x 5-mm
screws
(4, one on each
corner)
4 rubber screw-covers/display bumpers (6) 5 display bezel
Removing the Display Bezel
CAUTION: Before you begin the following procedure, follow the safety instructions in the Product
Information Guide.
NOTICE: To avoid electrostatic discharge, ground yourself by using a wrist grounding strap or by periodically touching
an unpainted metal surface (such as the back panel) on the computer.
NOTICE: To help prevent damage to the system board, remove the main battery (see Before Working Inside Your
Computer) before working inside the computer.
1. Follow the instructions in Before Working Inside Your Computer
.
2. Remove the display assembly (see Removing the Display Assembly
).
3. Remove the six rubber screw-covers/display bumpers.
4. Remove the two screw covers and the four shoulder screws.
5. Remove the four M2.5 x 5-mm screws at the corners of the bezel.
NOTICE: Removal of the bezel from the display back cover requires extreme care to avoid damage to the bezel.
6. Use your fingers to separate the bezel from the display back cover by pulling the lower-right corner of the bezel down
 Loading...