ENGLISH
Installation Connections Settings Operation Other functions
Operating the
remote control unit
Troubleshooting Specifications
30°
30°
Approx.
23 feet / 7 m
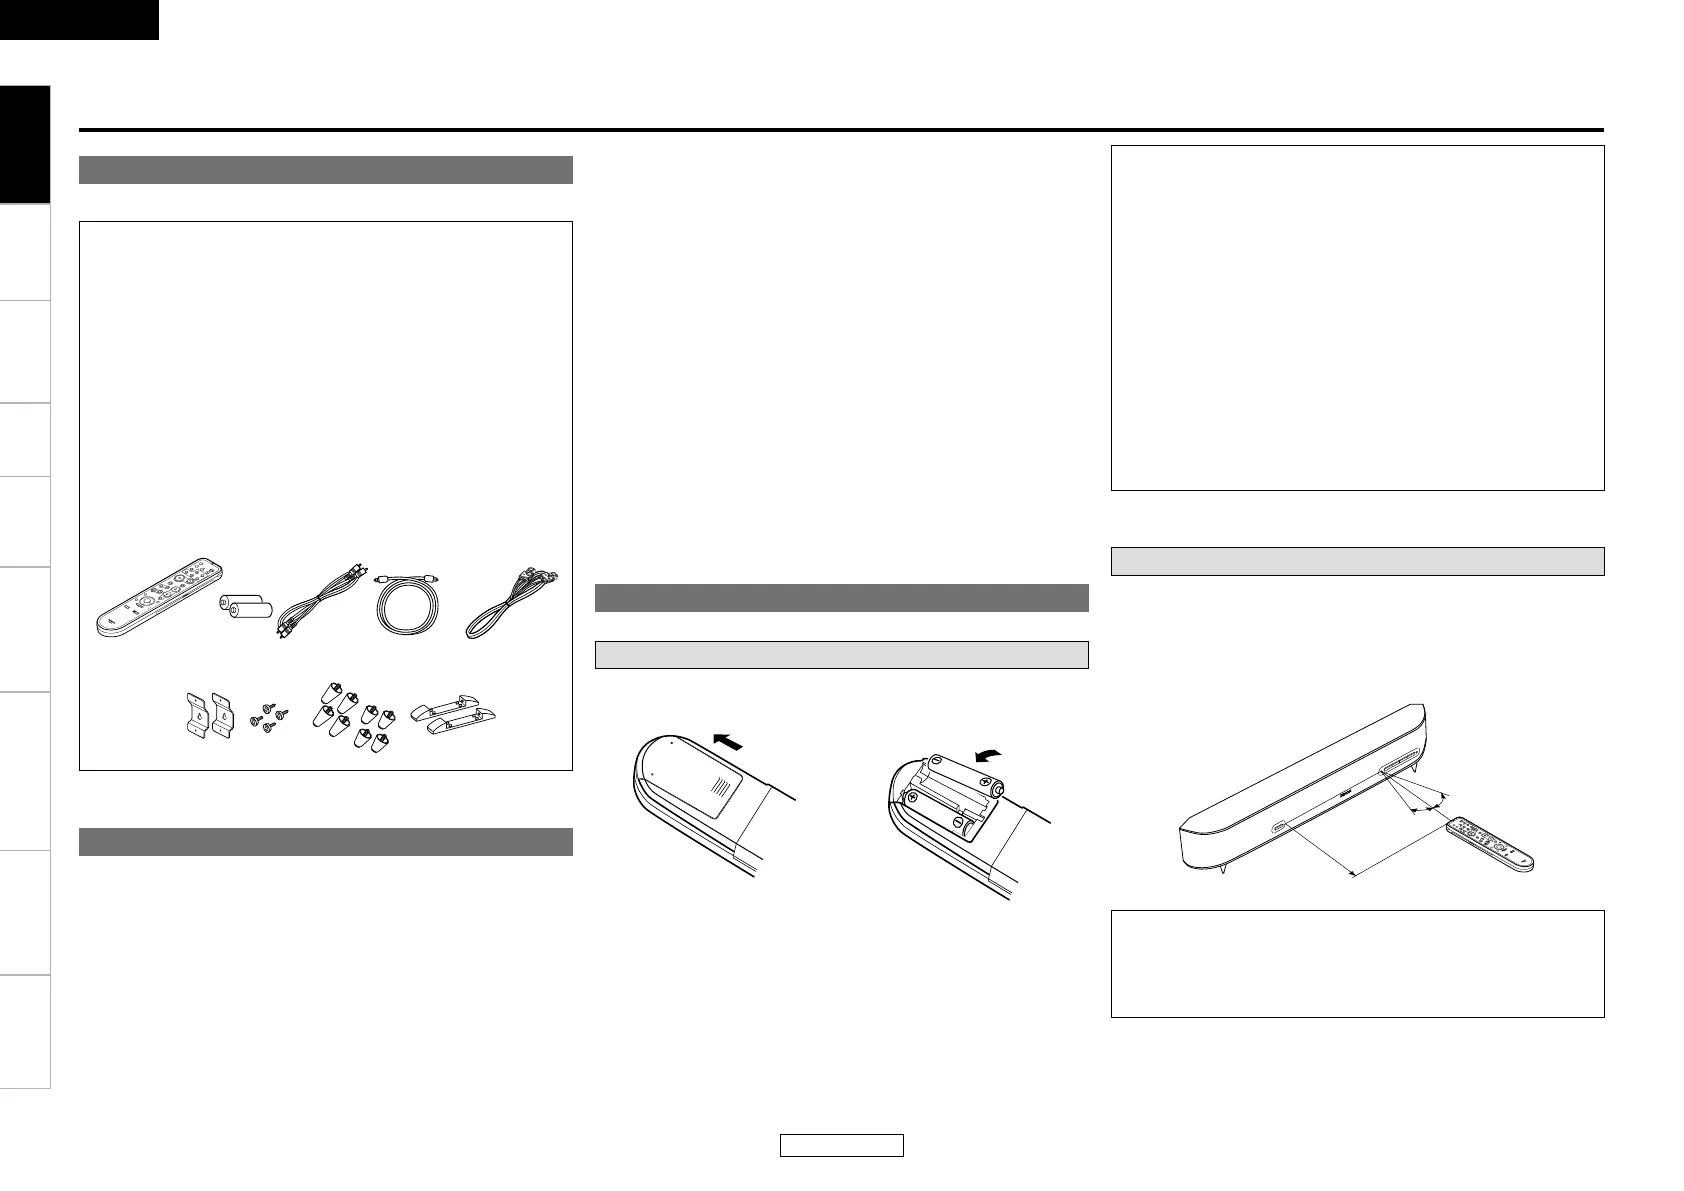
Accessories
Check that the following parts are supplied with the product.
q Owner’s Manual ...................................................................... 1
w Warranty
(for North America model only) ............................................... 1
e Service station list ...................................................................1
r Power cord (Already connected)
(Cord length: Approx. 6.5 ft / 2 m) .......................................... 1
t Remote control (RC-1074) ........................................................ 1
y R6/AA battery .......................................................................... 2
u Audio cable (Cable length: Approx. 4.9 ft / 1.5 m) .................... 1
i Optical fiber cable (Cable length: Approx. 4.9 ft / 1.5 m)..........1
o Subwoofer cable (Cable length: Approx. 9.8 ft / 3 m) ..............1
Q0 Wall bracket .............................................................................2
Q1 Screw ...................................................................................... 4
Q2 Feet (0.08 ft / 25 mm / 0.11 ft / 35 mm) ...........................4 each
Q3 Vertical installation stands ....................................................... 2
Getting Started
About the remote control unit
q Push the lock lever in the
direction of the arrow and lift.
w Set two R6/AA batteries in the
battery compartment in the
indicated direction.
e Put the rear cover back on.
Inserting the batteries
• Point the remote control unit at the remote sensor when operating
it.
• The remote control unit can be used from a distance of up to about
23 feet / 7 meters, at a horizontal angle of up to 30° with respect to
the sensor.
Operating range of the remote control unit
NOTE:
• The set may function improperly or the remote control unit may
not operate if the remote control sensor is exposed to direct
sunlight, strong artificial light from an inverter type fluorescent
lamp or infrared light.
Cautions on handling
• Before turning the power switch on
Check once again that all connections are correct and that there are
no problems with the connection cables.
• Power is supplied to some of the circuitry even when the unit is
set to the standby mode. When traveling or leaving home for long
periods of time, be sure to unplug the power supply cord from the
power outlet.
Notes on batteries:
• Replace the batteries with new ones if the set does not operate
even when the remote control unit is operated close to the unit.
(The supplied batteries are only for verifying operation.)
• When inserting the batteries, be sure to do so in the proper
direction, following the “q” and “w” marks in the battery
compartment.
• To prevent damage or leakage of battery fluid:
• Do not use a new battery together with an old one.
• Do not use two different types of batteries.
• Do not attempt to charge dry batteries.
• Do not short-circuit, disassemble, heat or dispose of batteries in
flames.
• If the battery fluid should leak, carefully wipe the fluid off the
inside of the battery compartment and insert new batteries.
• Remove the batteries from the remote control unit if it will not be
in use for long periods.
• About condensation
If there is a major difference in temperature between the inside of
the unit and the surroundings, condensation (dew) may form on
the operating parts inside the unit, causing the unit not to operate
properly.
If this happens, let the unit sit for an hour or two with the power
turned off and wait until there is little difference in temperature
before using the unit.
• Cautions on using mobile phones
Using a mobile phone near this unit may result in noise. If so, move
the mobile phone away from this unit when it is in use.
• Moving the unit
Turn off the power and unplug the power cord from the power
outlet.
Next, disconnect the connection cables to other system units before
moving the unit.
• Note that the illustrations in these instructions may differ from the
actual unit for explanation purposes.
ENGLISH
Getting Started
 Loading...