49
6) Click Send Setup Table to Logger to send the setup table to the logger and make it the active table.
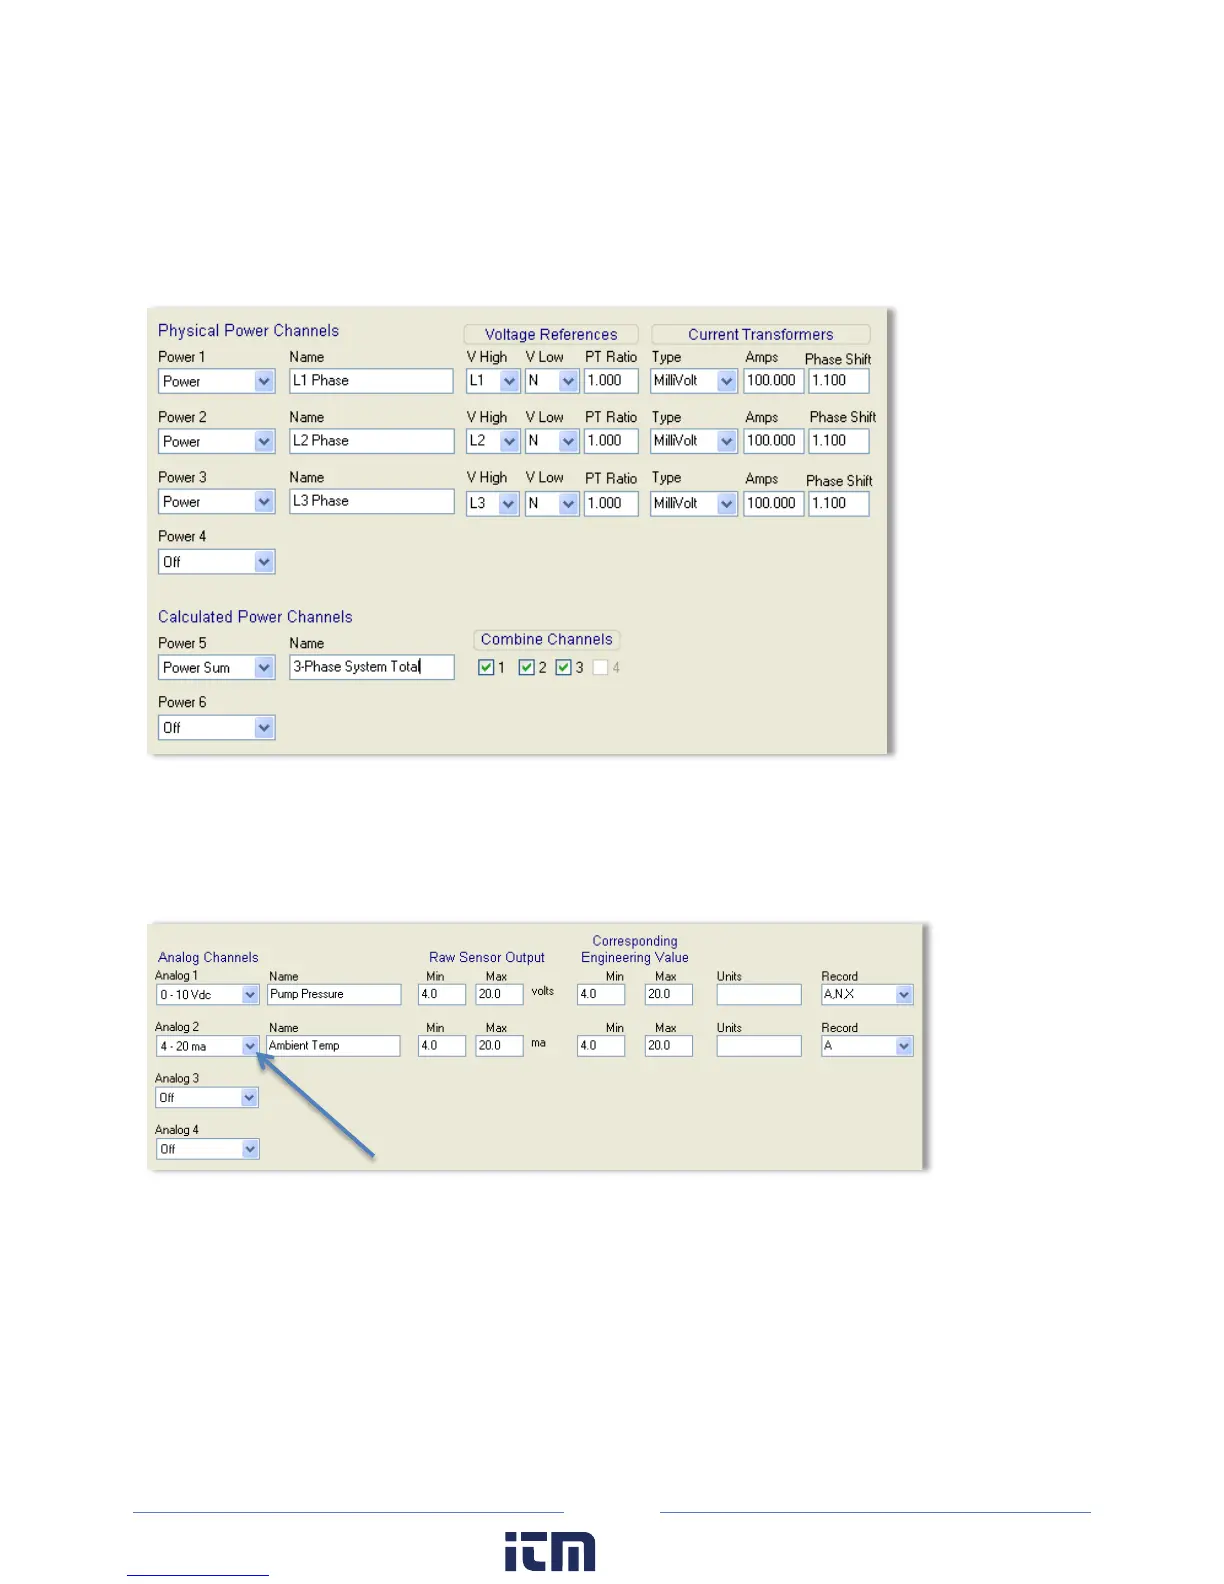
The following graphic is an example of a Setup Table for a 3-phase 4-wire connected load using a
Calculated Power Channel with Combine Channels 1, 2, and 3 selected to optimize memory usage on
the ELITEpro XC.
N
OTE: The Recorded values listed to the right of the Current Transformers section on the Setup Table
are not shown in this graphic.
ANALOG OUTPUT CHANNELS
N
OTE: Turn the analog channels on/off by choosing an option from the drop-down list.
1) Select Current/Voltage/Off from the drop-down menu for the channel type. Additional fields display
on the Setup Table screen when an analog channel current or voltage is selected.
2) Enter a descriptive name in the Name field to identify your measurement. This name appears in the
retrieved logger data header.
w ww. . com
information@itm.com1.800.561.8187

 Loading...