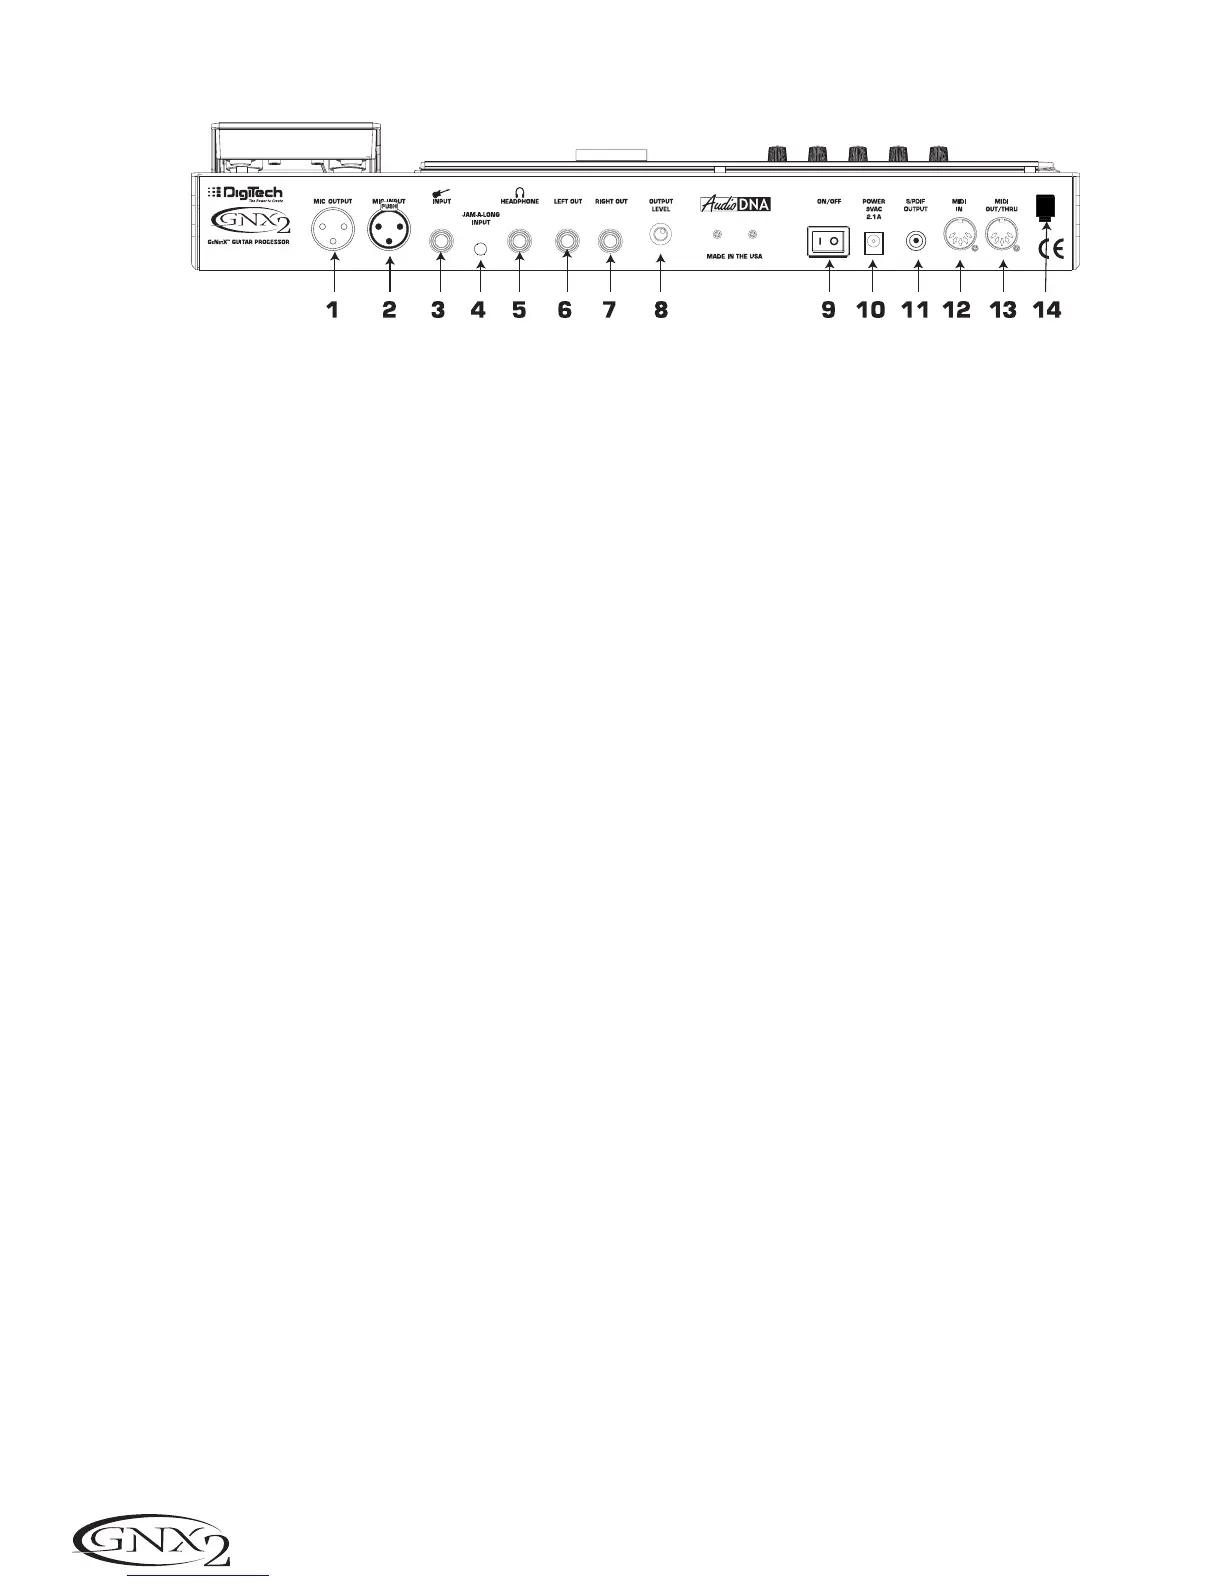
The Rear Panel
1. Mic Output
This XLR jack passes your mic signal to the house mixing console.
2. Mic Input
This XLR jack connects a low impedance mic to the GNX2 that can be used with the Talker and
Vocoder effects. A mic with a cardioid pattern is recommended.
3. Input Jack
Connect your instrument to this jack.
4. Jam-A-Long Jack
Use a 1/8” stereo plug to connect this jack to the output of a tape or CD player. This lets you play
along with the music, or record a musical passage.
5. Headphone Output
Connect stereo headphones to this jack. Be sure to set the Target System Setup mode to Direct
when listening through Headphones (see page 40 for more information on selecting the Target System
Setup).Do not connect a mono plug to this jack, because you may damage the output driver.
6. Left Output
Connect to the input of an amplifier,input of a power amp, or line input of a mixing console.
7. Right Output
Use this jack in conjunction with the Left Output for stereo applications.Connect to the input of a
second amplifier,or the right input of a stereo power amp.
8. Output Level
Controls the overall volume level of the GNX2.
9. Power Switch
Turns the power on and off.
10. Power Input
Connect only the provided DigiTech PSS3 power supply to this jack.
11. S/PDIF Output
This is the GNX2’s digital output . The signal at this output is in a stereo digital format,and is to be
connected to a digital S/PDIF input such as those found on digital recording devices.
NOTE: Do not connect the S/PDIF output to analog auxiliary, CD, phono,or tape inputs on consumer
electronic devices. It is not compatible with these inputs.
6
Introduction
 Loading...