Quick Start
The Quick Start section is included for those of you who would rather play now and read later.
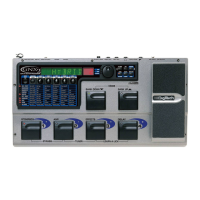
Making Connections
Connect your instrument to the INPUT jack on the rear panel. Connect the LEFT/RIGHT
OUTPUTS to the input(s) of your amplifier(s), power amp,or mixer.
Apply Power
Turn the OUTPUT knob on the rear panel of the GNX2 all the way down (fully counter clockwise).
Connect the plug of the PSS3 power supply to the POWER jack on the GNX2. Connect the other end
of the PSS3 power supply to an AC outlet and turn the GNX2 POWER switch on. Turn your
amplifier(s) on,and adjust the volume(s) to a normal playing level. Gradually increase the GNX2’s
OUTPUT volume.
Select an Output Mode
Press the UTILITY button and use the DATA WHEEL to select either the Stereo or Mono output
mode.
Select The Target System Setup
The GNX2 needs to know the type of amplification system it will be used with. After selecting an
Output,press the RHYTHM button. The Target System Setup menu is displayed. Use the DATA
WHEEL to select an amplification system,and press EXIT to return to Performance mode.
Select a Preset
The GNX2 comes with 64 pre-programmed Factory Presets,and 64 User Presets. From the factory,the
User Presets are exact duplicates of the Factory Presets.This lets you experiment without losing any of
the original presets.
Use the BANK footswitches to select a Bank,and Footswitches 1-4 to select a preset. The DATA
WHEEL can also be used to select a preset. After you find a preset you like, you can edit it. See Editing
and Creating a Preset page 13.
2
Introduction
 Loading...