3.8 UPS Connection - HotSwap MBP module configured (optional;
standard configuration of the HotSwap model)
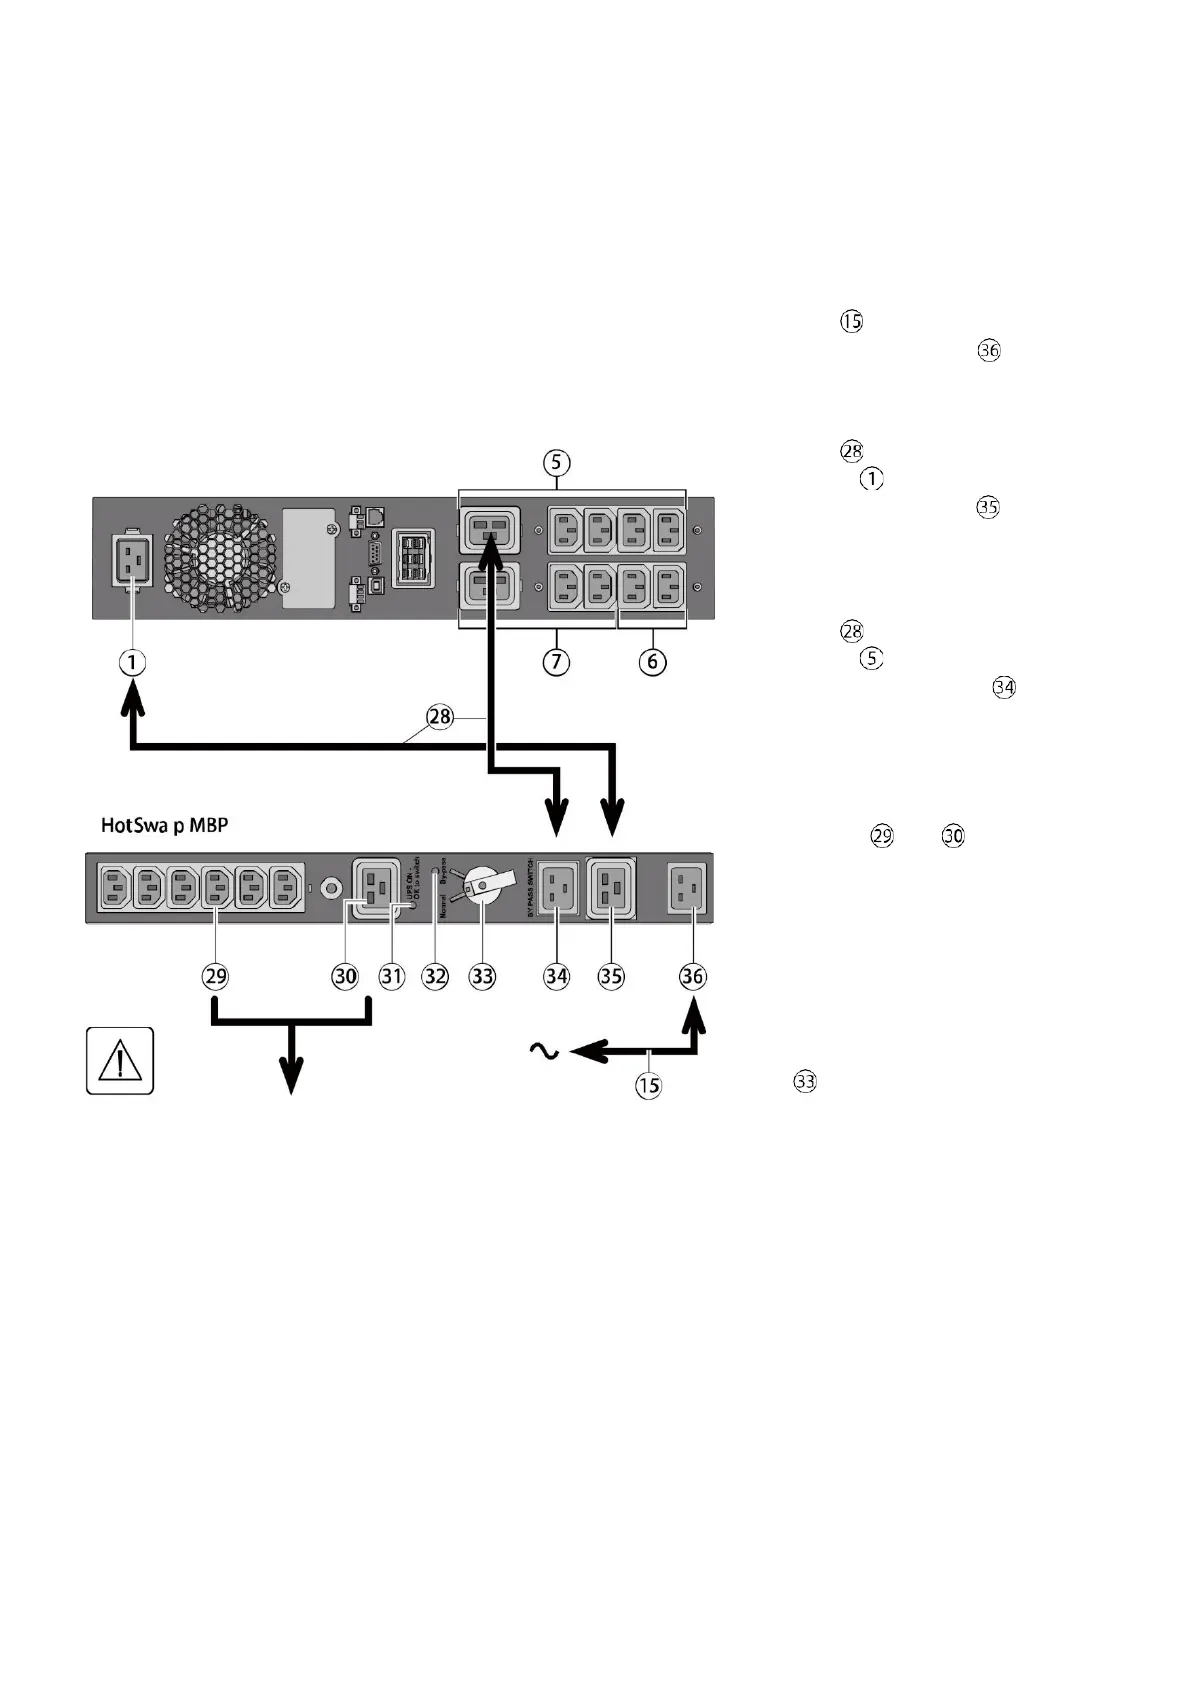
The HotSwap MBP module enables UPS servicing or even replacement without powering off the load.
9PX 2200IRT/9PX 3000IRT:
1. Use the supplied power
cord to connect the HotSwap
MBP's input socket to the AC
power supply.
2. Use the supplied power
cord to connect the UPS input
socket to the HotSwap MBP's
"UPS Input" socket . Both the
power cord and the connecting
socket are marked in blue.
3. Use the supplied power
cord to connect the UPS
socket to the HotSwap MBP's
"UPS Output" socket . Both
the power cord and the
connecting socket are marked in
red.
4. Connect the load to the
sockets and of the
HotSwap MBP. These sockets
vary depending on the HotSwap
MBP version.
Attention: Do not use the UPS
output socket to power the
load, as the power supply to
the UPS output may be cut out
when the HotSwap MBP knob
is in bypass.
9PX 1000IRT/9PX 1500IRT:
An additional power cord
accessory is required to connect
the UPS and MBP; sold
separately.
Follow the same steps as for
9PX 2200IRT/9PX 3000IRT and
note the blue and red markings.
 Loading...