Copyright © 2017 Eaton Corporation. All Rights Reserved.
IPN 997-00012-72C July 2017
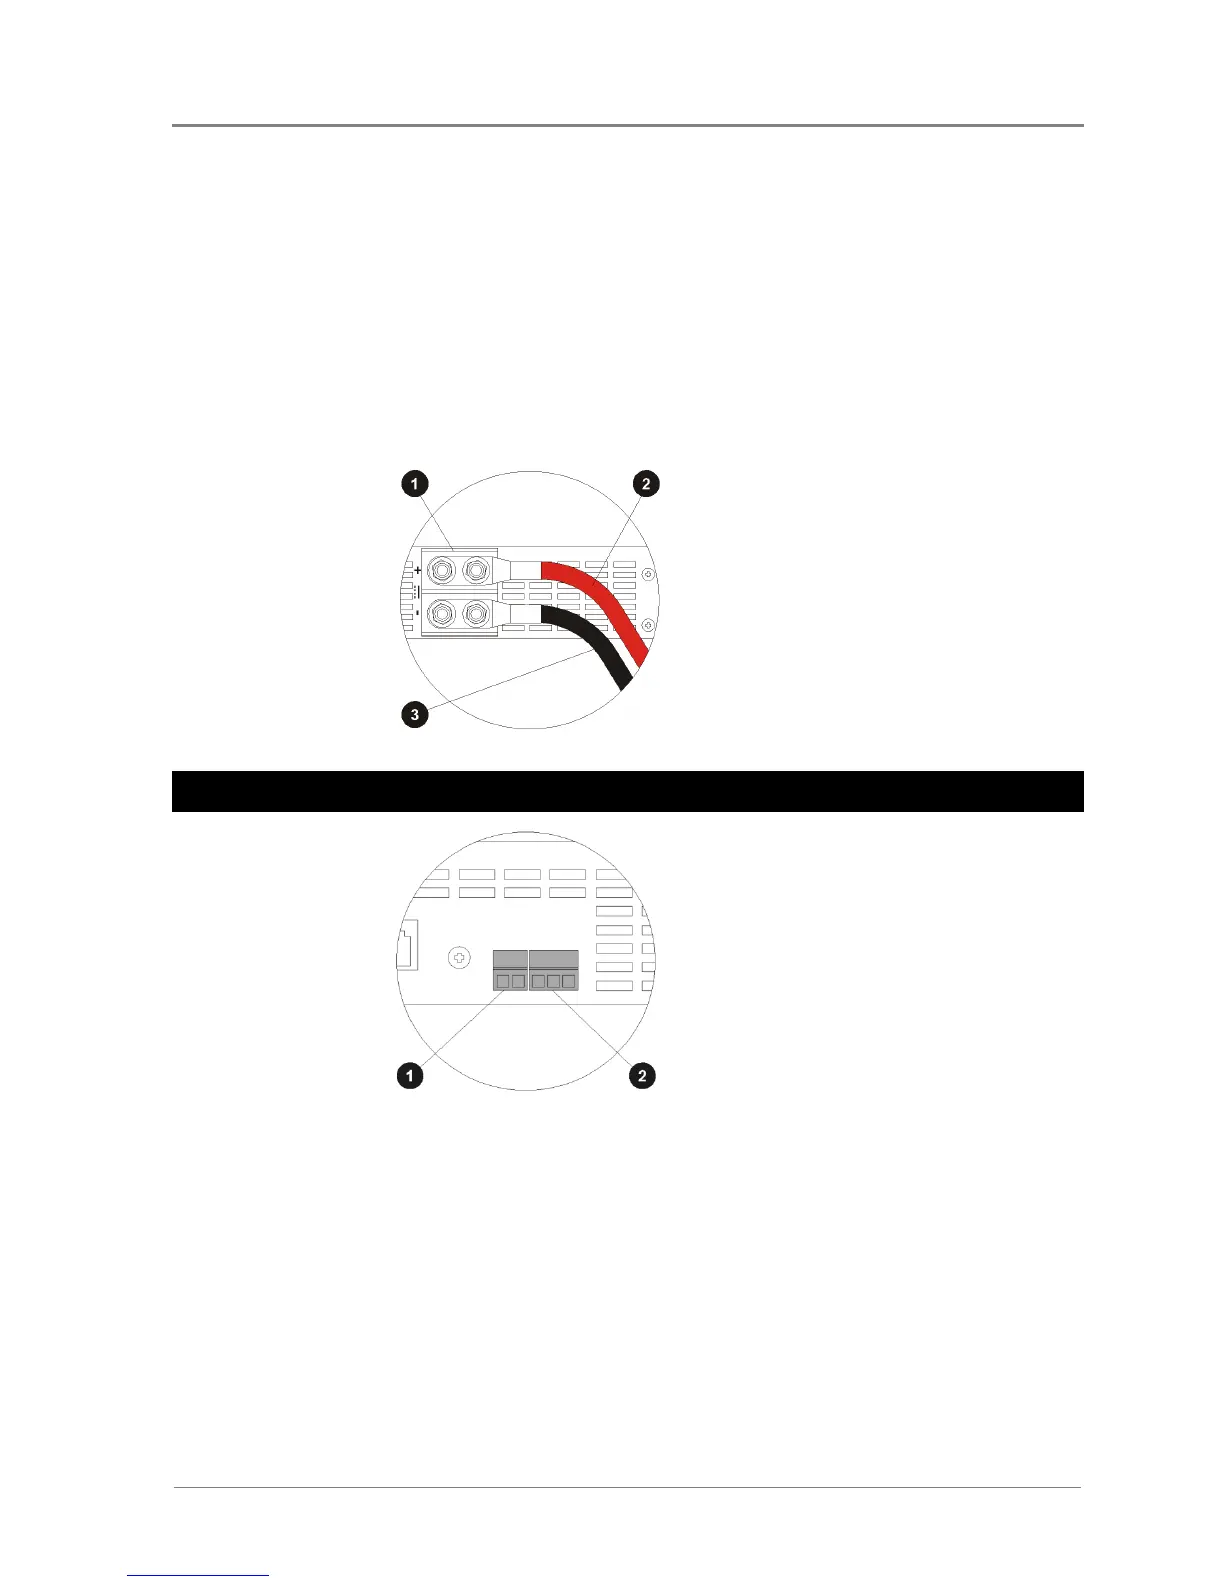
Connect the cables to the dc input terminals:
1 Terminate the cables with crimp lugs (2-hole, to suit 1/4" studs, 5/8" spacing). For 6AWG
use:
Strip length: 7/8" (22mm)
Crimp lug: Burndy type YA6C-2L
Crimp tool: Burndy type Y2MR
2 Connect the dc cables to the power input terminals on the rear panel.
[+] is positive; [-] is negative. Check carefully that dc input cable polarity is correct.
3 Tighten the nuts to 3.9 - 4.5Nm (35 - 39 inch-pounds).
Loose connections will overheat and could result in a potential hazard.
DC terminals
Positive (+) dc input cable
Negative (-) dc input cable
Remote Control and Alarm Connections (Optional)
Remote on/off connector.
Alarm relay connector
(COM-NC-NO).
Remote Control
If remote control is not required, leave the Remote On/Off terminals (Remote SW, 1 and 2)
open (default).
For remote control, connect a switch or relay contacts to the Remote On/Off terminals (Remote
SW, 1 and 2). Use wire size: 0.5 - 2.0mm2, 20 - 14 AWG.
See Remote Control Operation on page 10 for initial setup and operation.
 Loading...