c
Important:
Do not leave the printer standing for a long time.
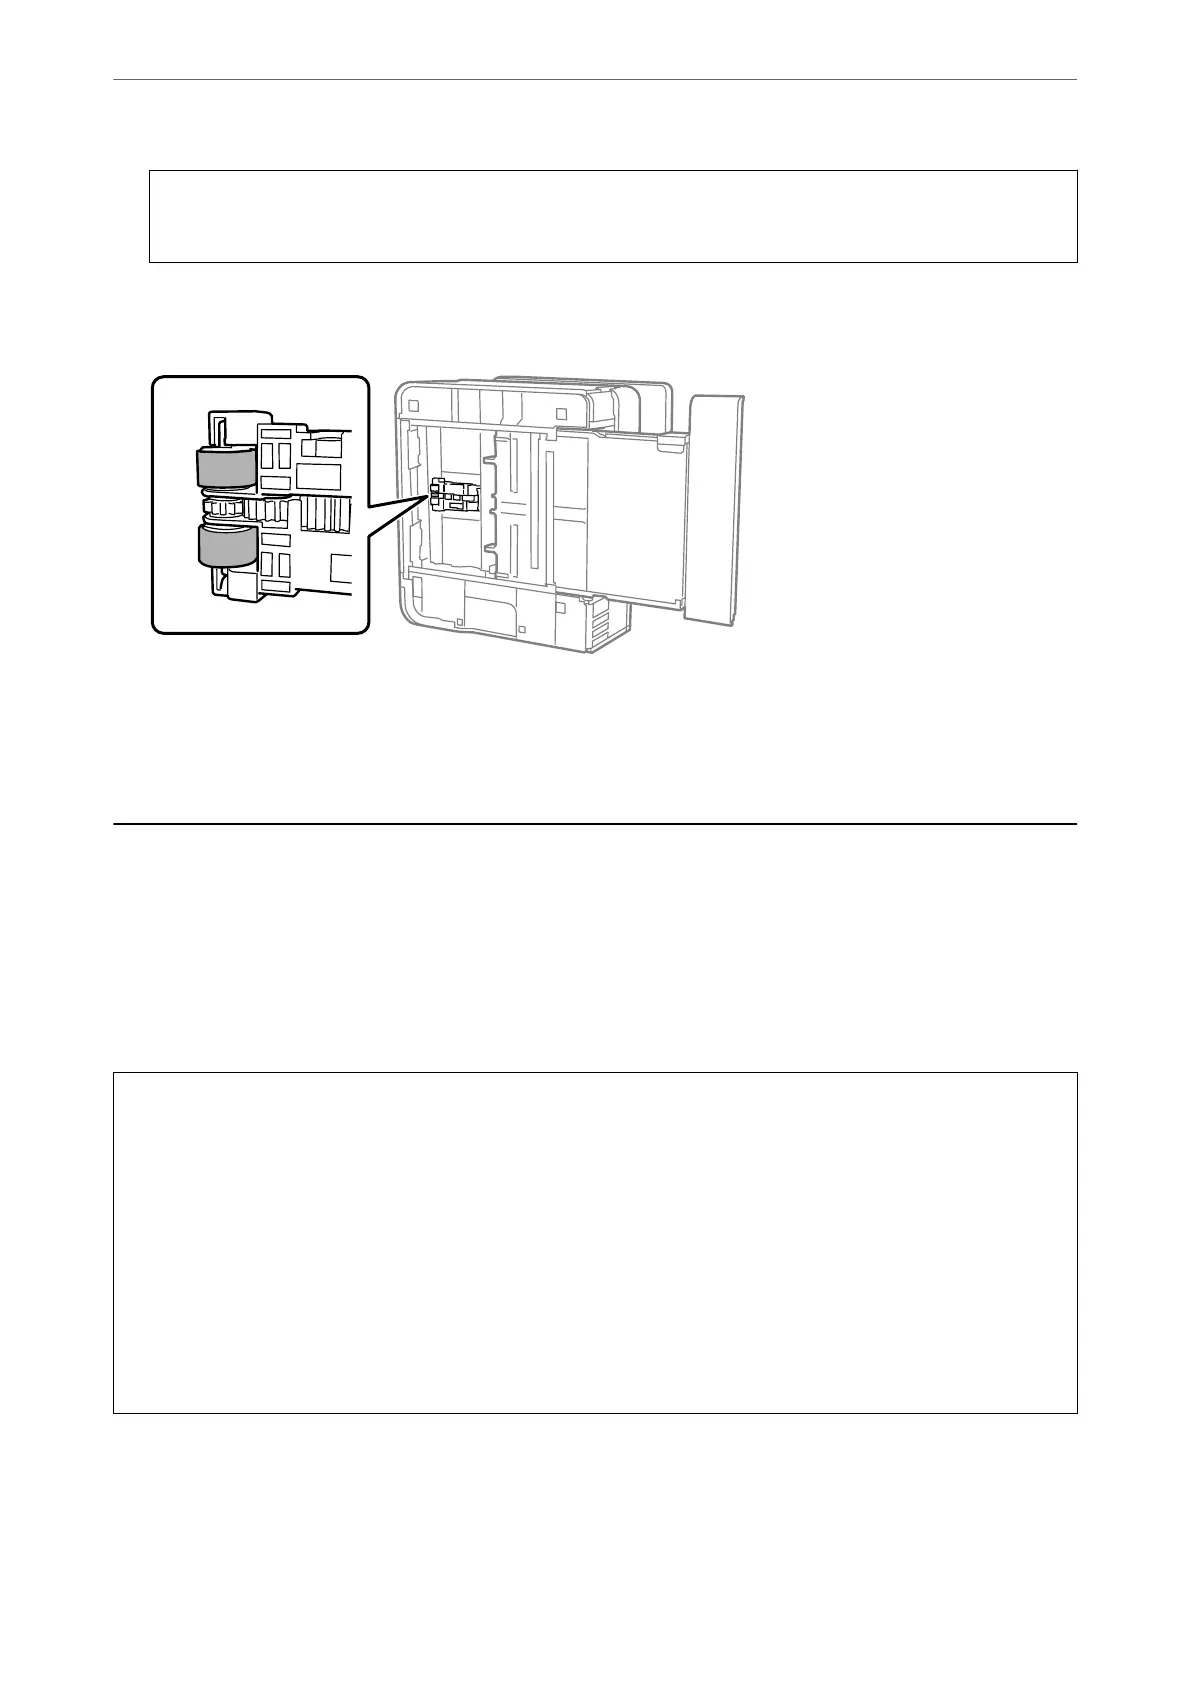
7.
Dampen a so cloth with water, wring it out thoroughly, and then wipe the roller while rotating it with the
cloth.
8.
Return the printer to its normal position, and then insert the paper cassette.
9.
Connect the power cord.
Improving Print, Copy, Scan, and Fax Quality
Checking and Cleaning the Print Head
If the nozzles are clogged, the printouts become faint, there is visible banding, or unexpected colors appear. If the
nozzles are severely clogged, a blank sheet will be printed. When print quality has declined, rst use the nozzle
check feature to check if the nozzles are clogged. If the nozzles are clogged, clean the print head.
c
Important:
❏ Do not open the printer cover or turn o the printer during head cleaning. If the head cleaning is incomplete, you
may not be able to print.
❏ Head cleaning consumes ink and should not be performed more than necessary.
❏ When ink is low, you may not be able to clean the print head.
❏ If print quality has not improved aer repeating nozzle check and head cleaning 3 times, wait for at least 12
hours without printing, and then run the nozzle check again and repeat the head cleaning if necessary. We
recommend turning o the printer by using the
P
button. If print quality has still not improved, run Power
Cleaning.
❏ To prevent the print head from drying out, do not unplug the printer while the power is on.
1.
Select Maintenance on the printer's control panel.
2.
Select Print Head Nozzle Check.
Maintaining the Printer
>
Improving Print, Copy, Scan, and Fax Quality
>
Checking and Cleaning the Print Head
111