Adjustment Work
Adjustment work comprises 3 types of adjustments that
are done in order.
Preparation
Use the following to do adjustment work.
Adjustment Film Sheet (3 sheet)
Use the ones distributed during User Self Repair
training.
M size platen
Use one that has no grip pad on it.
Execute Print Head
Alignment
A
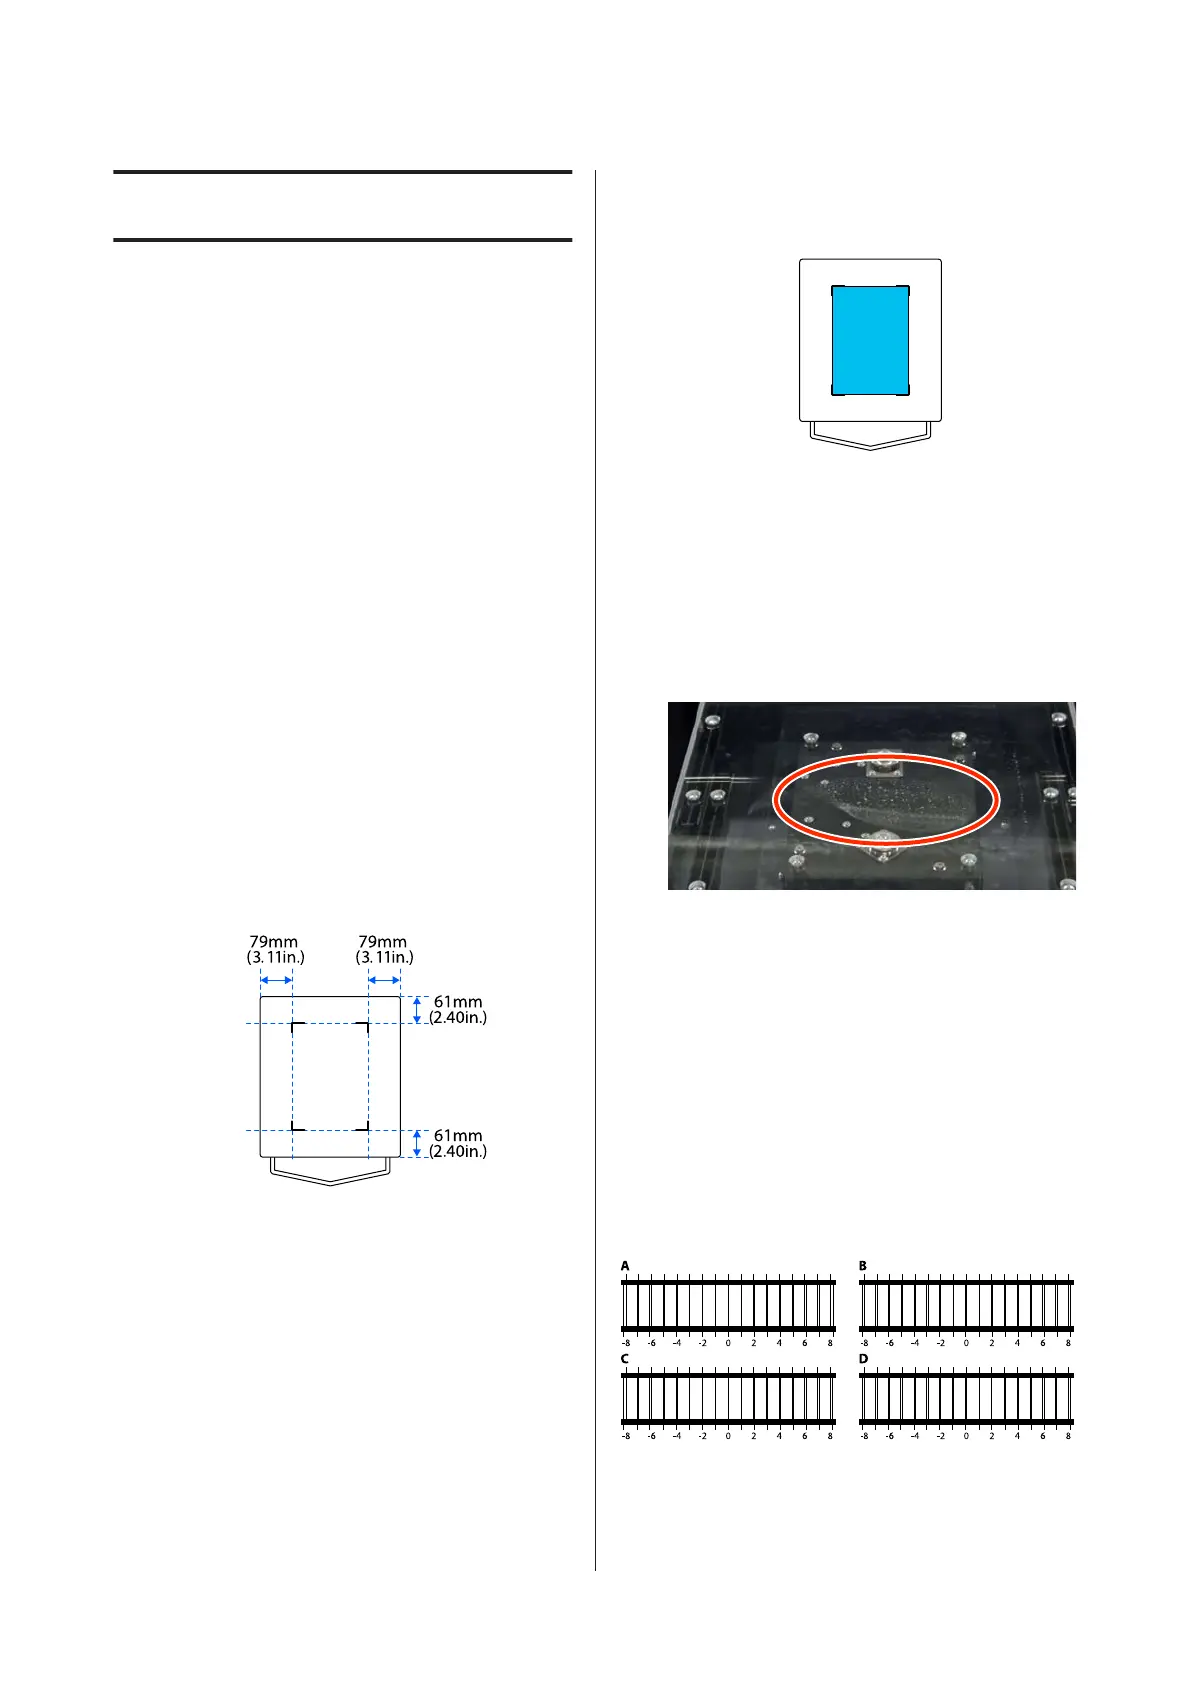
Mark guidelines for the position on the platen to
set the film, as shown in the illustration.
B
Use a sprayer to spray water on the center of the
platen.
If you do not dampen the surface of the platen
with water, you cannot correctly set the
Adjustment Film Sheet.
C
Starting from the front of the platen, slide a new
Adjustment Film Sheet along the surface of the
platen so it aligns with the marks as you place it.
Be sure to align the film with the markings. If it is
placed in a different position, the platen may be
soiled with ink.
D
Be sure that the film adheres correctly.
❏ If there is air between the film and the platen, as
shown in the illustration, return to step 3 and
reset it.
❏ If there is any water on the surface of the film,
use a soft cloth that is not likely to generate lint
to wipe it off.
E
Press Start.
Pressing the x button starts printing the
adjustment pattern. When printing the pattern is
complete, the adjustment value entry screen is
displayed. Continue to the next procedure.
F
Check the printed adjustment pattern.
Check the 4 patterns A to D, and select from -8 to
+8, where the line appears thinnest (lines
overlap) in the pattern.
SC-F3000 Series How to Replace the Print Head
Adjustment Work
23
 Loading...