94
Connecting to External Devices
Follow the steps below to connect external devices to the interface section.
1
Connect each cables to the connectors at the back of the printer.
2
Connect other ends of the cables to external devices.
CAUTION
When connecting external devices to the USB (including Micro-USB) connectors,
follow the precautions below.
Confirm the rated current of the external devices by checking the descriptions
on the devices or manuals. Do not use a device whose rated current is unclear.
Use the UL-approved external devices (only for North American users).
Connect the external devices only when those total rated current is less than
2.0A.
When using the printer, make sure the protective cover fits firmly into place.
When LAN cables are installed outdoors, make sure devices without proper surge
protection are cushioned by being connected through devices that do have surge
protection. Otherwise, the devices can be damaged by lightning.
Connecting the optional Wireless LAN Cable Set (OT-WL01) to the USB connector
enables the wireless LAN connection. (See "Connecting the wireless LAN cable set" on
page 50.)While connecting via wireless LAN, keep the Ethernet cable unconnected to
the printer.
For the Micro-USB connector, use the Micro USB (A-Micro B type) cable.
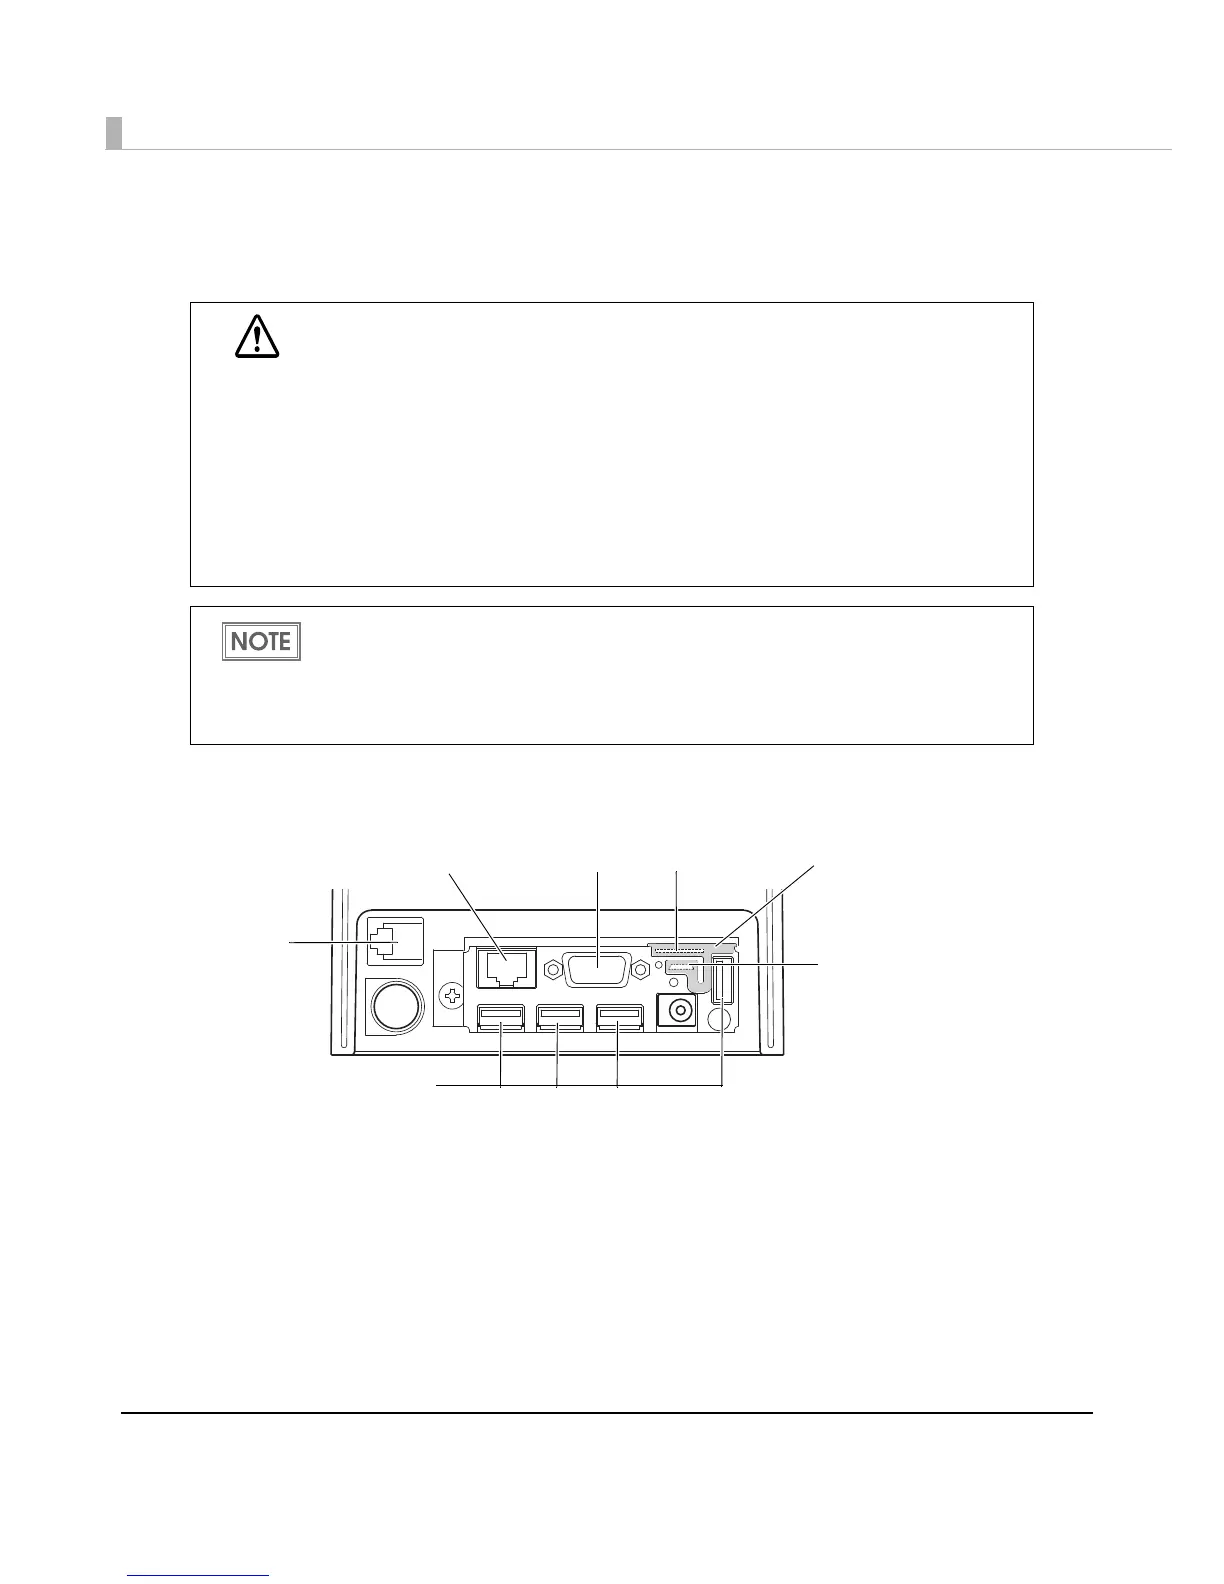
Drawer kick-out
connector
USB connectors
(for optional products)
Ethernet connector
*1 *2
Micro-USB (Type AB)
connector
(for setting only)
Protective cover
*1: Analog RGB connector (not available currently)
*2: Micro SD card slot (available when using the PHP function with
the firmware version 2.00 or later.)
 Loading...