3
2
1
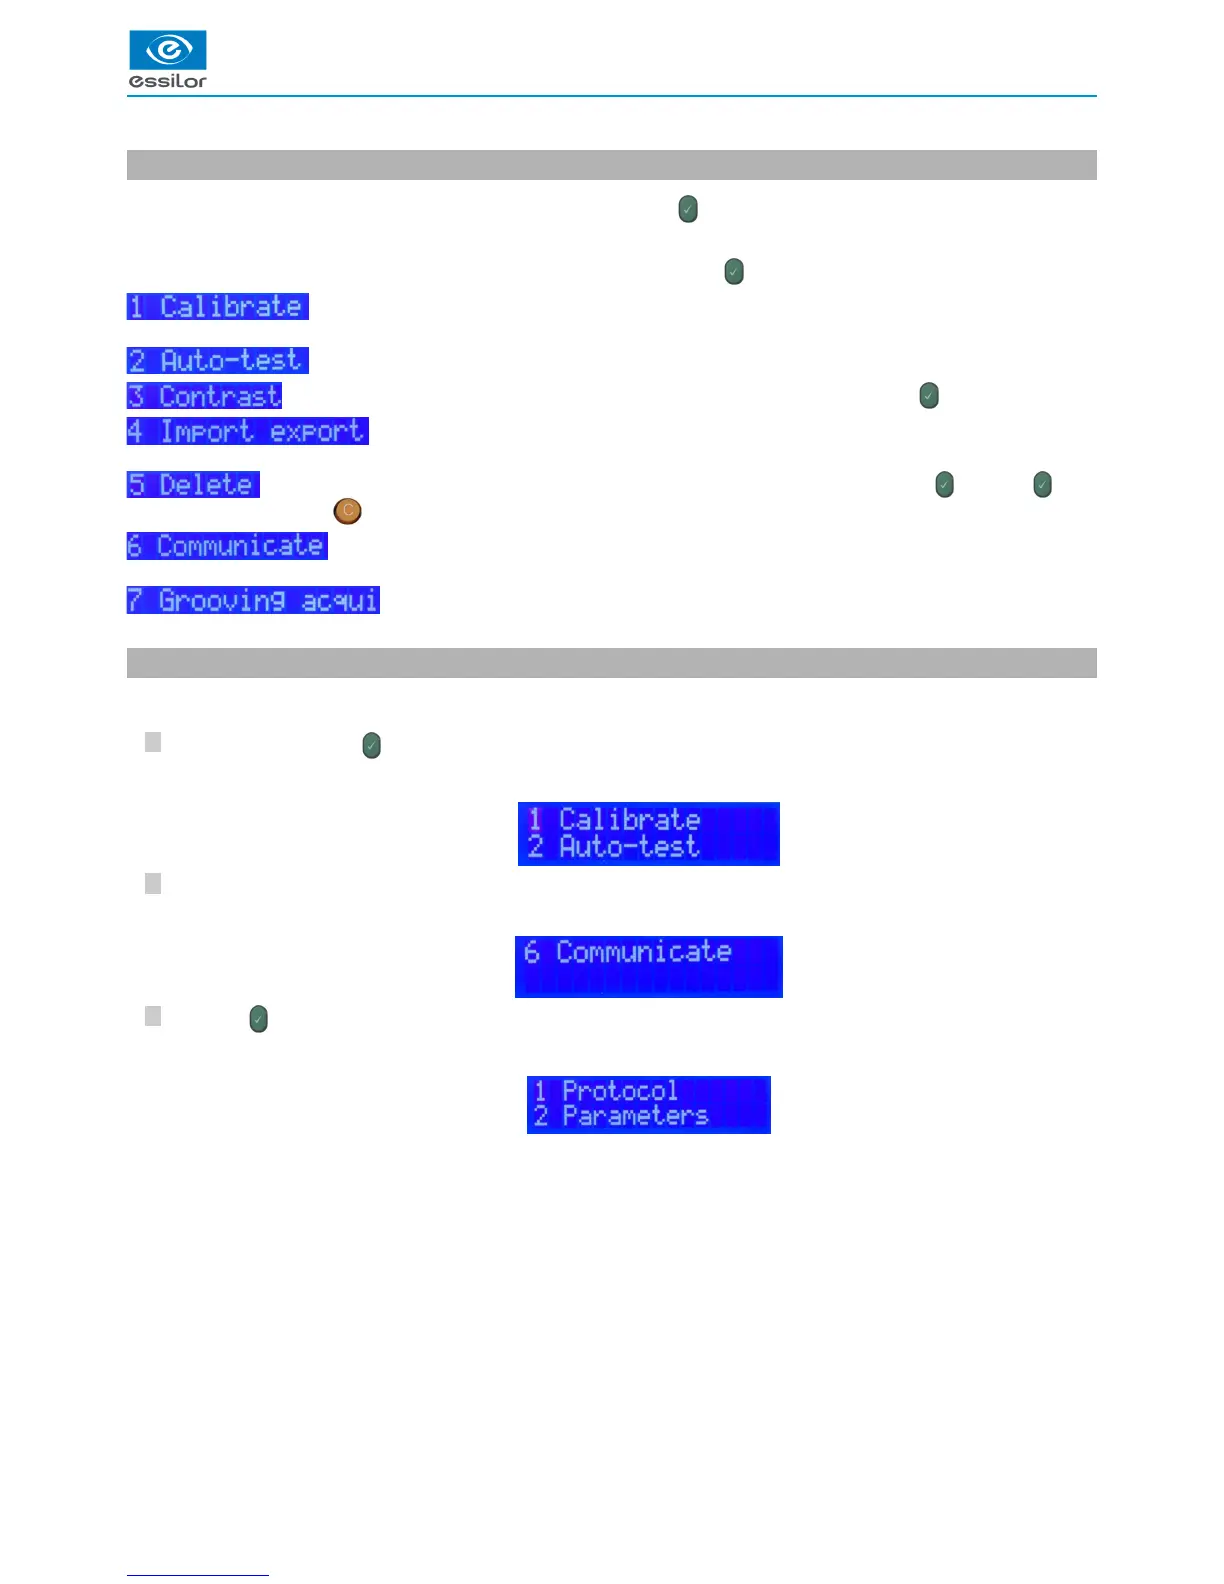
5. Presentation of the internal menu
The internal menu of the tracer is accessible by pressing simultaneously on and “1”.
It is composed of 7 sub-menus.
To access one of these sub-menus, enter the figure corresponding, then press on :
: launching of a complete calibration. For more information, consult the section Auto-Maintenance >
calibration. (p.54)
: launching of an autotest. For more information, consult the section Auto-Maintenance > Autotest. (p.55)
: adjustment of the display contrast; enter the desired value (from 1 to 9), then press on .
: data exchange with an external USB key. For more information, consult the section Import/export.
(p.57)
: deletion of information from the tracer; enter the desired value (from 1 to 9), then press on . Press on again
to confirm the deletion or on to cancel the deletion.
: setting of the communications of the tracer with your environment. For more information, consult the
Installation > Connections. (p.18)
: access the three modes of groove acquisition. For more information, consult the section
Utilization of the tracer > Frame tracing > Groove acquisition. (p.47)
6. Connection configuration
To configure the connection:
Press simultaneously on and “1”.
Press on “6”.
Press on to enter the menu.
The display indicates:>
The display indicates:>
The display indicates:>
 Loading...