9
8
7
6
5
4
3
2
1
2. Calibration
This step requires a certain amount of time and blocks the use of the tracer. It is however essential for the maintenance of
the tracer’s performance.
Press simultaneously on and “1”.
Select by pressing on “1” then on .
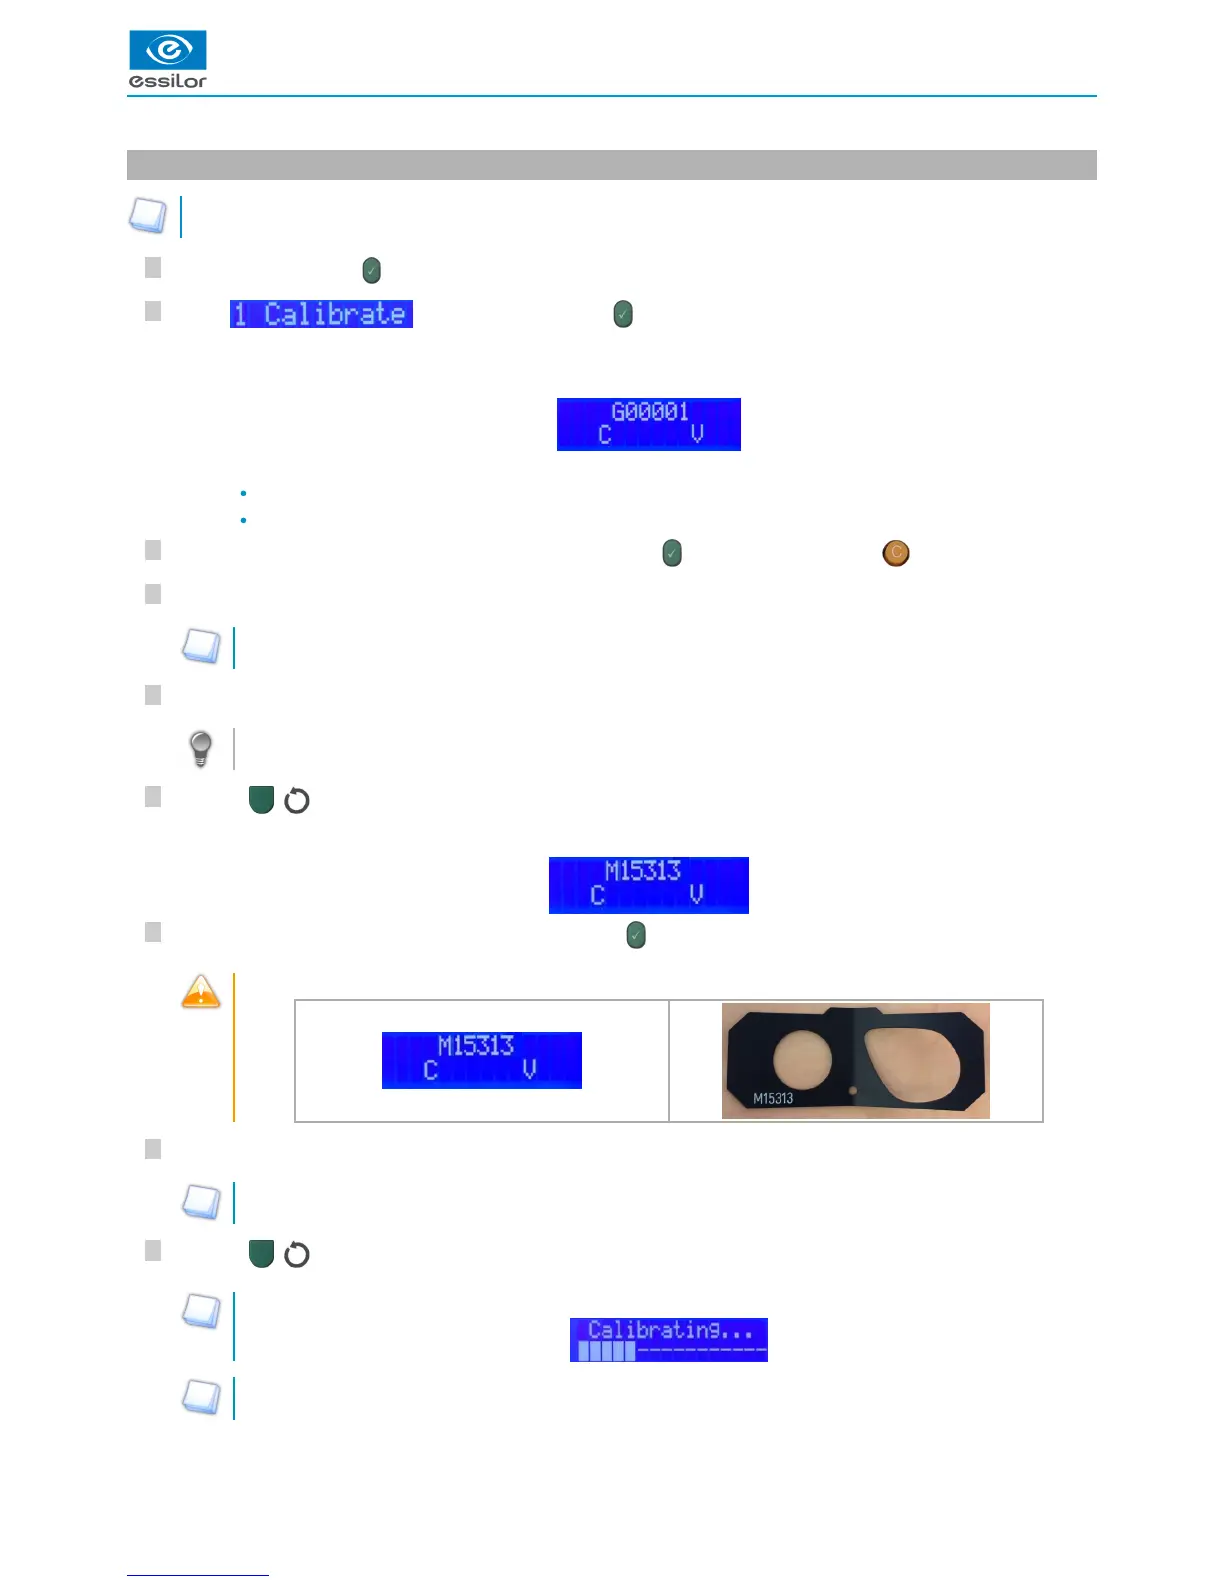
The first step consists in calibrating the “pattern” precision using the metal pattern gauge.
With:
G: pattern
00001: Pattern number provided by default with the tracer.
Select the pattern number delivered with the tracer then, press on to launch the calibration or to exit the menu.
Position the pattern provided with the tracer on the pattern holder (nose towards the left).
Make sure that it is stable.
Then, position the pattern holder within the tracing boundary.
For more information, consult the section Tracer Utilization > frame tracing > pattern tracing, demo or recut lens,
pattern holder. (p.49)
Press on ( ) of the tracer to launch tracing.
Select the gauge caliber number on the tracer then, press on .
Make sure that the pattern holder number and the gauge caliber number are identical.
Position stably the frame gauge within the tracing boundary on the 4 lower studs.
The “V” must be open aiming up.
Press on ( ) of the tracer to launch tracing.
During the calculation phase, the display indicates:
This operation can take about ten minutes.
The display indicates:>
At the end of tracing, the display indicates:>
 Loading...