05-5
Starting System
05-5
TESTING (Continued)
Starter Load Test
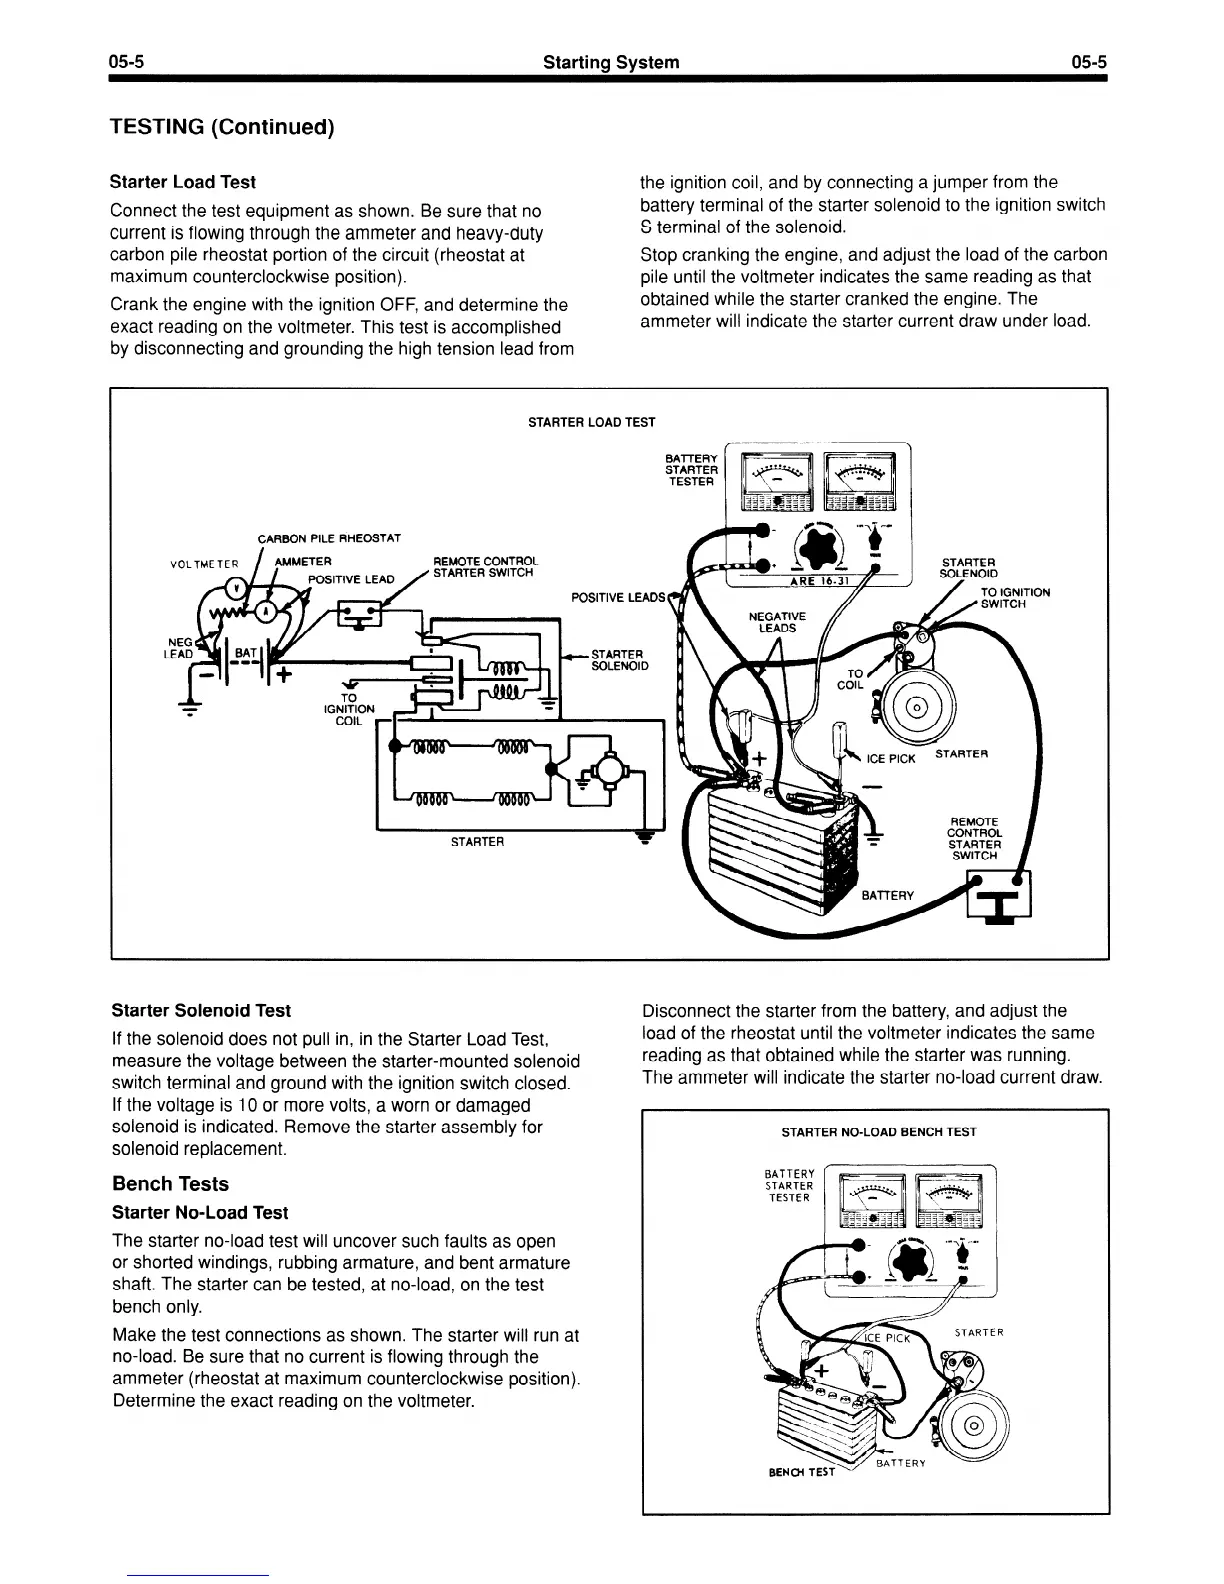
Connect the test equipment as shown. Be sure that no
current is flowing through the ammeter and heavy-duty
carbon pile rheostat portion of the circuit (rheostat at
maximum counterclockwise position).
Crank the engine with the ignition OFF, and determine the
exact reading on the voltmeter. This test is accomplished
by disconnecting and grounding the high tension lead from
the ignition coil, and by connecting a jumper from the
battery terminal of the starter solenoid to the ignition switch
S terminal of the solenoid.
Stop cranking the engine, and adjust the load of the carbon
pile until the voltmeter indicates the same reading as that
obtained while the starter cranked the engine. The
ammeter will indicate the starter current draw under load.
STARTER LOAD TEST
I
STARTER
SOQENOIO
CARBON PILE RHEOSTAT
REMOTE CONTROL
STARTER SWITCH
POSITIVE LEADS
Starter Solenoid Test
If the solenoid does not pull in, in the Starter Load Test,
measure the voltage between the starter-mounted solenoid
switch terminal and ground with the ignition switch closed.
If the voltage is 10 or more volts, a worn or damaged
solenoid is indicated. Remove the starter assembly for
solenoid replacement.
Bench Tests
Starter No-Load Test
The starter no-load test will uncover such faults as open
or shorted windings, rubbing armature, and bent armature
shaft. The starter can be tested, at no-load, on the test
bench only.
Make the test connections as shown. The starter will run at
no-load. Be sure that no current is flowing through the
ammeter (rheostat at maximum counterclockwise position).
Determine the exact reading on the voltmeter.
Disconnect the starter from the battery, and adjust the
load of the rheostat until the voltmeter indicates the same
reading as that obtained while the starter was running.
The ammeter will indicate the starter no-load current draw.
STARTER NO-LOAD BENCH TEST
 Loading...


