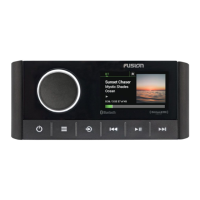
Enabling Standby Mode
By default, when you turn off the ignition (when connected) or
hold , the device turns off, and you must press to turn it on
again.
You can set the stereo to enter a standby mode when you turn
off the ignition (when connected) or hold . When you turn on
the ignition or press again, it takes less than the typical 30
seconds to turn on than with standby mode disabled.
You can enable standby mode on the device so you can turn it
on using another device on the network instead of pressing .
NOTE: When the device is off, it continues to draw
approximately 35 mA from the battery. When you enable
standby mode, the device draws more current because it is
listening for a power-on signal over the network. When the
device is off with standby mode enabled, it continues to draw
approximately 50 mA.
Select > SETTINGS > POWER OPTIONS > STANDBY
MODE.
The stereo now enters standby mode when you hold or turn
off the ignition. You can turn it on again from the CONTROL
screen on any device on the network.
Audio Control
Adjusting the Volume
You can control the volume of any zone on any stereo
connected to the Fusion PartyBus network.
1
Turn the dial to adjust the volume.
2
If necessary, press the dial to switch between zones.
TIP: You can select ALL to adjust the volume for all zones of
all grouped stereos at the same time.
Muting all Connected Stereos
You can quickly mute the audio from this stereo or from all
stereos connected to the Fusion PartyBus network (Fusion
PartyBus Networking, page 9).
1
From any source, press .
The mute symbol appears and audio from this stereo is
silenced.
NOTE: If the stereo is part of a group, the audio from all
grouped stereos is silenced.
2
Press and hold the dial to select MUTE SYSTEM.
Audio from all connected stereos is silenced.
3
Press and hold the dial to select UNMUTE SYSTEM.
Audio is restored to all connected stereos.
Adjusting the Subwoofer Level
You can adjust the subwoofer level for each zone.
1
Press the dial to open the CONTROL screen.
2
Turn the dial to select a zone.
3
Press and hold the dial.
The SUB LEVEL adjustment for the zone appears.
4
Turn the dial to adjust the subwoofer level.
Synchronizing the Source and Zone Volume
Levels
You can synchronize the volume levels on one or all zones with
some source devices, such as a Bluetooth source.
1
Select > SETTINGS > ZONE > PHONE VOLUME ZONE
SYNC.
2
Select a zone or ALL.
When you adjust the volume on the source device, the volume
on the selected zone is also adjusted.
Adjusting the Gain for an Auxiliary Device
You can adjust the gain for a connected auxiliary device to
achieve a volume level similar to that of other media sources.
You can adjust the gain in 1 dB increments. You can also adjust
the gain for digital sources using an optical audio connection.
1
Select an auxiliary source.
2
Select an option:
• To increase the gain, select .
• To decrease the gain, select .
NOTE: To achieve the best audio quality when using a
portable media player with headphone output, it may be
necessary to adjust the volume control on the media player,
instead of adjusting the gain.
Speaker Zones
You can group speakers in one area into a speaker zone. This
enables you to control the audio level of the zones individually.
For example, you could make the audio quieter in the cabin and
louder on deck.
You can set the balance, volume limit, tone, subwoofer level,
subwoofer frequency, and name for each zone, and configure
other zone-specific settings (Speaker Zone Settings, page 10).
DSP Settings
This stereo features digital signal processing (DSP). You can
select pre-configured DSP settings for Fusion
®
speakers and
amplifiers to optimize audio reproduction in their installed
locations.
All DSP settings are configured using the Fusion-Link
™
remote
control app (Fusion-Link Wireless Remote Control App,
page 12).
Configuring the DSP Settings
You must download and install the Fusion-Link remote control
app on your compatible Apple
®
or Android
™
device before you
can configure the DSP settings (Fusion-Link Wireless Remote
Control App, page 12).
You can configure the DSP settings to optimize the sound on
each zone with the installed speakers, amplifiers, and
environment.
1
From the settings menu on your Apple or Android device,
connect to the stereo using Bluetooth technology, or connect
to the same wireless network as the stereo.
2
Open the Fusion-Link remote control app on your compatible
Apple or Android device.
3
If necessary, select the stereo you want to configure.
4
Select SETTINGS.
5
If necessary, select the MUSIC tab.
6
Select Zone.
7
Select a zone.
8
Select DSP SETTINGS.
9
Configure the DSP settings as needed, depending on the
models of Fusion speakers and amplifiers connected to the
zone.
10
Repeat these steps for each zone.
11
After you have finished configuring the DSP settings for all
zones, select an option:
• On an Apple device, select SETTINGS > Zone >
SETTINGS > SEND DSP SETTINGS
• On an Android device, select SETTINGS > Zone > SEND
DSP SETTINGS.
Audio Control 3

 Loading...