EasyManuals Logo

Garmin FENIX 6 PRO Series User Manual

Garmin FENIX 6 PRO Series
132 pages
To Next Page IconTo Next Page
To Previous Page IconTo Previous Page
Page #26 background imageLoading...
Page #26 background image
Moving the Flag
You can take a closer look at the green and move the pin location.
1 From the hole information screen, press .
2 Select Move Flag.
3 Press UP or DOWN to move the pin position.
4 Press .
The distances on the hole information screen are updated to show the new pin location. The pin location is
saved for only the current round.
Viewing Measured Shots
Before the device can automatically detect and measure shots, you must enable scoring.
Your device features automatic shot detection and recording. Each time you take a shot along the fairway, the
device records your shot distance so you can view it later.
TIP: Automatic shot detection works best when you wear the device on your leading wrist and make good
contact with the ball. Putts are not detected.
1 While playing golf, press .
2 Select Measure Shot.
Your last shot distance appears.
NOTE: The distance automatically resets when you hit the ball again, putt on the green, or move to the next
hole.
3 Press DOWN.
4 Select Previous Shots to view all recorded shot distances.
Manually Measuring a Shot
1 Take a shot and watch where your ball lands.
2 From the hole information screen, press .
3 Select Measure Shot.
4 Press DOWN.
5 Select Add Shot > Yes.
6 Walk or drive to your ball.
Viewing Layup and Dogleg Distances
You can view a list of layup and dogleg distances for par 4 and 5 holes. Custom targets also appear in this list.
1 From the hole information screen, press .
2 Select Layups.
Each layup and the distance until you reach each layup appear on the screen.
NOTE: Distances are removed from the list as you pass them.
Saving Custom Targets
While playing a round, you can save up to five custom targets for each hole. Saving a target is useful for
recording objects or obstacles that are not shown on the map. You can view the distances to these targets from
the layup and dogleg screen (Viewing Layup and Dogleg Distances, page18).
1 Stand near the target you want to save.
NOTE: You cannot save a target that is far from the currently selected hole.
2 From the hole information screen, press .
3 Select Custom Targets.
4 Select a target type.
18 Activities and Apps

Table of Contents

Questions and Answers:

Question and Answer IconNeed help?

Do you have a question about the Garmin FENIX 6 PRO Series and is the answer not in the manual?

Garmin FENIX 6 PRO Series Specifications

General IconGeneral
Display Resolution260 x 260 pixels
Display TypeSunlight-visible, transflective memory-in-pixel (MIP)
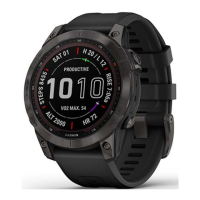
Case MaterialFiber-reinforced polymer with metal rear cover
Strap MaterialSilicone
Water Rating10 ATM
Memory32 GB
ConnectivityBluetooth, ANT+, Wi-Fi
Music StorageUp to 2, 000 songs
Lens MaterialCorning Gorilla Glass DX
Bezel MaterialStainless steel
Quickfit Watch Band CompatibleYes (22 mm)
Physical Size47 x 47 x 14.7 mm
Display Size1.3" (33.0 mm) diameter
Weight83 grams
Battery LifeSmartwatch: Up to 14 days; GPS: Up to 36 hours; GPS + Music: Up to 10 hours; Max Battery GPS Mode: Up to 72 hours; Expedition GPS Activity: Up to 28 days; Battery Saver Watch Mode: Up to 48 days
SensorsGPS, GLONASS, Galileo, heart rate monitor, compass, gyroscope, accelerometer, thermometer
Smart FeaturesSmart notifications, Text response/reject phone call with text (Android only), Calendar, Weather, Controls smartphone music, Find My Phone, Find My Watch, VIRB Camera Remote, Smartphone compatibility, Garmin Pay
CompatibilityAndroid, iOS

Related product manuals