– 25 –
To replace the door:
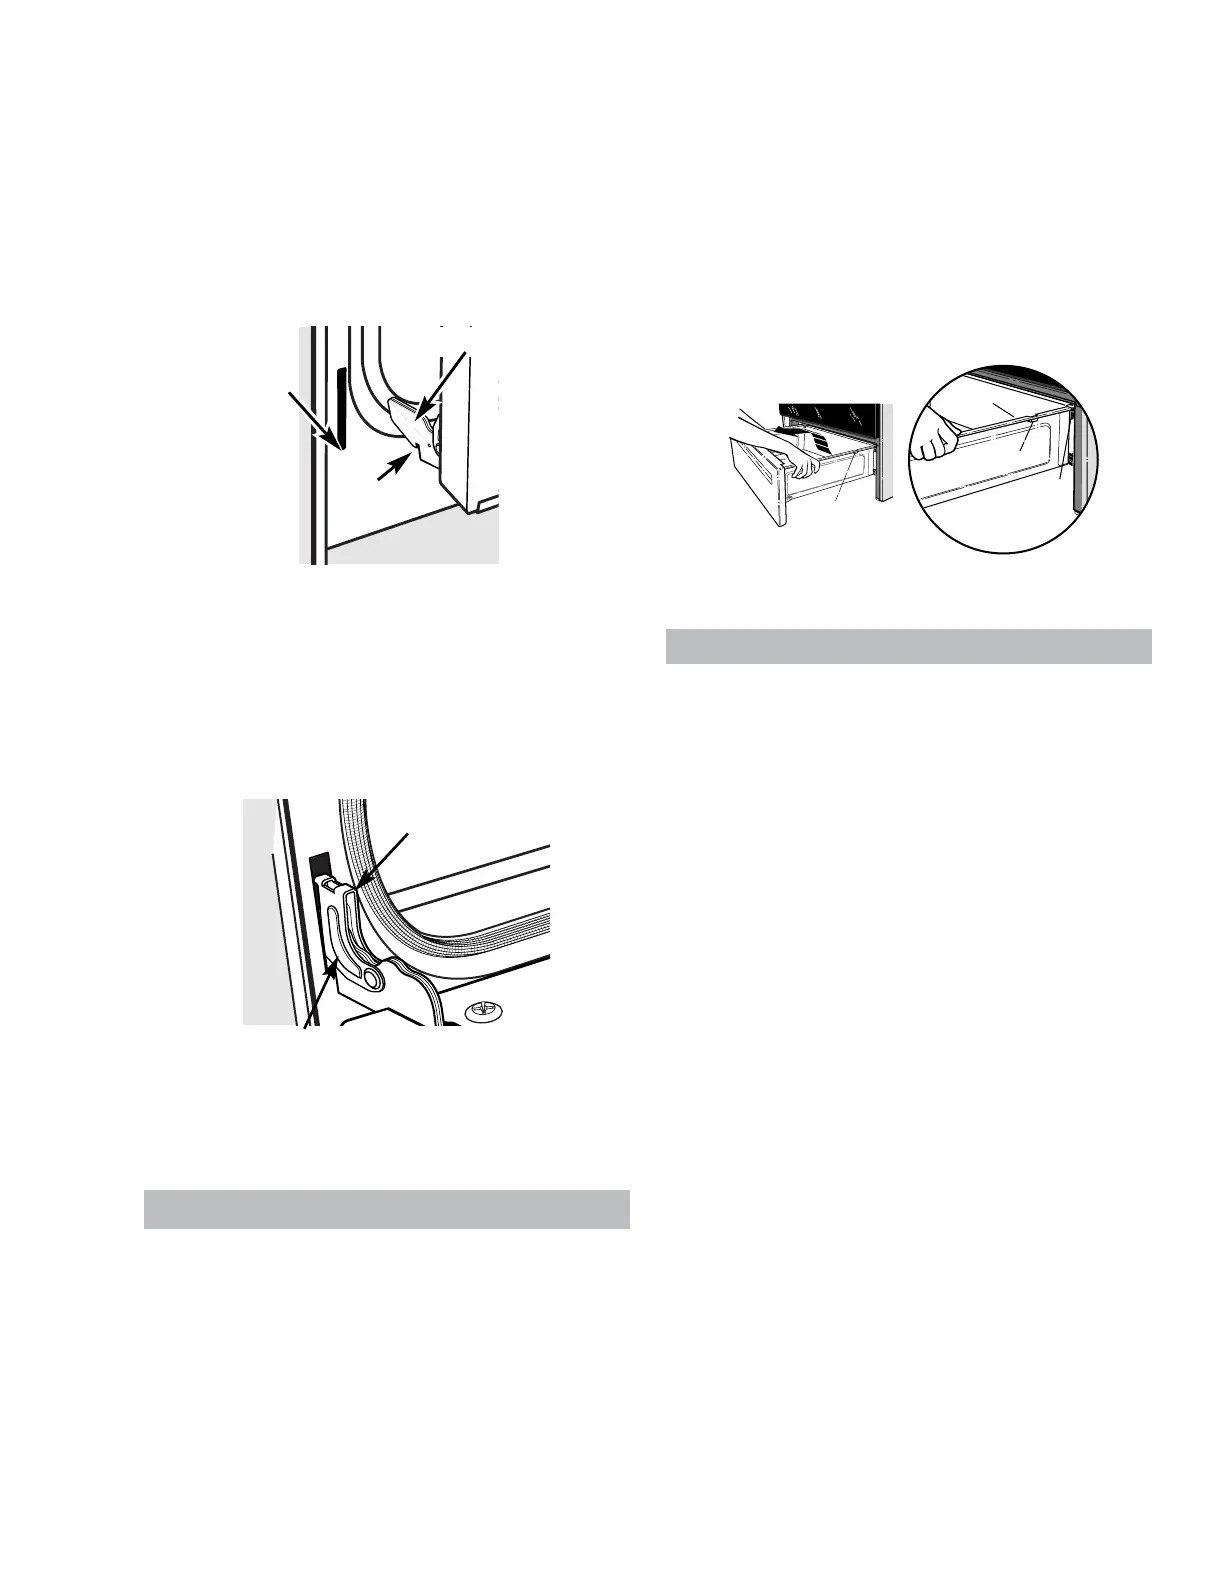
1. Firmly grasp both sides of the door at the top.
2. With the door at the same angle as the
removal position, seat the indentation of the
hinge arm into the bottom edge of the hinge
slot. The notch in the hinge arm must be fully
seated into the bottom of the slot.
Indentation
Bottom
edge
of slot
Hinge arm
3. Fully open the door. If the door cannot be fully
opened, the hinge is not properly seated.
4. Push the hinge locks up against the front
frame of the oven cavity, to the locked
position.
5. Close the oven door and check for proper
alignment, rubbing, etc.
Storage Drawer
To remove and replace the storage drawer:
1. Pull the drawer out until it stops.
2. Lift the front of the drawer until the stops clear
the guides.
3. Remove the drawer.
Locked position
Sealed hinge arm
4. To replace the storage drawer, place the
drawer rail on the guides.
5. Push the drawer in until it stops.
6. Lift the front of the drawer and push in until the
stops clear the guides.
7. Lower the front of the drawer and push in until
it closes.
Range Removal
WARNING: Shut off the gas to the range before
range removal.
To remove the range:
1. Remove the oven door (see procedure).
2. Remove the storage drawer.
3. Unplug the range through the storage drawer
opening.
4. Disconnect the gas line.
Caution: Take the necessary precautions to
protect the floor from damage that could be
caused by moving the range.
5. Carefully pull the range out until the rear
leveling leg has cleared the Anti-tip Bracket.
6. Using a
7
/16-in. wrench, screw the back
leveling legs out to raise the rear of the range
above the counter.
7. Using a
7
/16-in. wrench, screw the front leveling
legs out to raise the front of the range above
the counter.
8. Carefully pull the range out while lifting up until
the back of the range is accessible.
Note: Make sure the anti-tip bracket is installed
correctly when pushing the range back into place.
 Loading...